As you decrease the Threshold, you will see a thickening of the shape in the middle:
9.15 Bulge
The Bulge feature allows you to apply various expanding or shrinking distortions to a shape. These
distortions can be applied to the top side of the shape, the bottom side, or both. They can be applied to the
left side, the right side, or both. And the distortions can be expanding on both sides, shrinking on both
sides, or a combination.
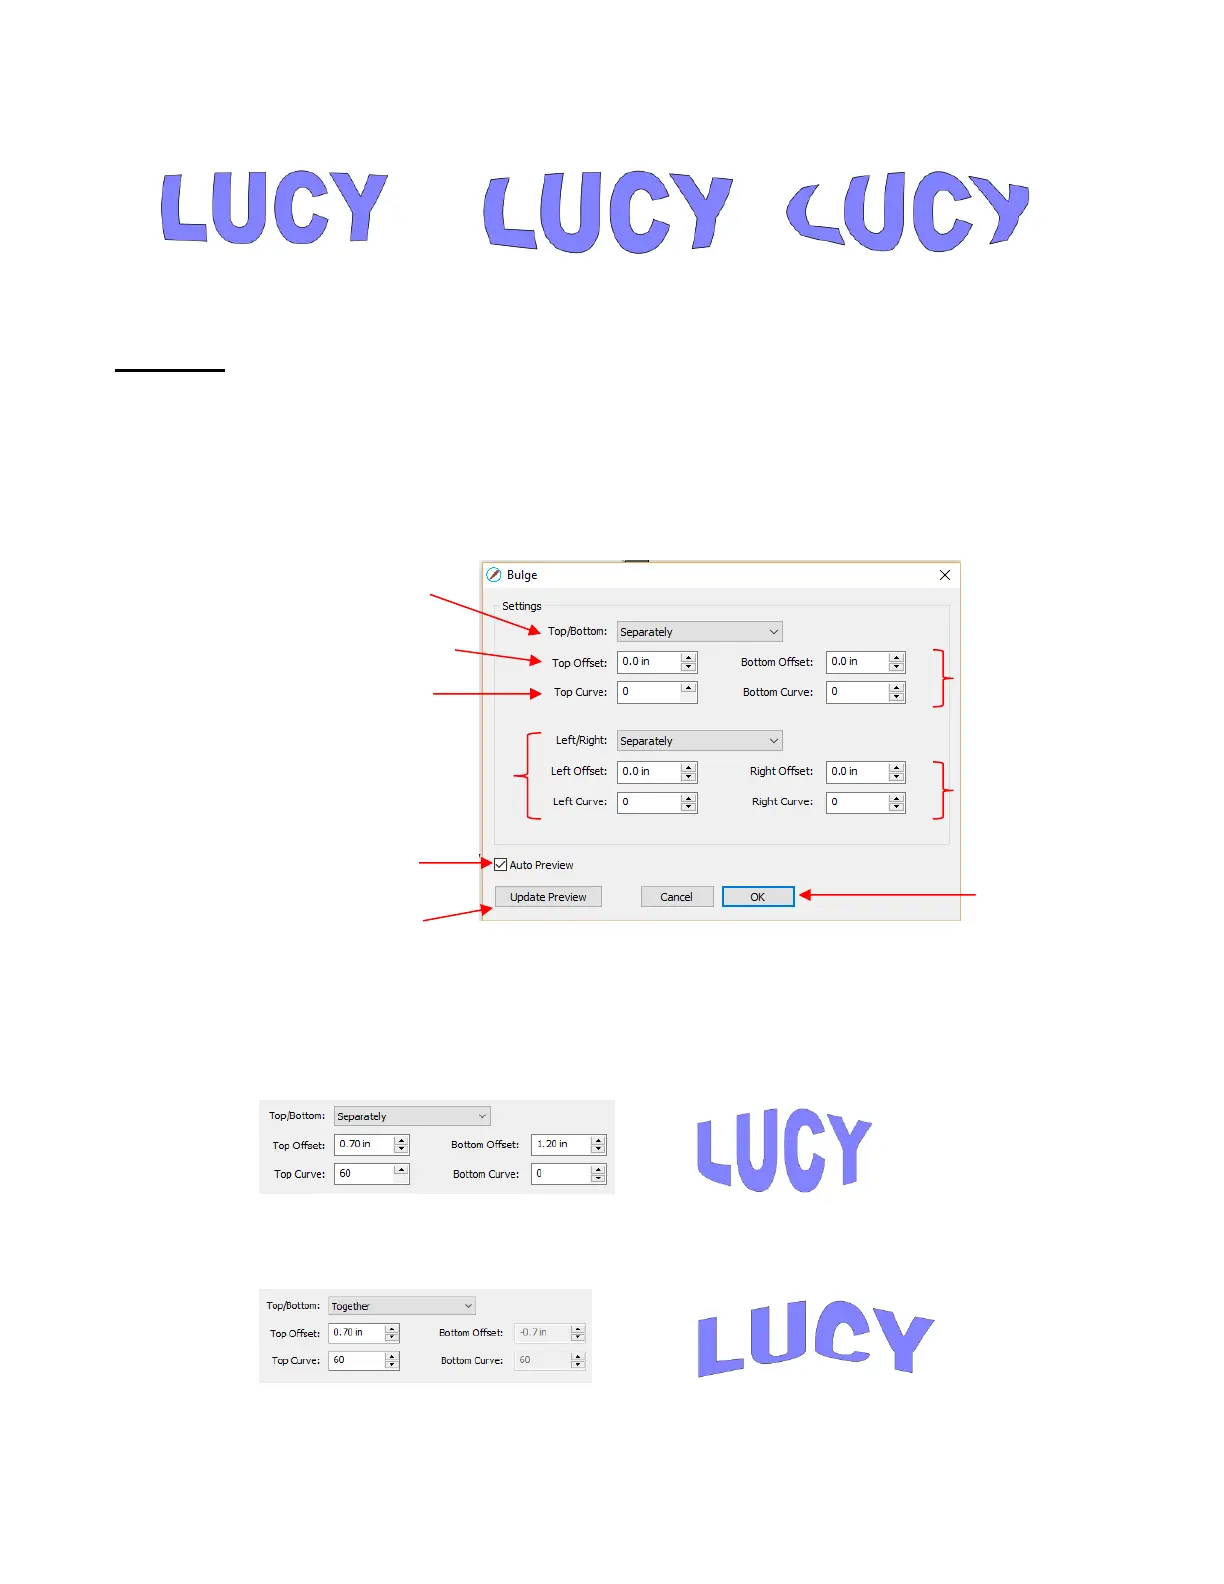
To open the Bulge window, select the shape and go to Effects>Bulge:
In the top portion of the window are settings for applying Bulge to the top or bottom of a shape. The
Top/Bottom setting allows you to choose if you want to apply the settings in one of three ways:
Separately: The Offset and Curve settings can be different for the top versus the bottom
Together: The Offset and Curve settings will be applied equally to both the top and the bottom. In this
case the Bottom Offset and Bottom Curve settings will be grayed out.
Opposite: The Offset and Curve settings will be applied opposite to one another on the top and the
bottom. In this case, the Bottom Offset and Bottom Curve settings will again be grayed out.
 Loading...