11.06.2 Scan2Cut: Additional Methods and Details
As was mentioned in the prior section, there are alternative methods that will also work and may be more
suitable. Note that these alternatives are presented in a logical order versus a preferential one. My favorite,
by far, is Alternative 3 so don’t skip reading it! :-)
Alternative 1 Use Custom Registration Marks
Instead of using the corners of the sheet for aligning the laser, you can use a black pen and draw your own
four registration marks around the image(s):
The four marks can be anything easy to draw but typically dots are the easiest to align.
The marks should be positioned outside of the bounding box that would surround the images.
The marks do not need to be aligned. This is assuming you still initially use the four corners of the sheet
to align the red boxes.
The advantage of this method is that the registration marks will be closer to the image being cut which
lends itself to better accuracy in most cutters. The black dots are also easier for alignment than the
corners of a white sheet of a paper.
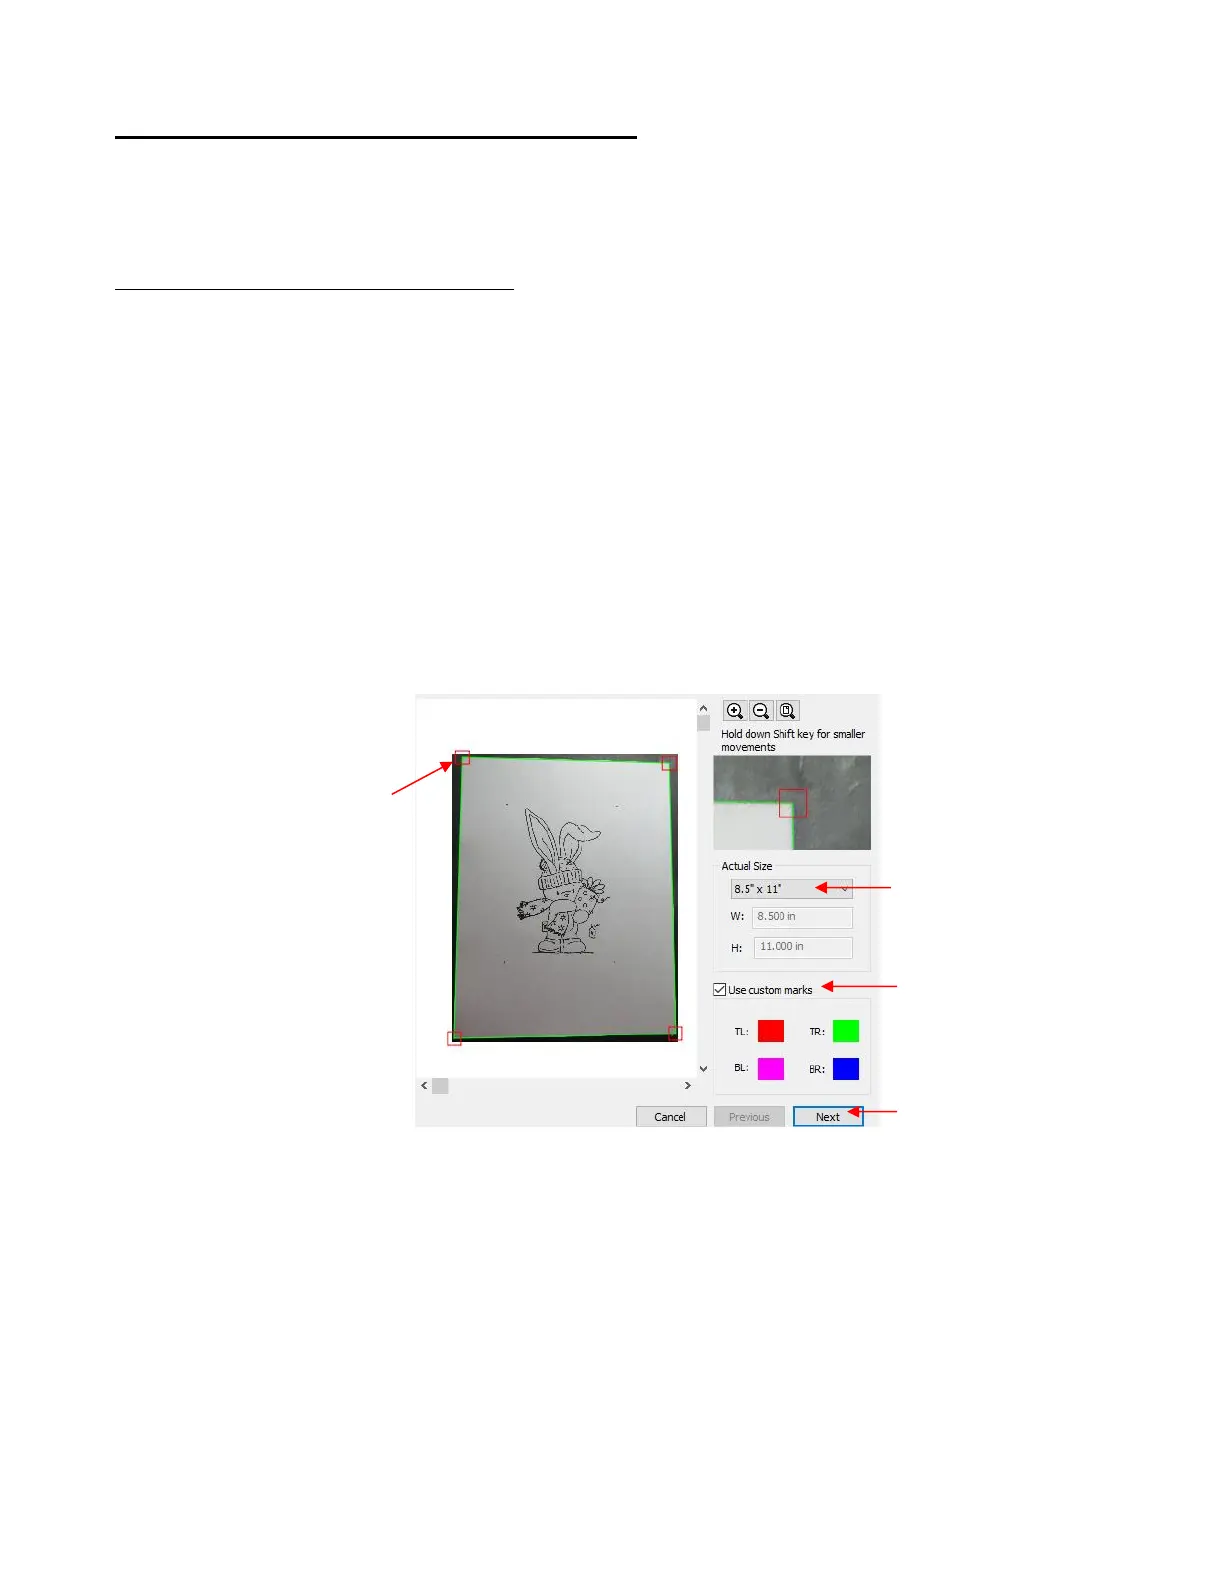
Repeat the steps outlined in Section 11.06.2 up to opening the Scan2Cut window. After loading the image
and selecting the paper size, again roughly position the four red squares over the four corners of the sheet.
Then zoom in and accurately position them:
Click on Next and, this time, the image is surrounded by colored “+” icons and you will then center these
icons with the dots you drew around the image: