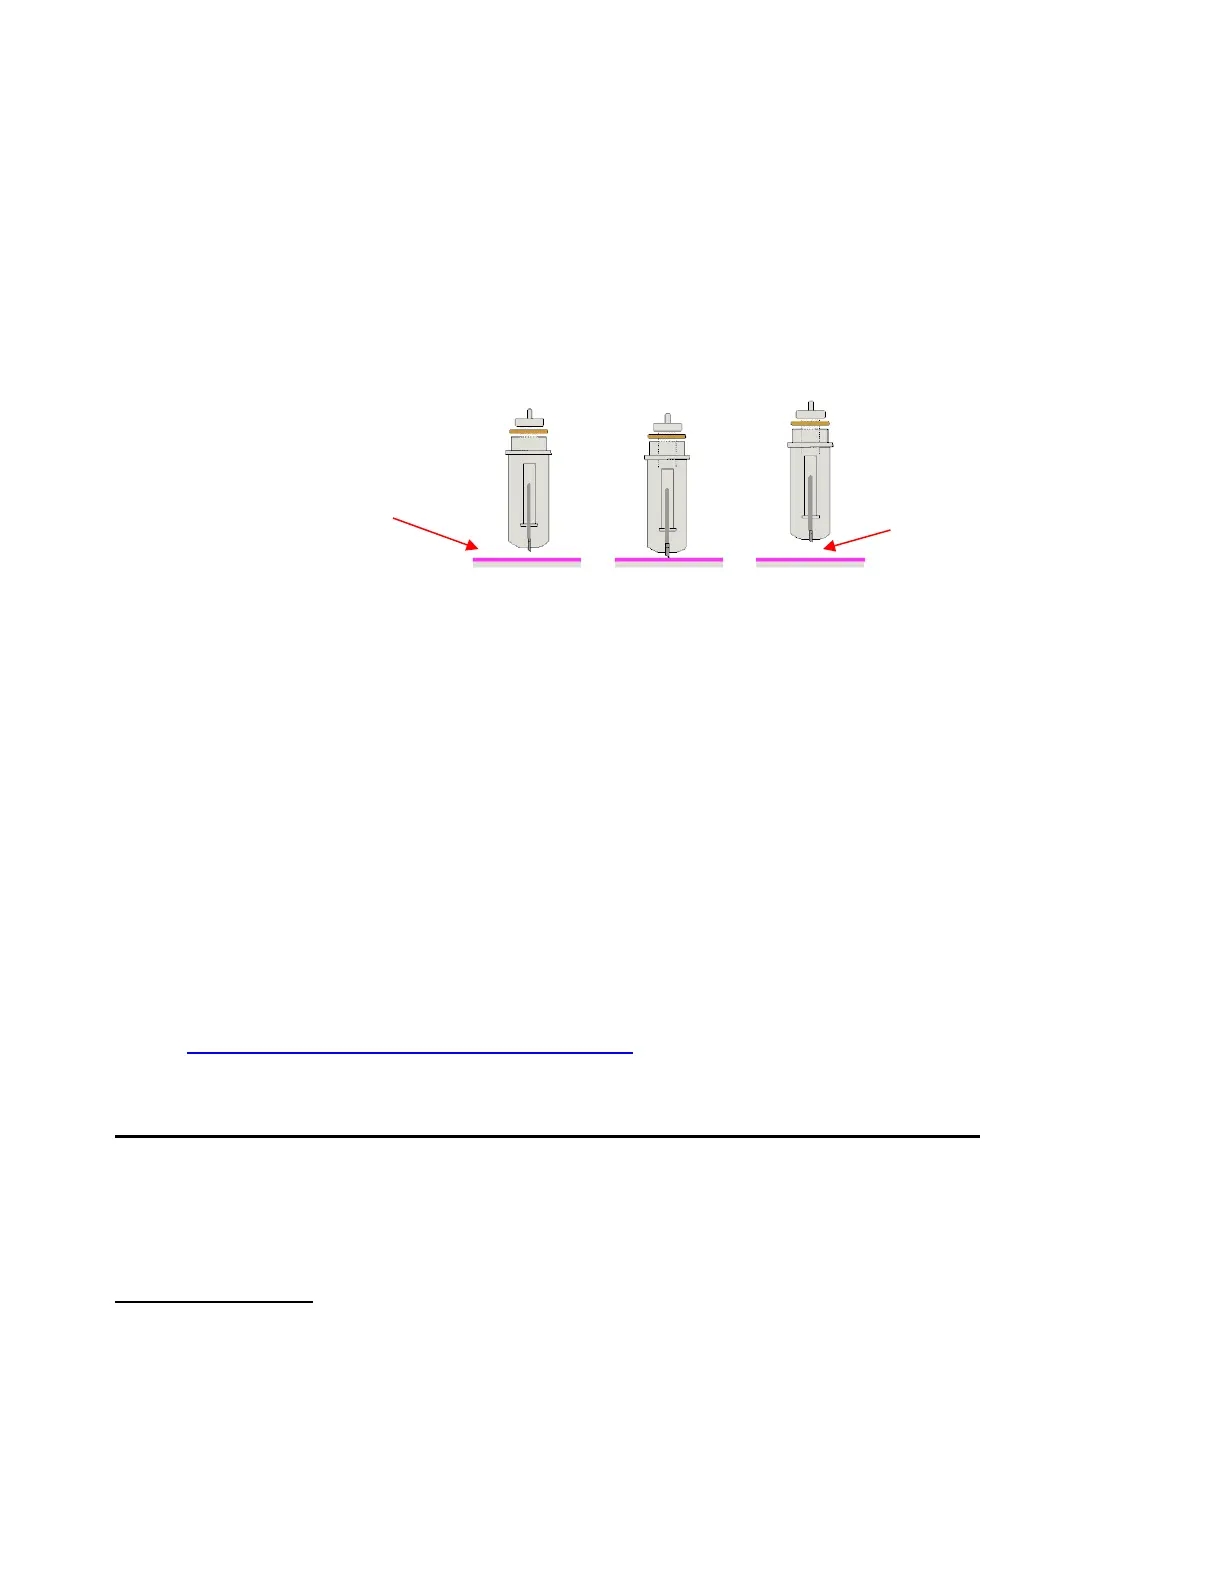
with the outer rim touching the blade holder seat. You have control over that height and can raise the blade
holder up a little higher before locking it into place with the front screw on the blade holder seat.
Adjust the blade height so that:
The blade tip will not be dragging across the material you are cutting when moving to the point to begin
the cut.
The dropping of the blade will invoke more downward force… to a point! Thinner, easy-to-cut materials
(such as paper and vinyl) can have the blade tip fairly close to the material. So, mount the blade holder
so that the rim is resting on the blade holder seat. Denser materials, such as cardstock, chipboard and
craft plastic, need the blade tip a little higher, but not too high:
There are several methods to use in making sure the blade tip is set at a consistent height from one cut to
the next:
One recommended method for getting the same height set for all of your cuts is to use a spacer of some
kind. Place the spacer on top of the material you are cutting. Loosen the front screw and insert the
blade holder so that the tip of the blade is touching the top of the spacer. Now tighten the front screw
and remove the spacer. This distance will provide the blade some “punch room” to give the extra force
and more consistent cutting of your material. What to use for this spacer? For materials such as
cardstock and fabric, try using 25 Post-It note sheets or 12 squares cut from cardstock. When cutting
very thick materials, such as 0.03” chipboard, felt, or craft foam, use 13 Post It note sheets or 6 squares
of cardstock instead.
An alternate method is to cut O rings to slip over the bottom of the blade holder and then allow the blade
holder and O rings to sit on top of the blade holder seat. Use 1 ring for thin materials (paper and vinyl), 2
rings for cardstock, 3 rings for rhinestone template materials, 4 rings for thick chipboard, and so forth.
Unlike the method above, you do not have the material itself lifting the blade holder position, so you
need to keep increasing the number of O rings for thicker materials. These rings can be cut from cereal
boxes with two glued together to create one ring. The cutting file for these is located here:
http://www.iloveknk.com/FreeFiles/KNK/Important/
Adjust the Speed, Force, and Number of Passes Based on the Material and Shapes
Using correct cut settings is equally important as the type of blade, blade length, and blade height. Refer to
Section 2.02 for details. Again, some suggested settings are located at the end of this chapter and settings
for using the various Zing Air accessory tools are located at the end of Chapter 12.
Perform Test Cuts!
Select a shape from the SCAL Library and size it to be about 0.3 inches (~ 8 mm). Make sure you can get a
very clean cut before proceeding with your project. When cutting intricate shapes or a specialized
application, a test cut of an intricate image, such as a letter or a small portion of your rhinestone pattern,
might be a better indicator of correct settings.
 Loading...