Do you have the pinch wheel levers raised in the front (so that the pinch wheels are down)?
Have you set the blade length based on the thickness of the material you are cutting?
Do you have the blade holder firmly mounted in the blade holder seat and the blade tip at the correct height
above the material?
Have you set the Origin at the bottom right corner of your material (or wherever you need the origin to be)?
Have you set the Pressure? And the Speed?
Have you selected the correct Offset for the blade you are using?
Do you need to turn on Multi-cut for this material?
Have you selected the Cut Mode you wish to use? Do you know, with confidence, where your shapes are
going to cut?
2.08 Resolution Calibration
If you were to cut out any particular shape, for example, a 10” x 10” square, you might find that it actually
measures 9-15/16” x 10-1/32”. It will be very close to 10” x 10” but perhaps just slightly smaller or larger in
either or both dimensions. Now this might be perfectly acceptable for the type of cutting you do. Therefore, it
may not even be necessary to do this particular calibration. However, if you do want to make sure your
shapes are cut precisely, the following procedure will allow you to calibrate your Zing Air.
Note that this Resolution only applies to Origin Point and WYSIWYG cutting modes. For Print and Cut
applications, Resolution is determined automatically based on where the registration marks are set with the
laser light during the print and cut process.
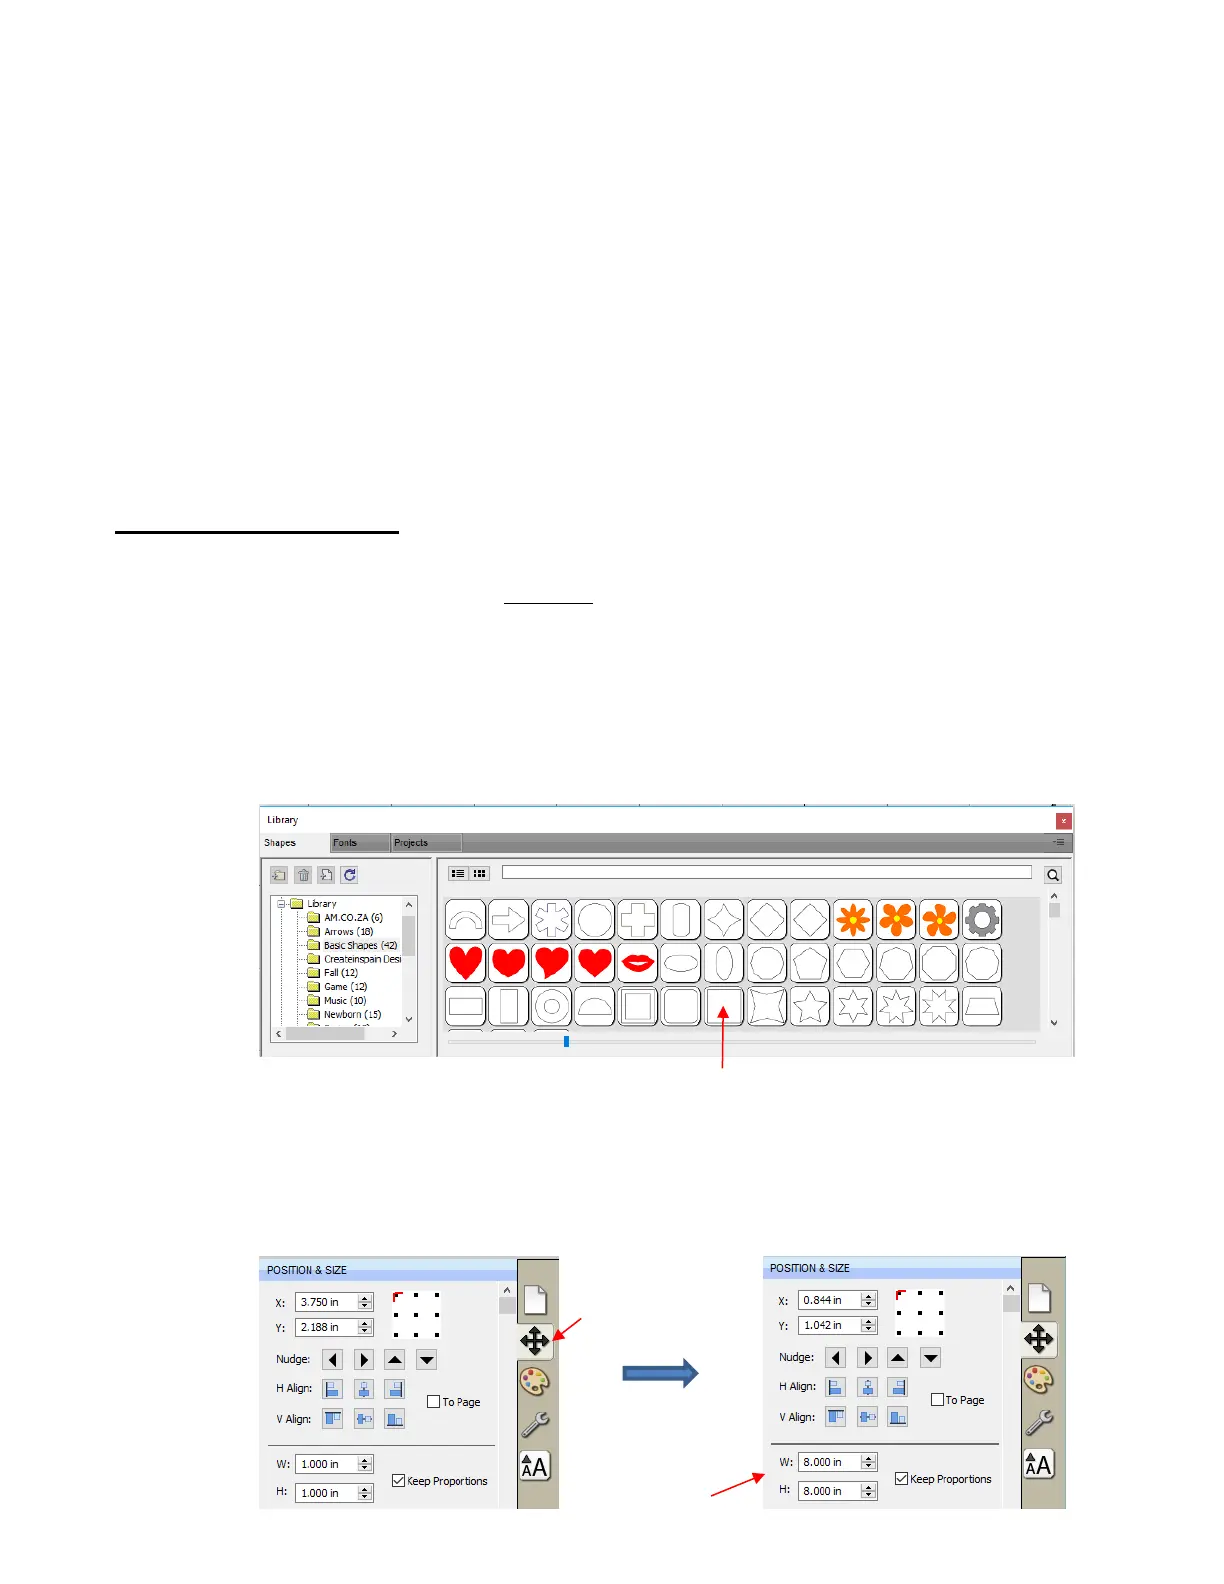
Go to the Library and select the square shape:
Make sure you have selected the square and not the rounded square to the left of it because you will be
measuring this square with a ruler after drawing it.
To resize the square, select it and then click on the Position & Size icon to display that panel. The square
will be 1” x 1”. Change the size (W and H) to the largest size that will fit on the paper you have available. It
is recommended that at least 10” x10” be used:
 Loading...