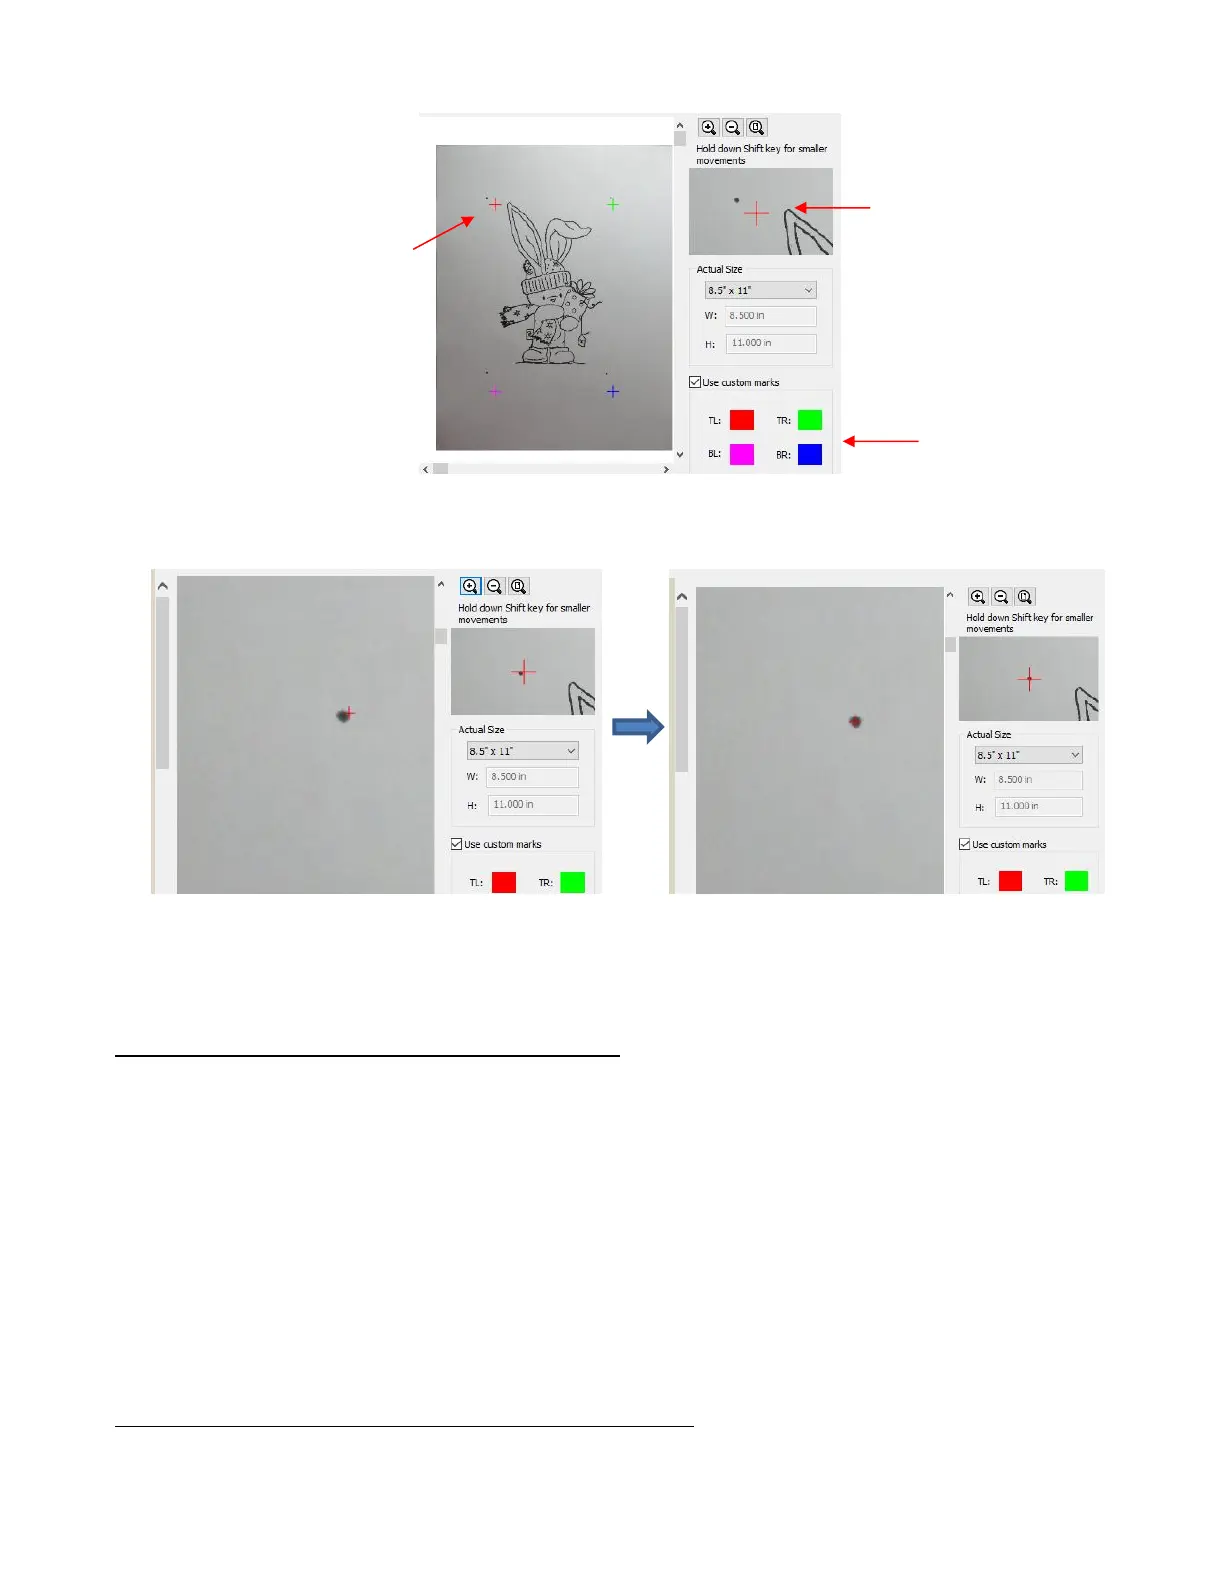
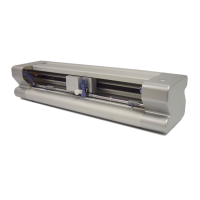
As with the red squares in the prior step, first drag the colored marks so they are approximately over the
hand-draw marks. Then, zoom in and precisely center them:
Repeat for the other three marks and then click on OK. The main SCAL window will now have the image
ready to trace. Complete the same steps as in the earlier method but use the dots for alignment of the laser
light instead of the corners of the paper.
Alternative 2 Use Registration Marks Drawn onto the Mat
Instead of using the sheet of paper, carefully add permanent registration marks to the grid of your mat:
The advantage of this method is that your images can be on any size of paper, such as a scrap.
Use a black Sharpie and a ruler and choose suitable grid intersections so that you can accurately
determine the W and H to enter into the Scan2Cut window.
You can also have several sets in case you want some that are nearer to the images on small sheets.
You can also add the four custom marks onto your sheet, if desired.
Once you’ve placed your sheet onto the mat and photographed or scanned it, do not move that sheet.
Proceed as in the original tutorial using the registration marks on the mat as the corners for aligning the
laser.
Alternative 3 Use Custom Registration Marks for Both Alignments
Instead of using the sheet of paper, you add a perfect regular pattern of hand drawn dots around the
image(s). The advantages to this method are:


 To Next Page