The dots are easier for alignment with the laser
Having the dots closer to the image versus using the outside corners of the paper allow for more
accurate PNC
You can skip the second window where alignment is needed with the colored icons
Note that you must be very precise in placing those four dots:
The dots must be arranged in a perfect rectangular pattern
You must know the exact distance between the dots for the W and H dimensions under Actual Size
To facilitate the drawing of these dots, a template file
can be cut and used whenever this method will be
employed:
The template is a grid of perfectly spaced and perfectly aligned holes. You can download these
templates in both Letter size (spacing is every 0.5 inch) and A4 (spacing is every 10 mm) from this link:
http://www.iloveknk.com/FreeFiles/SCAL/SCAL-Scan2Cut-Grids.zip
The template is cut from acetate or any material that is durable enough to be used over and over. You
can use ordinary cardstock, however be careful to not tear or even crumple the edges of the holes.
This template is used to add the dots around the image(s) with the assurance that the measurements
are precise and the dots are aligned in a perfect rectangle.
After adding the dots, photograph or scan the image. Again, make sure the sheet is laying flat on the
surface.
Use a ruler to measure the left-to-right (W) and the up-and-down (H) spacings between the dots on the
sheet:
Note that because the grid is designed with precise spacing, meauring the spacing will be easy. In the
Letter size grid, the circles are 0.5” apart. In the A4 grid, the circles are 10 mm apart. Thus:
o If the Letter template is used, the spacing will be to the nearest half of an inch
o If the A4 template is used, the spacing will be to the nearest 10 mm or nearest centimeter
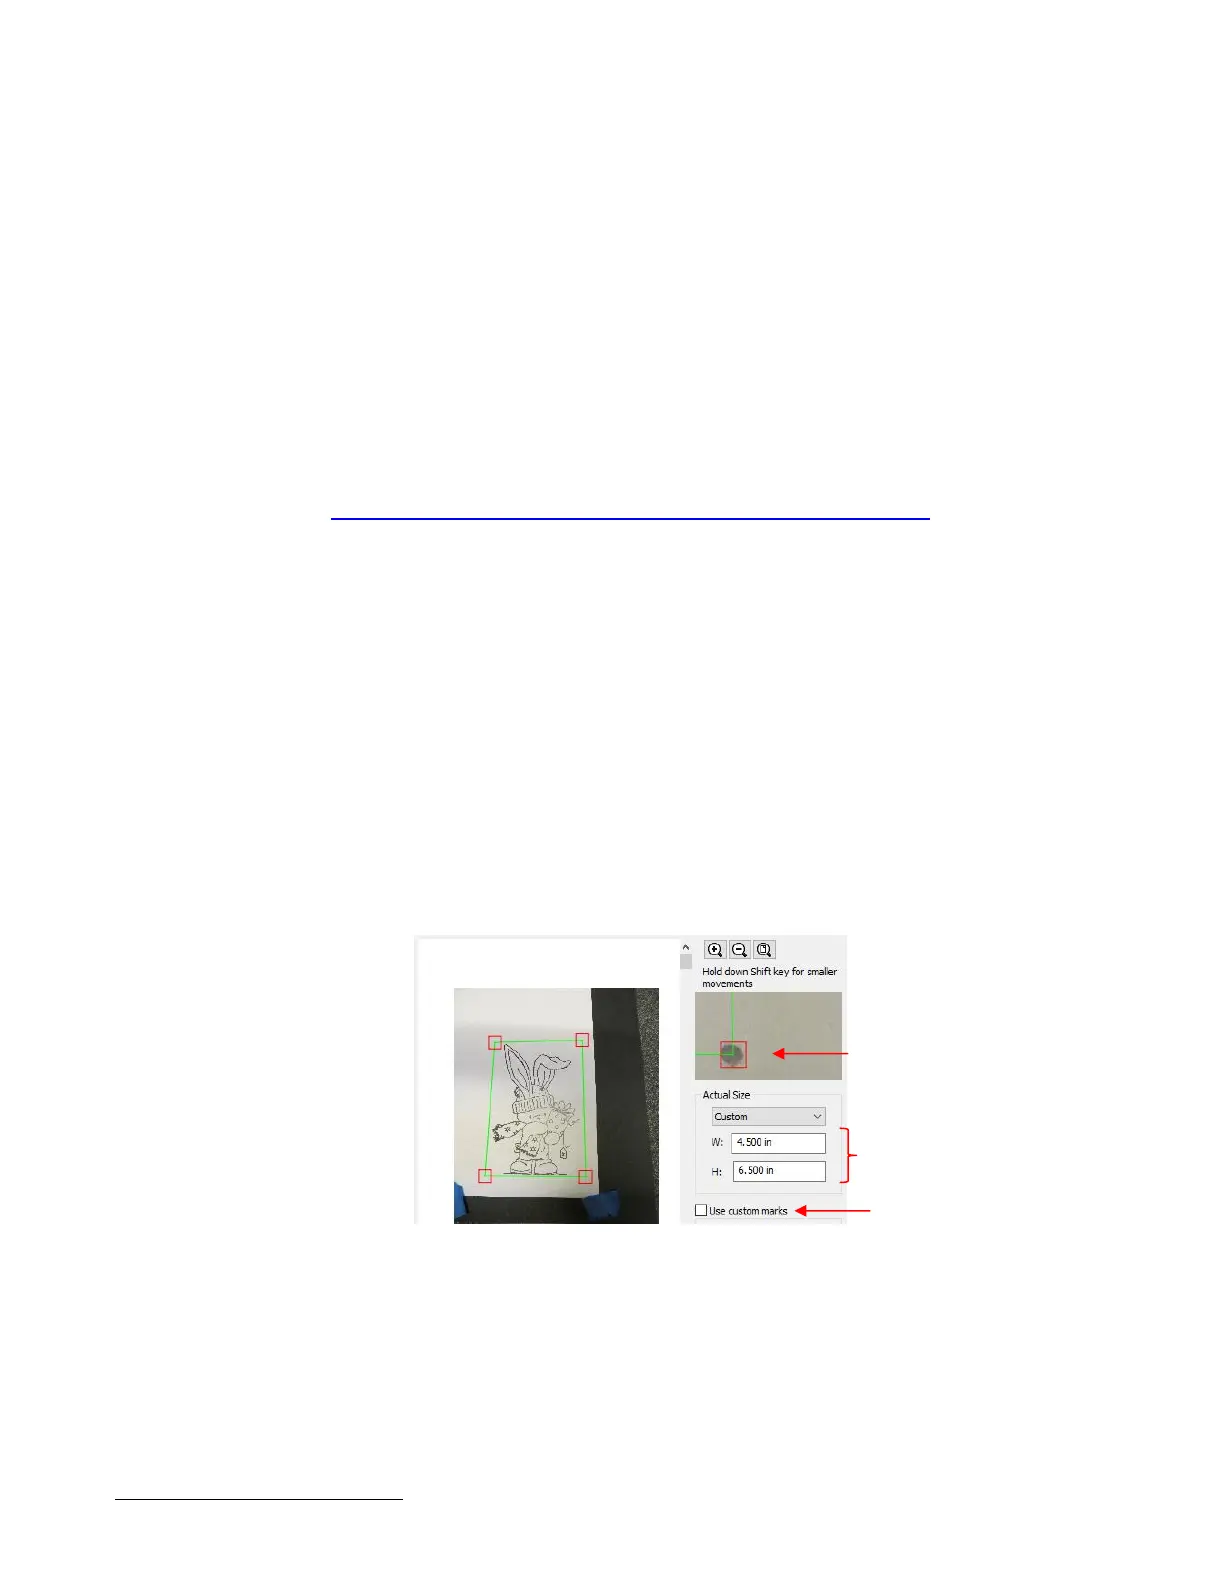
In the Scan2Cut window, select Custom under Actual Size and then enter the W and H measurements:
As in the prior instructions, be very precise when aligning the red squares with the centers of the drawn
dots.
Proceed as before, with the tracing of the shape and using Path>Path Offset to provide some room for
error in the cut.
Set the origin with the tip of the blade approximately over the lower right dot.
Carry out the Print+Cut process aligning the laser dot with the four dots you added around the image(s).
The results should be quite accurate, even when using a photographed image.
 Loading...