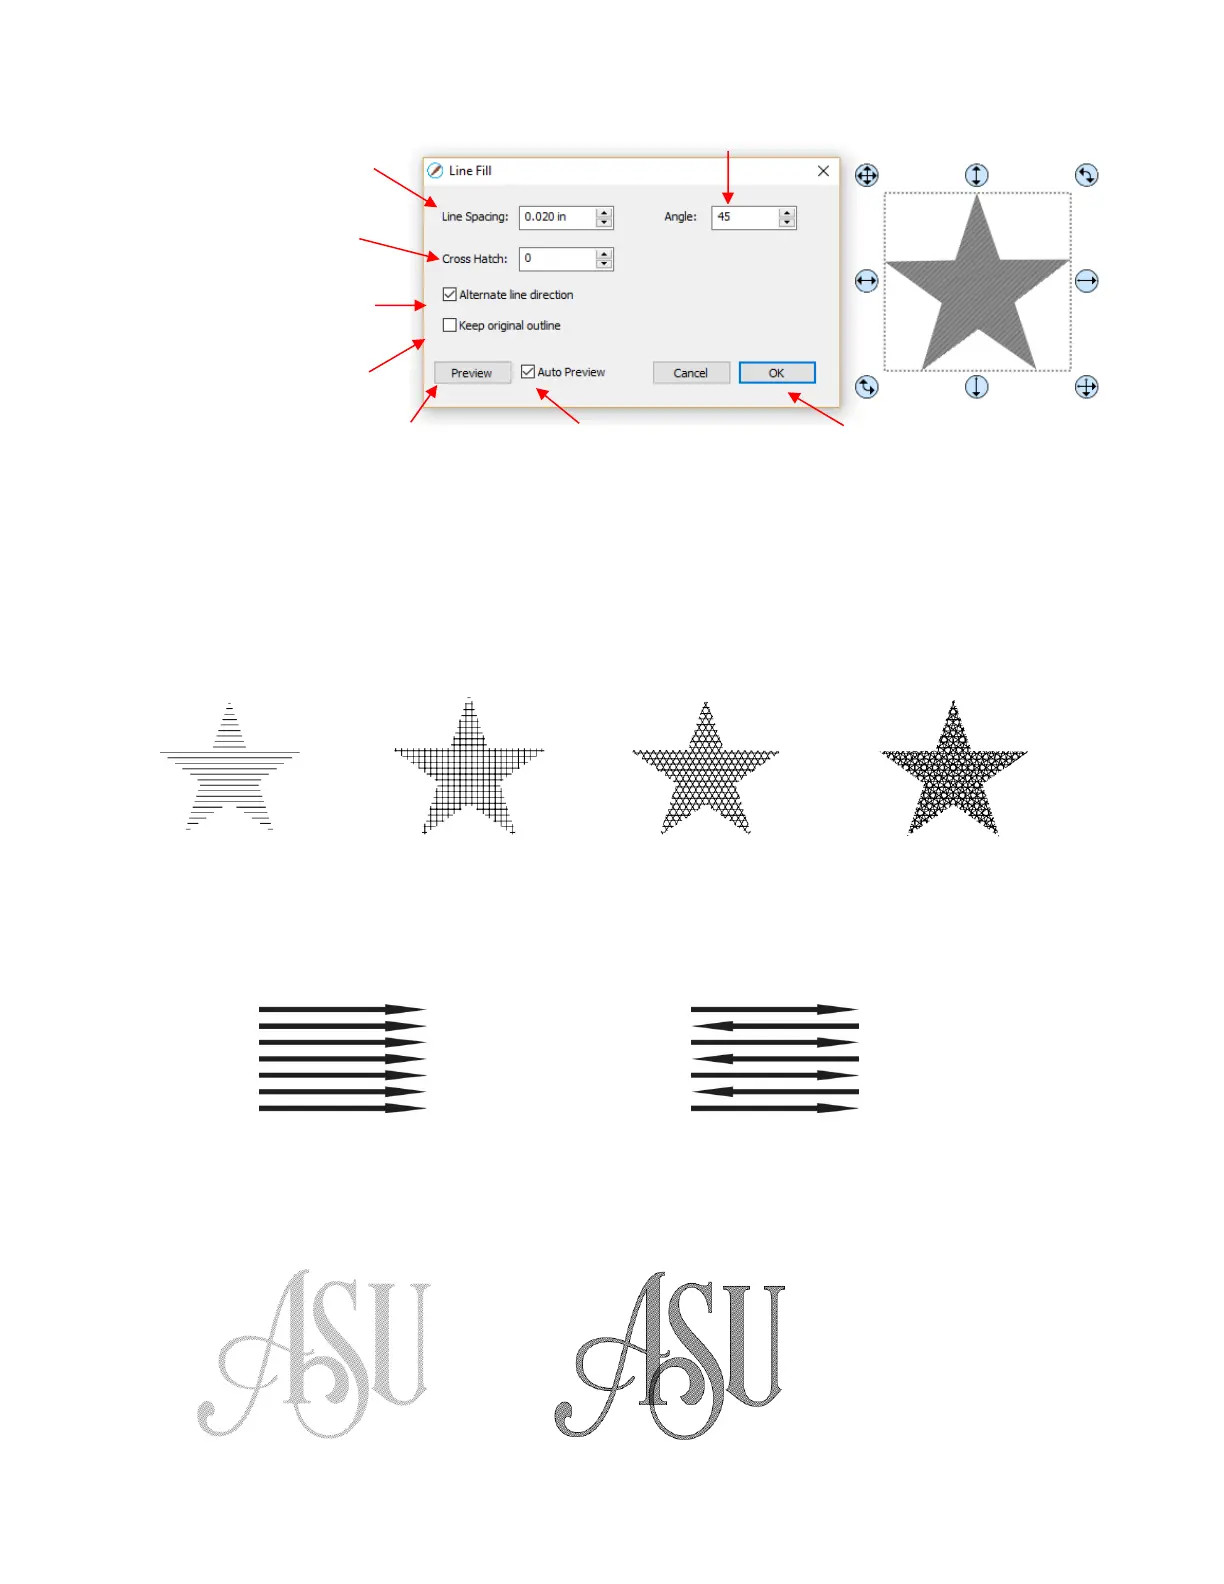
Line Spacing: This is selected based on the width of the line produced by the tool to be used. If it’s too
small to accurately measure, use 0.02” or 0.5 mm for a small test shape and then adjust, as needed, to
fit the tool and application.
Angle: Choose an angle for the Line Fill. An Angle of 0 results in horizontal lines and an Angle of 90
results in vertical lines. Note the diagonal pattern in the prior screenshot using an Angle of 45.
Cross Hatch: Increasing Cross Hatch adds additional intersecting lines to the pattern which can result
in a more complete fill but will take longer to engrave or draw:
Alternate Line Direction: This controls whether the tool always returns to the same side before
dropping down to engrave or draw. In some applications, it may need to be unchecked to provide a
more even appearance, however it will take much longer to execute:
Keep Original Outline: Usually a good idea in case you want to revise your pattern later on. Also,
when working with lettering, having the outline improves readability:
For more information on using an engraver, refer to Section 12.09.
 Loading...