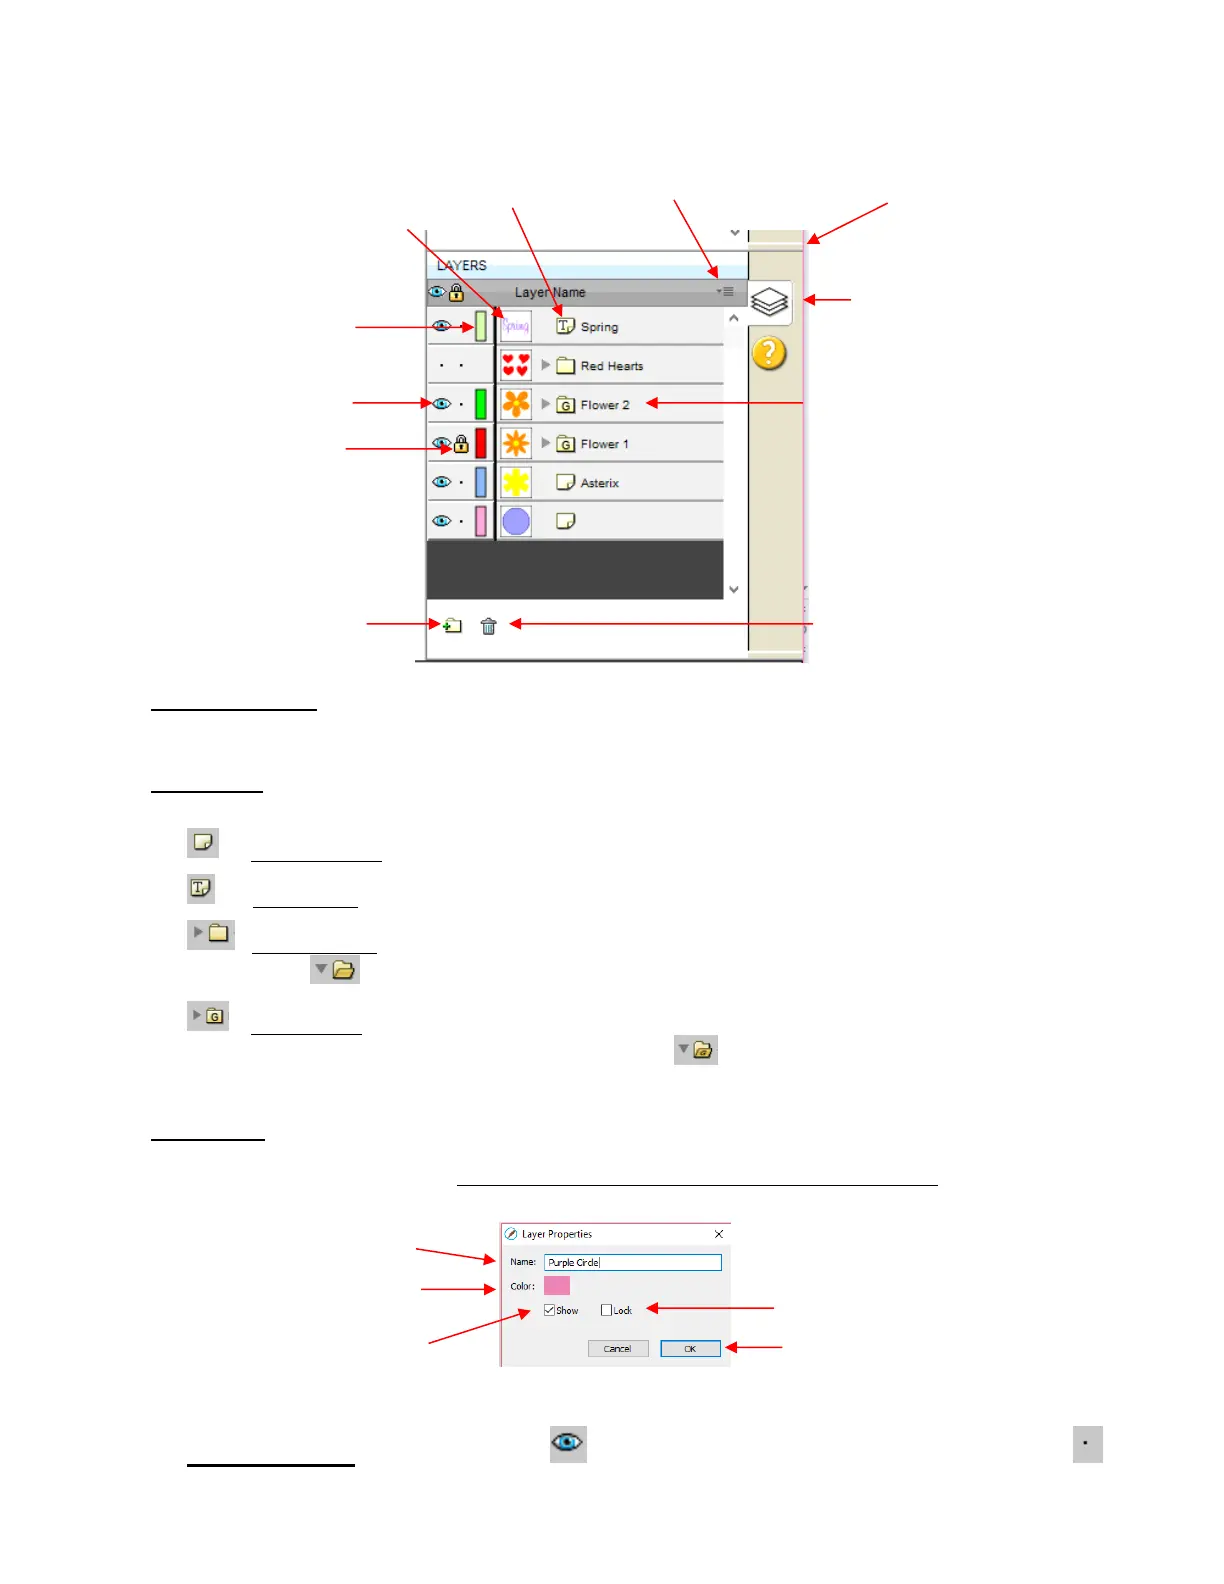
Layer Thumbnail: Each layer has a thumbnail showing the shapes assigned to that layer. Click on that
thumbnail and all shapes on that layer will be selected. If you wish to add the shapes from another layer to
the section, hold the Shift key and click on the other thumbnail.
Layer Type: To the right of the Layer Thumbnail is the Layer Type, represented by one of four different
icons:
Regular shape
Text shape which is still able to be edited as text, such as changing the font
Regular folder of individual shapes: When the folder is opened, by clicking the gray triangle, the
icon changes and all layers or subfolders within are displayed.
Group folder where one or more of the shapes have been grouped together: When the folder is
opened, by clicking the gray triangle, the icon changes and all layers or subfolders within are
displayed.
Layer Name: In the prior Layers Panel screenshot, the last layer has no name. To add one, double-click
that layer to open the Layer Properties window. Here you can change the name of that layer as well as
some other settings. Note that the color assignment is for use on the Layers Panels only. It doesn’t change
the color of the shape assigned to that layer:
Hiding layers, locking layers, and assigning layer colors can also be done on the Layers Panel:
Hide/Show Layer: Click on the eye icon to hide that layer. The icon will be replaced with a dot
as shown for the Red Hearts layer and the shapes on that layer will no longer be seen on the Cutting
 Loading...