Do you have a question about the KTM 1190 RC8 EU 2008 and is the answer not in the manual?
Explains the meaning of specific symbols used in the manual.
Explains the type formats used for names and trademarks.
Maintenance work must be done by an authorized workshop to maintain warranty.
Fuels, lubricants, and materials must be used according to specifications.
Only use spare parts and accessories approved by KTM.
Non-reusable parts must be replaced; clean and check parts for reuse.
Pay attention to notes and warning stickers attached to the vehicle.
Defines risk levels: Danger, Warning, and Note with associated consequences.
Read manual carefully; assumes availability of special tools and equipment.
Location of chassis number stamped on frame and type label.
Key number found on KEYCODECARD; used for spare keys and programming.
Location of the engine number stamped on the engine.
Location of the fork part number on the fork stub.
Location of the shock absorber part number on the shock absorber.
Location of the steering damper part number on the steering damper.
Steps to jack up the motorcycle at the front using a work stand.
Steps to safely remove the motorcycle from the front work stand.
Steps to jack up the motorcycle at the rear using a work stand.
Steps to safely remove the motorcycle from the rear work stand.
Procedure for starting the motorcycle engine, including safety precautions.
How to adjust the fork's compression damping for optimal suspension behavior.
How to adjust the fork's rebound damping for vibration-free resetting.
Adjusting fork spring preload for rider weight and handling compromise.
Procedure for bleeding excess pressure from the fork legs.
Explains how vehicle level is adjusted at the front and rear.
Steps to adjust the front vehicle level by modifying fork leg height.
Adjusting the clutch lever position for rider comfort and hand size.
Adjusting the steering damper for stable steering at speed or no load.
Adjusting handlebar stub height for optimal riding position.
Adjusting the play in the gas Bowden cable for proper throttle response.
Explains the adjustable footrest system for individual setting.
Steps to adjust the footrest position for comfort or sporting use.
Explains the two positions for rear frame height adjustment.
Procedures to adjust the rear frame height to a higher or lower seat position.
Adjusting the shock absorber's low-speed compression damping.
Adjusting the shock absorber's high-speed compression damping.
Adjusting the shock absorber's rebound damping.
Adjusting the shock absorber's spring preload for rider weight.
Adjusting the rear vehicle level using the eccentric shaft.
Steps to remove the exhaust cover.
Steps to install the exhaust cover.
Procedure for removing the entire exhaust system.
Steps to install the exhaust system, including manifold and silencer.
Steps to remove the air filter and filter box top.
Steps to install the air filter and filter box top.
Procedure for removing the filter box bottom.
Steps to install the filter box bottom, including hose and sensor connections.
Procedure to remove the main seat.
Procedure to install the main seat.
Steps to remove the passenger seat.
Steps to install the passenger seat.
Safety precautions and steps to dismount the fuel tank.
Steps to install the fuel tank, including connecting hoses and sensors.
Procedure to remove the fuel tank guard.
Steps to install the fuel tank guard.
Steps to remove the side covers.
Steps to install the side covers.
Procedure to remove the left and right inside covers.
Steps to install the left and right inside covers.
Detailed steps for removing the front wheel, including brake caliper steps.
Steps for installing the front wheel, including spindle and brake caliper.
How to check tire condition for damage, cuts, and tread depth.
Procedure for checking and correcting tire air pressure when cold.
How to check the thickness of the front brake discs for wear.
Steps for removing the rear wheel, including chain and caliper.
Steps for installing the rear wheel, including bushings and chain.
Specifics for installing the rear wheel during engine installation.
How to check tire condition for damage, cuts, and tread depth.
Procedure for checking and correcting tire air pressure when cold.
How to check the thickness of the rear brake disc for wear.
How to check the chain for dirt.
Procedure for cleaning the drive chain.
How to check and adjust the chain tension.
Detailed steps for adjusting the chain tension and aligning the rear wheel.
How to check the rear and engine sprockets for wear.
How to measure chain wear.
How to check the chain sliding guard for wear.
Importance of checking rear hub shock absorbers for wear.
Safety precautions and steps for removing the motorcycle battery.
Steps for installing the motorcycle battery.
Procedure for recharging the battery, including safety and best practices.
Steps to change the main fuse to protect the electrical system.
How to locate and change fuses for various electrical components.
Importance of using genuine KTM brake linings for optimal performance.
How to check the minimum thickness of the front brake linings.
How to check the front brake fluid level and potential issues.
Procedure to top up the front brake fluid to the MAX level.
Adjusting the handbrake lever position for rider comfort.
How to check the minimum thickness of the rear brake linings.
How to check the rear brake fluid level and potential issues.
Procedure to top up the rear brake fluid.
Adjusting the footbrake pedal stub for desired lever length.
Adjusting the footbrake pedal using the piston rod.
Steps for removing the rear brake system components.
Steps for installing the rear brake system components.
Procedure for activating/deactivating ignition keys using the programming key.
How to switch between ROAD and RACE modes via the info display.
How to set the motorcycle's clock using the SET CLOCK function.
Adjusting the shift warning light RPM thresholds (RPM1 and RPM2).
Setting the blank time to prevent accidental lap presses.
Setting the total number of laps for the lap timer function.
Setting the reaction time for the fuel reserve display.
Setting the unit for distance display between kilometers and miles.
Setting the temperature unit display between Celsius and Fahrenheit.
Enabling or disabling the external temperature display.
Procedure for resetting the service reminder display.
How to check the headlight beam alignment against marks on a wall.
Adjusting the headlight beam distance using the adjustment screw.
Steps to replace the parking light bulb.
Steps to replace the low beam headlight bulb.
Steps to replace the high beam headlight bulb.
Comprehensive steps for removing the engine from the motorcycle frame.
Steps to prepare the engine before installing it back into the frame.
Steps to install the engine into the motorcycle frame.
Procedure to set the engine to TDC for the rear cylinder.
Procedure to set the engine to TDC for the front cylinder.
How to mount the engine onto a work stand for disassembly.
Steps to drain the engine oil before disassembly.
Procedure to remove the front valve cover.
Procedure to remove the rear valve cover.
Setting engine to TDC for the rear cylinder during disassembly.
Steps to remove the starter motor.
Procedure to remove the oil filler tube.
Steps to remove the heat exchanger.
Procedure to remove the rear timing chain tensioner.
Steps to remove the rear camshaft.
Steps to remove the rear cylinder head.
Steps to remove the rear piston.
Setting engine to TDC for the front cylinder during disassembly.
Procedure to remove the front timing chain tensioner.
Steps to remove the front camshafts.
Steps to remove the front cylinder head.
Steps to remove the front piston.
Steps to remove the generator cover.
Procedure to remove the ignition pulse generator.
Steps to remove the torque limiter and idler.
Steps to remove the engine rotor.
Steps to remove the left idler gear and timing chain.
Procedure to remove the engine oil filter.
Steps to remove the balancer shaft.
Steps to remove the balancer shaft's drive wheel.
Procedure to remove the gear position sensor.
Steps to remove the left suction pump assembly.
Steps to remove the water pump wheel.
Steps to remove the clutch cover.
Steps to remove the right idler gear and timing chain.
Steps to remove clutch discs, springs, and pressure components.
Steps to remove the outer clutch hub and pressure booster.
Steps to remove the primary gear.
Steps to remove the force pump assembly.
Steps to remove the shift shaft.
Steps to remove the shift drum locating component.
Procedure to remove the locking lever.
Steps to remove the left engine case.
Steps to remove the engine crankshaft.
Steps to remove the middle suction pump.
Steps to remove the transmission shaft.
Procedure to remove the oil spray tube.
Steps to remove timing chain rails from the right engine case.
Steps to remove timing chain rails from the left engine case.
Operations related to the right section of the engine case.
Steps to remove the main bearing from the right engine case.
How to select main bearing shells based on color marking or measurements.
Steps to install the main bearing into the right engine case.
Operations related to the left section of the engine case.
Steps to remove the main bearing from the left engine case.
Steps to install the main bearing into the left engine case.
Procedure for changing connecting rod bearings.
Operations related to the clutch cover.
Steps to change the crankshaft's step bearing.
How to check the radial clearance of the connecting rod bearing.
How to check the cylinder for damage and measure its diameter.
How to check the piston for damage and measure its diameter.
How to check the piston ring end gap.
How to check the clearance between piston and cylinder.
Operations related to the cylinder head.
How to check the cylinder head for damage, valve seats, and distortion.
Operations related to the right idler gear.
How to check timing chain, sprockets, rails, and camshafts for wear.
Steps to prepare the timing chain tensioner for installation.
How to check the oil pressure regulator valve.
How to check clearances for the engine oil pumps.
How to check clutch components for wear and damage.
How to check shift forks, drum, and rollers for wear.
Steps for pre-assembling the shift shaft.
Steps to dismantle the main shaft.
Steps to dismantle the countershaft.
How to check transmission gears, shafts, and bearings for wear.
Steps to assemble the main shaft.
Steps to assemble the countershaft.
Steps to install timing chain rails in the left engine case.
Steps to install timing chain rails in the right engine case.
Steps to install the oil spray tube.
Steps to install the transmission shaft.
Steps to install the middle suction pump.
Steps to install the engine crankshaft.
Steps to install the left engine case.
Steps to install the locking lever.
Steps to install the shift drum locating component.
Steps to install the shift shaft.
Steps to install the force pump assembly.
Steps to install the left suction pump assembly.
Setting engine to TDC for the rear cylinder during assembly.
Steps to install the primary gear.
Steps to install the outer clutch hub.
Steps to install clutch discs, springs, and pressure components.
Steps to install the right idler gear and timing chain.
Steps to install the clutch cover.
Steps to install the water pump wheel.
Steps to install the gear position sensor.
Steps to install the drive wheel of the balancer shaft.
Steps to install the balancer shaft.
Steps to install the left idler gear and timing chain.
Steps to install the engine oil filter.
Steps to install the engine rotor.
Steps to install the torque limiter and idler.
Steps to install the ignition pulse generator.
Steps to install the generator cover.
Steps to install the oil drain plug.
Steps to install the rear piston into the cylinder.
Steps to install the rear cylinder head.
Steps to install the front cylinder head.
Steps to install the front camshafts.
Steps to install the front timing chain tensioner.
Steps to install the heat exchanger.
Steps to install the oil filler tube.
Steps to install the starter motor.
Procedure for checking the rear valve clearance.
Steps to adjust the rear valve clearance.
Procedure for checking the front valve clearance.
Steps to adjust the front valve clearance.
Steps to install the front valve cover.
Steps to install the rear valve cover.
How to check the hydraulic clutch fluid level.
Steps to correct the hydraulic clutch fluid level.
Adjusting the shift lever stub for desired lever length.
Adjusting the shift lever position for riding style.
How to check the coolant level in the compensating tank.
How to check the antifreeze concentration of the coolant.
Steps to remove the radiator.
Steps to install the radiator.
Procedure for adding coolant and bleeding air from the cooling system.
Steps to fill the cooling system compensating tank correctly.
Procedure for checking valve clearance on both cylinders.
Steps to adjust the rear cylinder valve clearance.
Steps to adjust the front cylinder valve clearance.
Steps to remove the rear camshaft.
Steps to install the rear camshaft.
Steps to remove the front camshafts.
Steps to install the front camshafts.
Procedure to remove the rear timing chain tensioner.
Steps to install the rear timing chain tensioner.
Procedure to remove the front timing chain tensioner.
Steps to install the front timing chain tensioner.
Diagram and description of the engine's oil circulation paths.
How to check the engine oil level at operating temperature.
Procedure for changing engine oil, filter, and cleaning oil screens.
Steps for draining engine oil and cleaning oil screens.
Steps to remove the engine oil filter.
Steps to install the engine oil filter.
Procedure for filling the engine with the correct type and amount of oil.
How to top up the engine oil level.
Engine oil capacity information.
Coolant capacity information.
Battery specifications.
Fuse specifications.
Specifications for lighting components.
Front tire specifications.
Rear tire specifications.
Fuel tank capacity and reserve information.
General guidelines for cleaning the motorcycle safely.
Precautions for protecting the motorcycle during winter storage.
Actions to take before storing the motorcycle for a long period.
Steps to get the motorcycle ready after a period of storage.
List of service tasks recommended for authorized workshops.
Additional service tasks recommended for authorized workshops.
Specification and recommendations for brake fluid.
Specification for coolant and mixture ratio.
Specification for pre-mixed coolant.
Specification and recommendations for SAE 10W/50 engine oil.
Specification and recommendations for SAE 5W/40 engine oil.
Specification and recommendations for fork oil.
Specification for hydraulic fluid.
Specification for super unleaded fuel.
Recommendation for chain cleaner.
Recommendation for cleaning and polishing materials.
Recommendation for paint polish.
Recommendation for long-life grease.
Recommendation for motorcycle cleaner.
Recommendation for onroad chain spray.
Recommendation for universal oil spray.
Article number for bearing puller.
Article number for circlip pliers reverse.
Article number for extractor.
Article number for valve spring mounter.
Article number for limit plug gauge.
Article number for feeler gauge.
Article number for graduated disc.
Article number for Plastigauge measuring strips.
Article number for piston ring mounting tool.
Article number and feature for bearing puller insert.
Article number for step bearing tool.
Article number for pliers for band-type clamp.
Article number for multi-tooth wrench socket.
Article number for rear work stand.
Article number for work stand adapter.
Article number for front work stand.
Article number for engine work stand.
Article number for engine holder.
Article number for clutch holder.
Article number for mounting sleeve.
Article number for pressure piece.
Article number for extractor.
Article number for press drift.
Article number for engine blocking screw.
Article number for pressure bell.
Article number for extractor arms.
Article number for pressure piece.
Article number for extractor.
Article number for timing chain tensioner release device.
Article number for hex key bit.
Article number for press drift/press sleeve.
Article number for press sleeve.
Article number for frame support.
Article number for centering pin.
Article number for floor jack attachment.
Article number for piston pin lock ring insert.
Article number for spark plug wrench.
Article number for extractor.
Article number for valve spring mounting device.
Explanation of the JASO T903 MA standard for 4-stroke motorcycles.
Explanation of SAE viscosity classes for oils.
| Torque | 120 Nm @ 8, 000 rpm |
|---|---|
| Fuel System | Electronic fuel injection |
| Transmission | 6-speed |
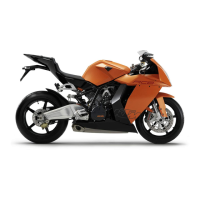
| Rear Suspension | WP Monoshock |
| Rear Brakes | Single 220 mm disc, 2-piston caliper |
| Fuel Capacity | 16.5 liters |
| Seat Height | 805 mm |
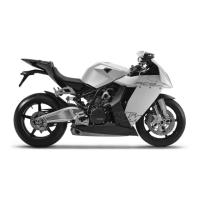
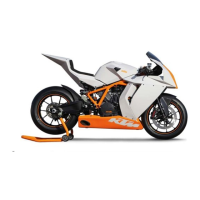
| Engine Type | V-twin, 4-stroke |
| Power | 155 hp @ 10, 000 rpm |
| Front Suspension | WP USD Ø 43 mm |
| Front Brakes | Dual 320 mm discs, 4-piston calipers |
| Frame | Chromium-Molybdenum trellis frame |
| Cooling | Liquid-cooled |
| Displacement | 1148 cc |