2-S23
MX5100, WSM
CLUTCH
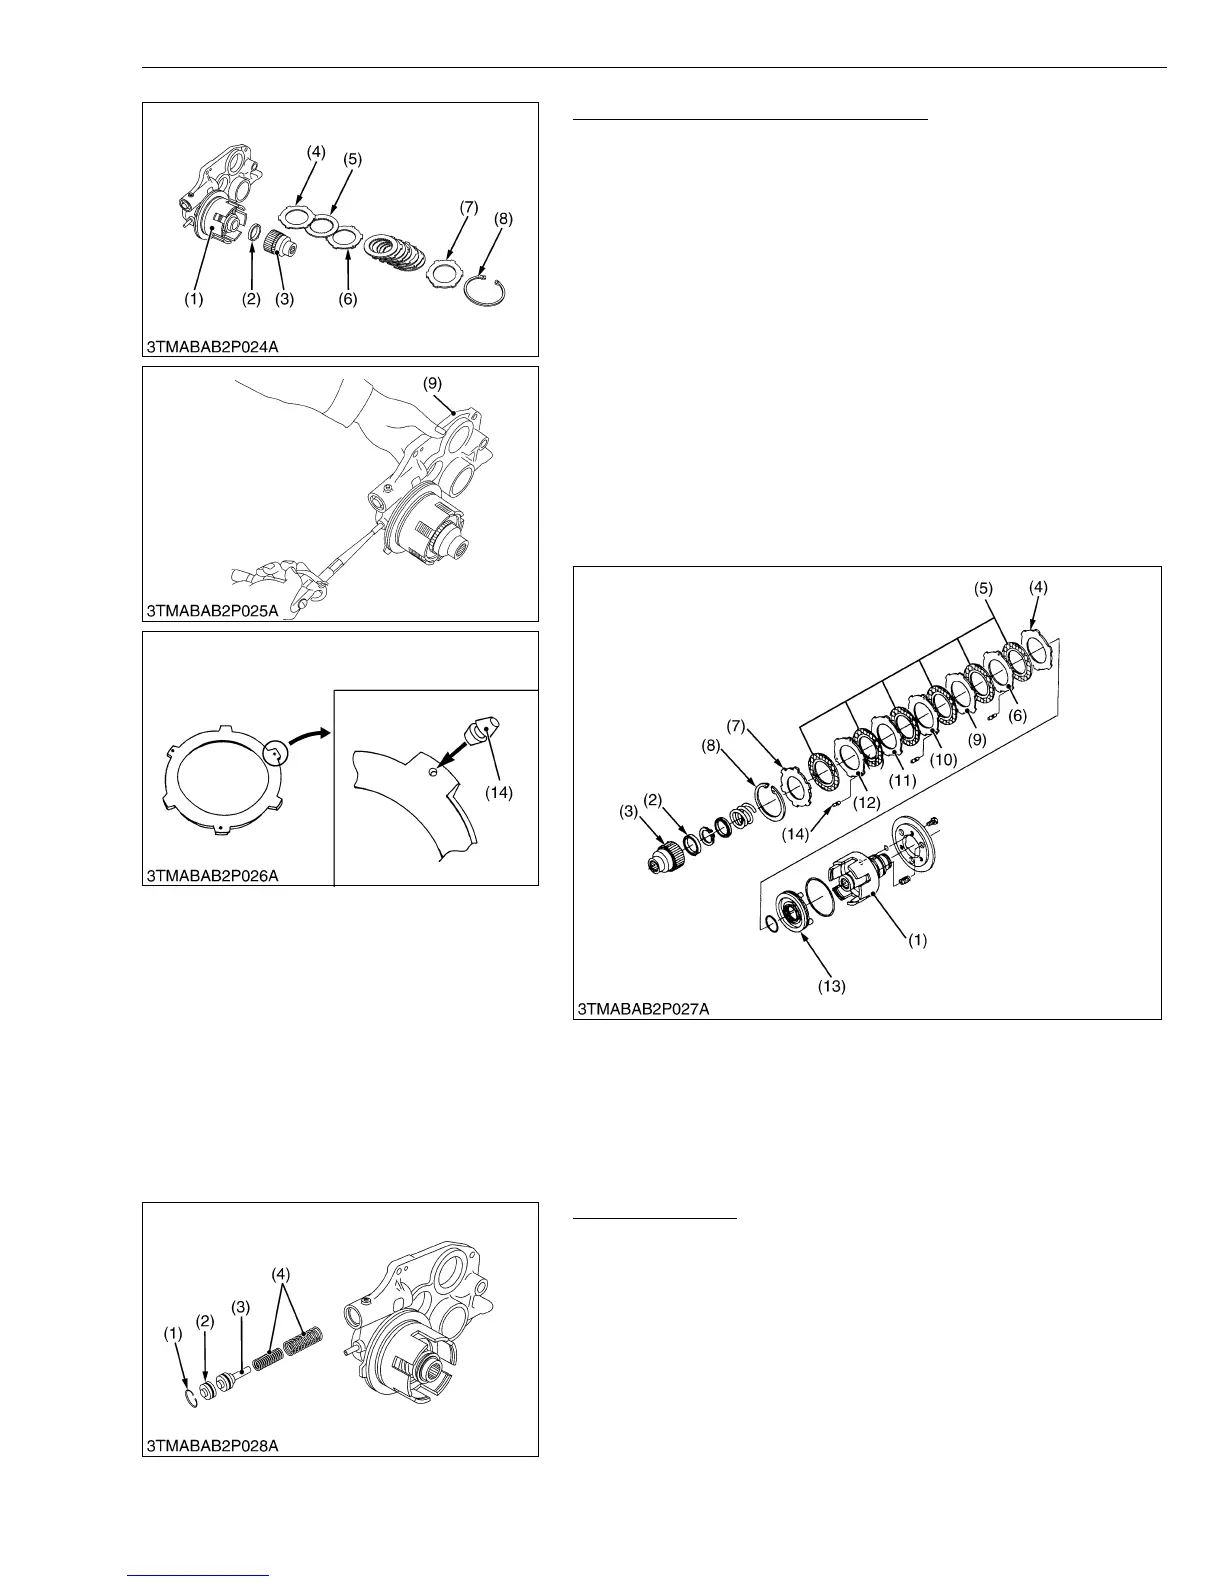
Disassembling PTO Clutch Assembly
1. Remove the internal snap ring (8), and then take out the clutch
discs (5), the back plate (7), the steel plates (6), (9), (10), (11) and
(12), the hub (3) and the bearings (2).
(When reassembling)
• Install the clutch discs (5) and steel plates (12), (11), (10), (9) and
(6) mutually. (Refer to figure below.)
• Do not confuse the two types steel plates. The steel plates with
the plug rubbers (14) are (6), (10), (12) and without plug rubbers
(14) are (9) and (11).
• Do not confuse the back plate (7) and steel plates. The back
plate (7) is thicker than the steel plates.
• Assemble the plug rubbers portion of the three steel plates (6),
(10) and (12) are same positions while assembling them. (Refer
to figure below.)
• Apply enough transmission fluid to the discs (5).
• Confirm the moving of the piston (13) smoothly when pressure air
at 0.29 to 0.39 MPa (3 to 4 kgf/cm
2
, 42 to 57 psi) is sent to clutch
pack. (Refer to the figure left.)
W10159250
Modulating Valve
1. Remove the internal snap ring (1).
2. Remove the spring seat (2).
3. Draw out the spring (4) and piston (3).
W10163300
(1) Clutch Case
(2) Bearing
(3) Hub
(4) Steel Plate (without Plug Rubber)
(5) Clutch Disc
(6) Steel Plate (with Plug Rubber)
(7) Back Plate
(8) Internal Snap Ring
(9) Steel Plate (without Plug Rubber)
(10) Steel Plate (with Plug Rubber)
(11) Steel Plate (without Plug Rubber)
(12) Steel Plate (with Plug Rubber)
(13) Piston
(14) Plug Rubber
(1) Internal Snap Ring
(2) Spring Seat
(3) Piston
(4) Spring