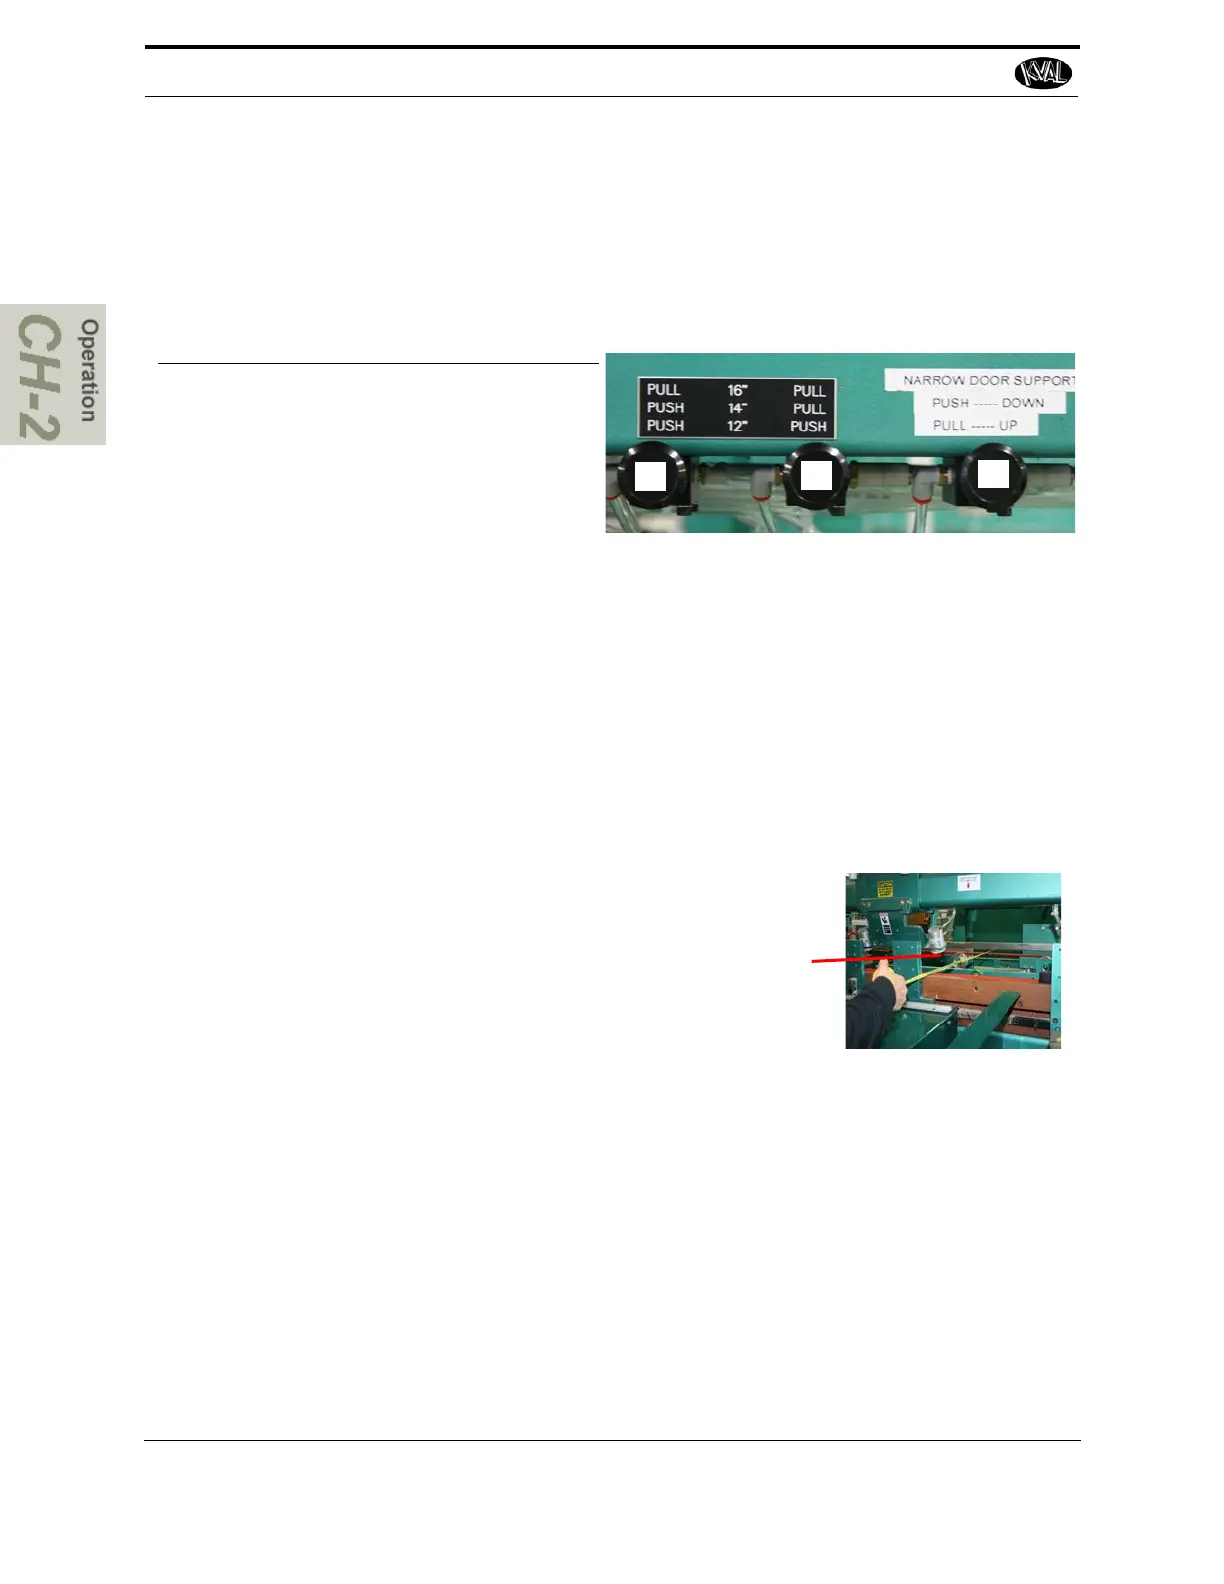
This option supports doors under 16" and allows machining on either lock or hinge side with the
use of a side shim. This shim is not included. The controls include 3 knobs to raise the wheels and
adjust the width to 12.0'', 14.0'', and 16.0''. Set the controls as shown below to the following order
for the desired width. Knobs 1 and 2 adjust the width. Knob 3 raises the wheels.
1
2
3
Door Size Knob 1
Position
Knob 2
Position
Knob 3
Position
16.0 Inch Pull OUT Pull OUT Pull OUT
14.0 Inch Push IN Pull OUT Pull OUT
12.0 Inch Push IN Push IN Pull OUT
To process doors, it is recommended to manually put two doors with the same width side by side.
The second door will act as a shim and allow machining on both sides of the door (lock and
hinge pocket) if desired. It is important to keep the doors together, try clamping the doors
together.
1. Turn off the Auto Feed select the either right hand or left hand from the control bar
on the middle front of the machine.
2. Manually put door stop up.
3. Set the control buttons to the desired width. See the figure
above.
4. To make minor adjustments to the width on the machine,
measure the doors and measure from the brass of the H
block to the back fence of the machine.
5. To allow room for doors to be fed in, use manual width
adjust width to the measurement plus 1.0''. See “Width
Adjust Operation” on page 2-50
6. Manual feed doors from the out-feed to the door stop at the in-feed.
7. Align the doors of needed.
8. Clamp door and jamb.
9. Perform normal steps to machine the door (s). See “Quick Start” on page 2-31
Note: If machining both sides of the doors, flip the doors over to machine the other
edge the doors. Ensure the doors are side by side as close to the original setup.
Re perform steps 1 through 9.