LDI Intellectual Property.
Not for secondary distribution or replication, in part or entirety.
DIGISONDE-4D
SYSTEM MANUAL
VERSION 1.2.11
6-22 SECTION 6 - MAINTENANCE
CHAPTER 2
REPLACEMENT OF MODULES
ACCESSING OR REPLACING LRM’S IN THE DPS MAIN CHASSIS.
NOTE:
A ground strap should be worn when handling LRM’s to avoid damaging
them by electrostatic discharge (ESD)
6:68. Access to Main Chassis
1. Shut off power.
2. Remove DPS enclosure front cover by turning the four fastener knobs counter-clockwise.
3. Remove the four panel mount screws at left and right sides of DPS main chassis front panel.
4. Slide the main chassis forward (toward you) until slides lock.
5. Remove the top cover by loosening six #6-32 screws at the top left and right sides of the main
chassis.
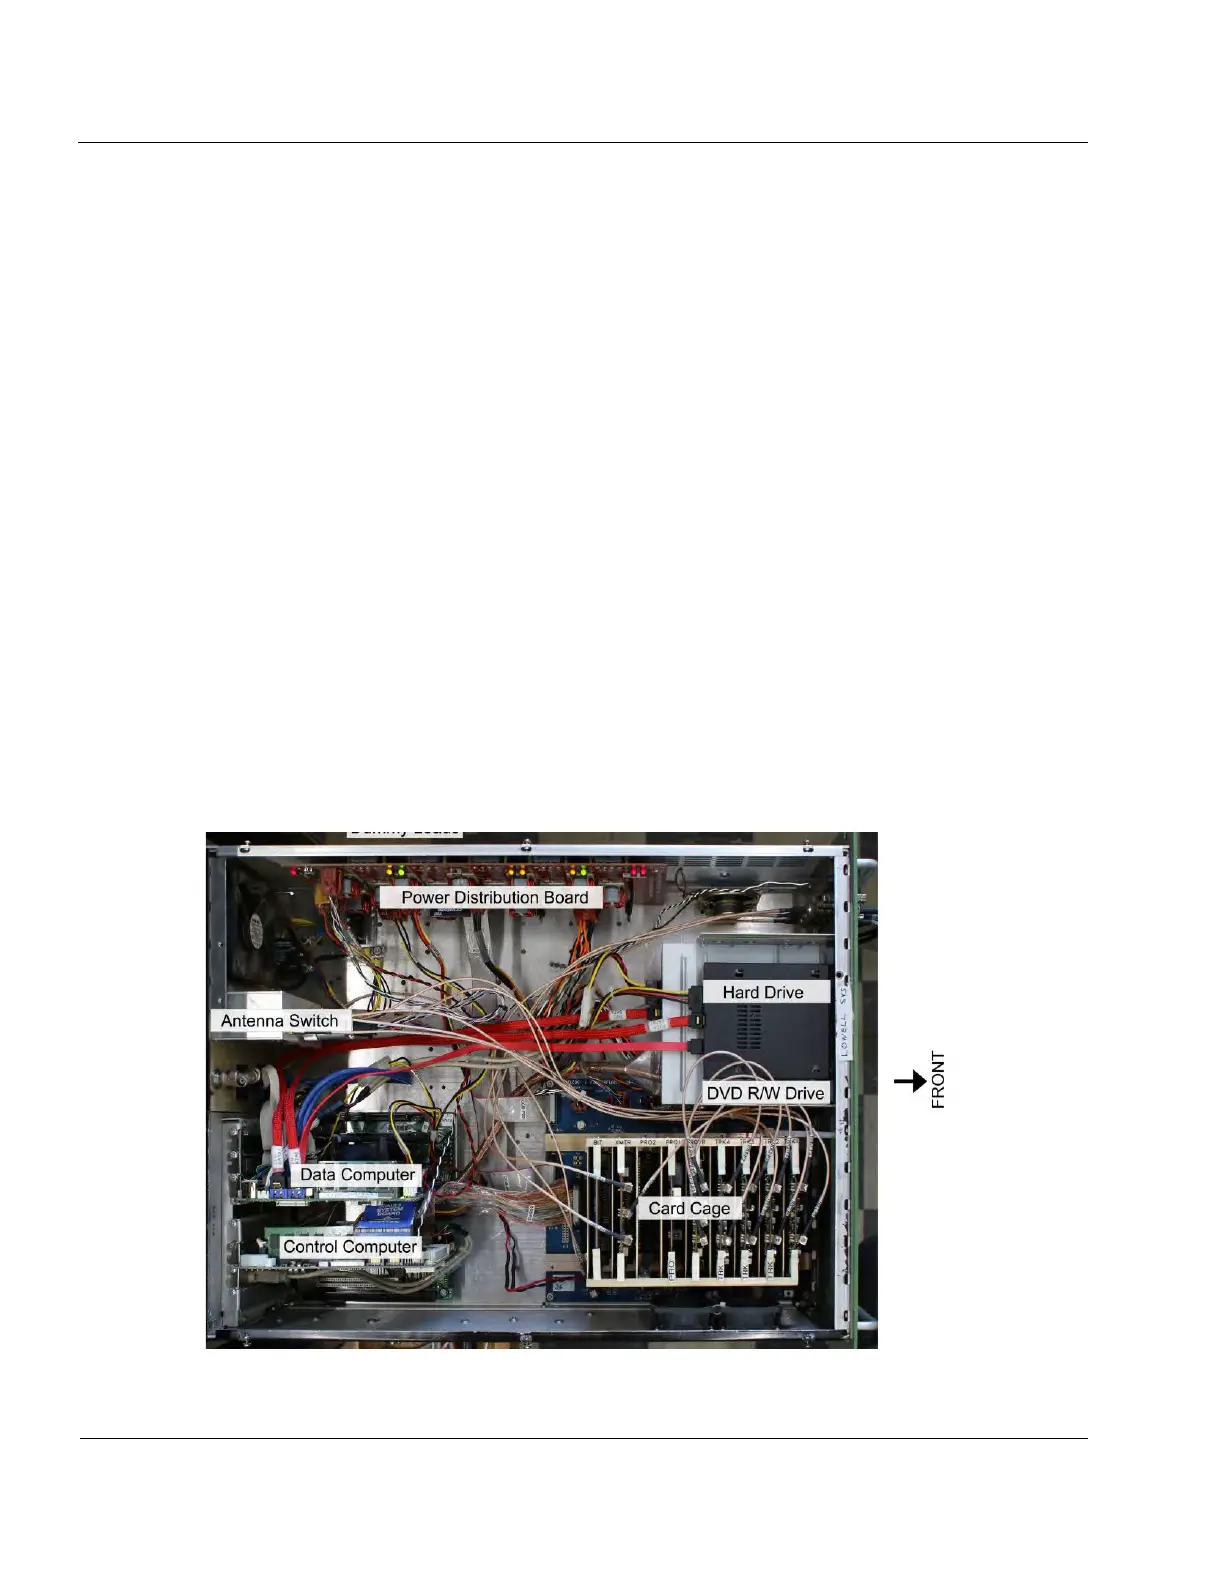
6. Locate the LRM to be replaced (see Figure 6-20). The Tracker, Digital Receiver, Pre-
processor, Digital Transmitter, and BIT cards are located in the card cage. The card cage is silk
screened to show the locations of the individual cards.
Figure 6-20: Digisonde
®
Upper Chassis