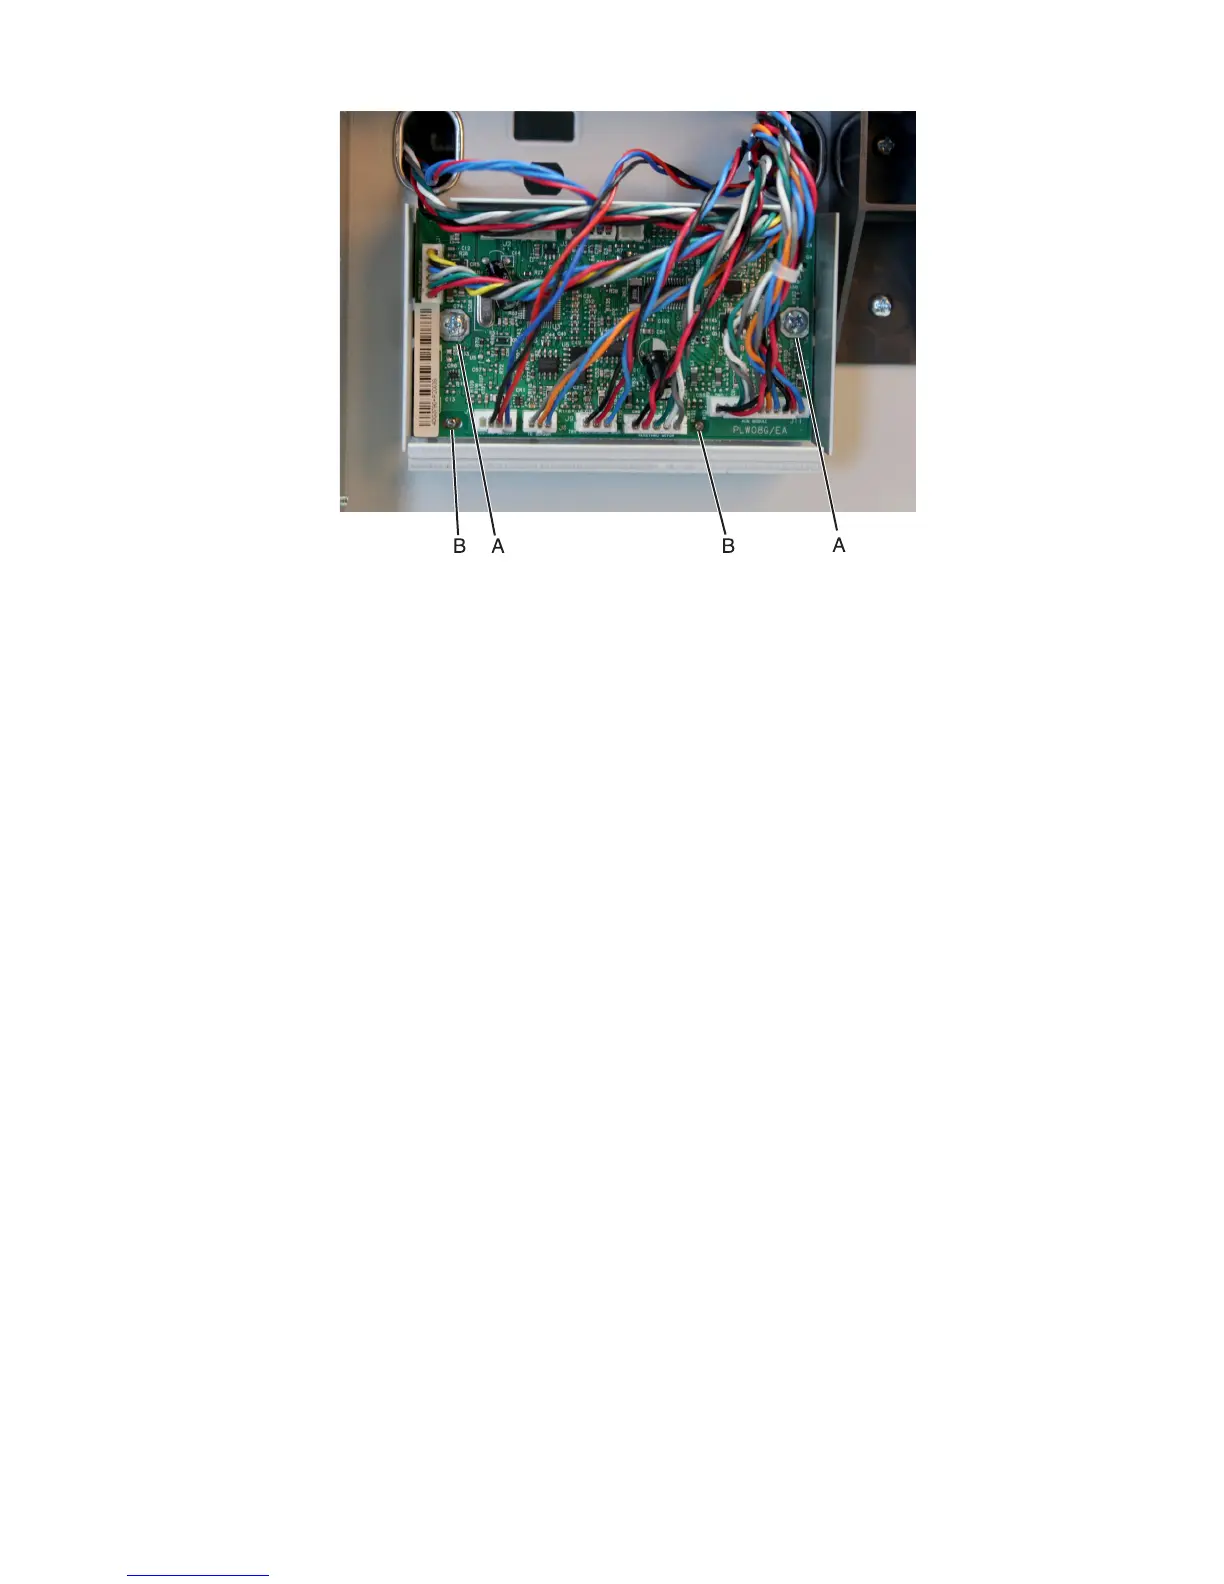
4 Remove the controller PCBA.
Installation note: Make sure the controller PCBA is properly mounted by aligning the pins (B).
HCIT top cover assembly removal
Note: This is not a FRU.
1 Remove the drawer assembly rear cover. See “HCIT drawer assembly rear cover removal” on page 428.
2 Remove the drawer assembly left cover. See “HCIT drawer assembly left cover removal” on page 429.
3 Disconnect all cables from the controller PCBA.
Note: Pay attention to the original routing of the cables. Make sure that the cables don't interfere with the
drawer's moving parts. Use cable ties to keep the cables organized.
4063
Repair information
434