58
SC100/200 Series Users Manual EM-6337-B Rev.15
6.3.1.4. CONFIG MODE
Following methods are available for conguring the Controller.
• Via the front panel control on Programming view (Engineering views)
• SFEW3E Loop Conguration Builder software
• SCCFG PC Congurator software
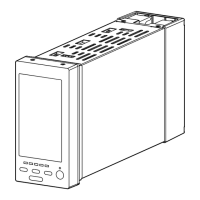
When using infrared communication, be sure to set only one Controller module to SFEW or SCCFG communication mode
at once so that other modules do not interfere when more than two modules are mounted close to each other. During the
SFEW communication mode, the front monitor LED slowly blinks and the Programming view is locked (not displayed) among
Engineering views. When the Controller is set to the SCCFG mode, the monitor LED rapidly blinks.
6.3.1.5. BACK LIGHT OFF
Screen backlight is forcibly turned off irrespective of alarm status of the moment. It is automatically turned on again when an
alarm caused by new event is triggered or the screen is touched.
When the backlight is set to on, the Controller shows rst Operation view registered as Home without the ‘Eng’ button.
6.3.1.6. BACK LIGHT BRIGHTNESS
Backlight brightness can be set from level 1 (darkest) to 5 (brightest) in 5 steps. Its life span is for approx. 50000 hours in
25°C (time before the brightness is reduced by half with brightness setting 5). Longer life is expected by reducing brightness
level.
Characters/images on the screen may not clearly be legible in a bright environment such as under direct sunlight, even at
the highest brightness setting. Place a sun shield over the front panel in such case.
6.3.1.7. SCREEN SAVER (time)
Screen saver can be set either to off, or on between 1 and 99 minutes. When the screen saver is on, backlight is turned off.
Pressing any one of the front push buttons reactivates the backlight without applying its originally assigned function.
The module goes back to normal status in case of an alarm.
Screen saver does not turn on when:
• PV high or low alarm is tripped.
• AL1, AL2, AL3 or AL4 is indicated.
• The device is in an abnormality.
• Engineering view is on the screen.
6.3.1.8. PV INPUT TYPE
Choose an input type for universal input Pv1 and Pv2. Hardware wiring conguration may vary depending on the type. Refer
to: 4.9. CONNECTION DIAGRAM.
6.3.1.9. COLD JUNCTION COMPENSATION (Pv)
Enable or disable cold junction compensation for T/C input.
When the function is enabled, the Controller measures absolute temperature to cancel errors by room temperature.
6.3.1.10. TEMPERATURE RANGE (Pv)
The Controller handles analog data in percentage between -15 and 115%. With temperature input (T/C or RTD), it converts
a specic temperature range into the percentage. Temperature unit: °C.
6.3.1.11. MV 0/100% SYMBOL
MV bargraph can be accompanied with symbols indicating 0% and 100% status respectively. Choose among: O, C, OP, CL,
HI, LO, 100, 0, Max, Min or no indication.