215651 166 Revision B
For D1X headers only:
$
%
&
'
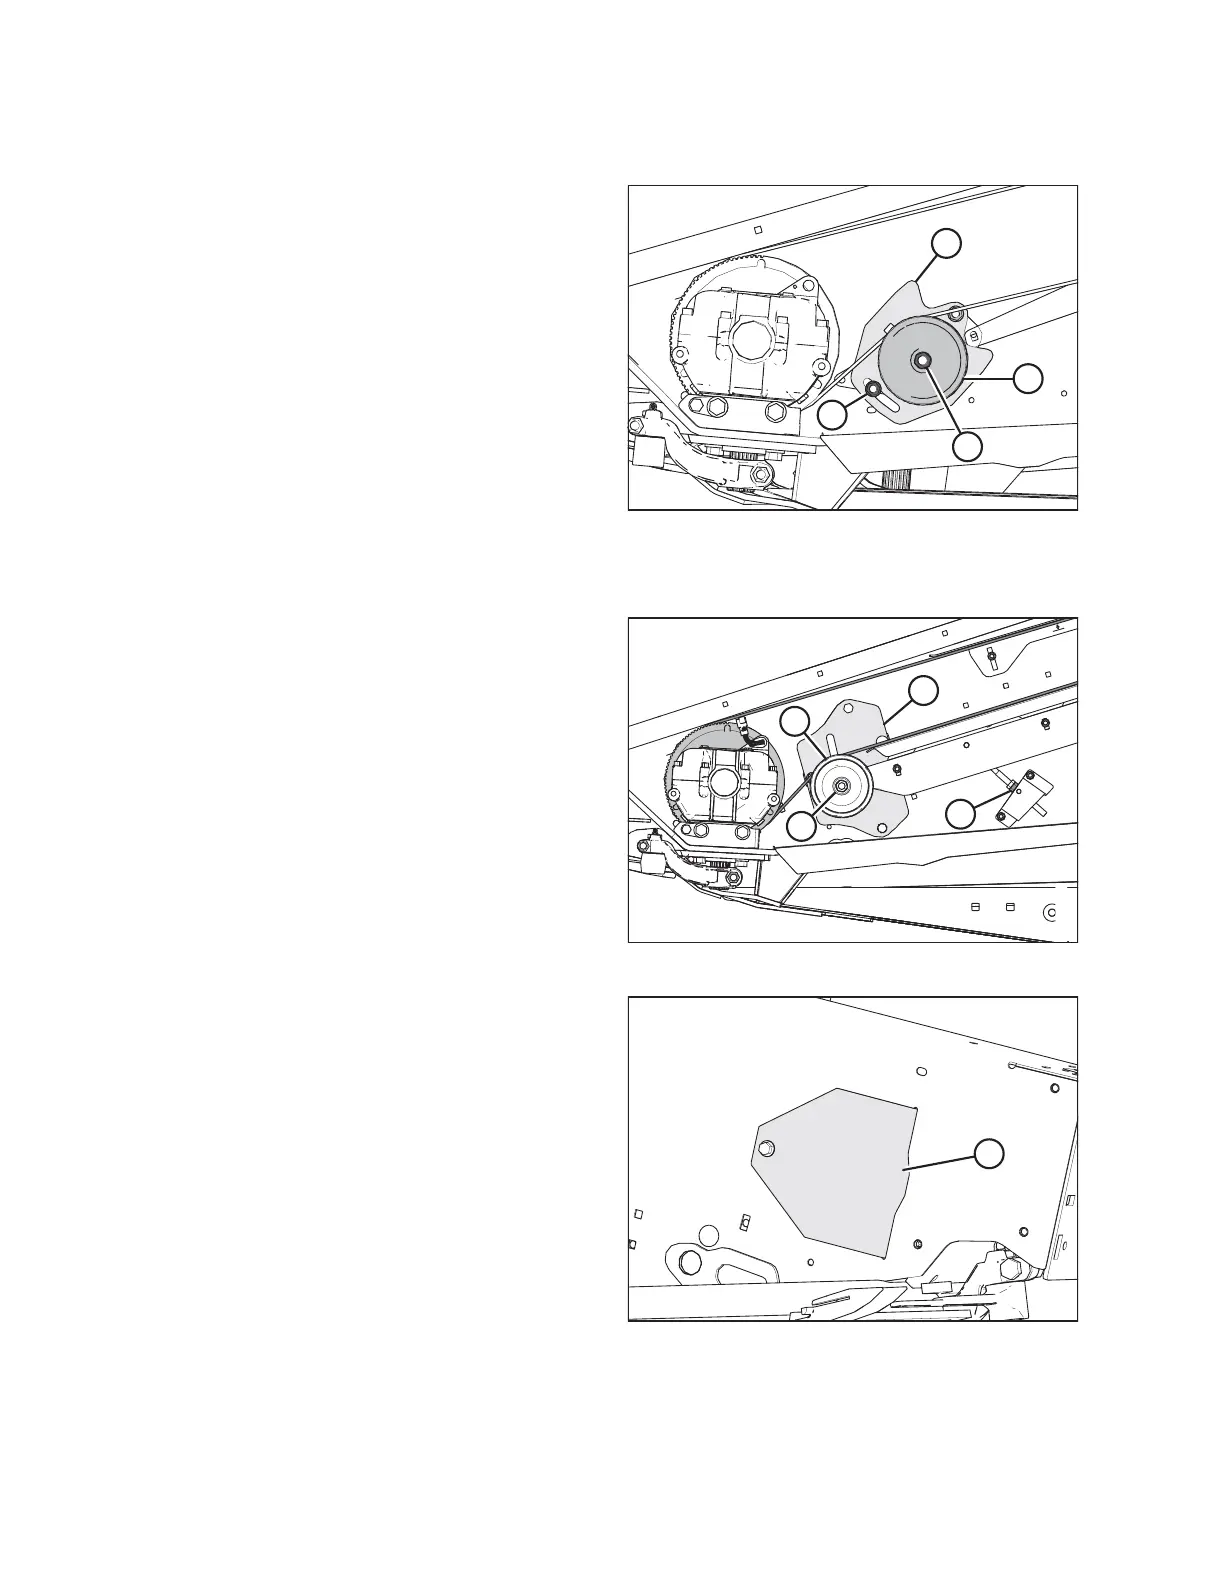
Figure 5.89: Knife Drive – D1X Header Shown
6. Ensure the knives are timed before tightening the belt. For
instructions, refer to Adjusting Timed Double-Knife Timing,
page 169.
7. Slide idler pulley (A) up the slot on support bracket (B) to
take up the slack in the timing belt.
NOTE:
Ensure nut (C) is as high as possible in the slot on support
bracket (B).
8. Tighten nut (D) to 212–234 Nm (157–173 lbf·ft).
For D1XL Series Draper Headers only:
$
%
'
&
Figure 5.90: Knife Drive – D1XL Header Shown
1. Ensure the knives are timed before tightening the belt. For
instructions, refer to Adjusting Timed Double-Knife Timing,
page 169.
2. Slide pulley (A) up the slot on support bracket (B) to take
up the slack in the timing belt and tighten adjuster nut (C).
NOTE:
Ensure idler pulley (A) is as high as possible in the support
bracket slot.
3. Tighten nut (D) to 212–234 Nm (157–173 lbf·ft).
NOTE:
If the belt is out of alignment, refer to Adjusting Tracking
for Timed Double-Knife Belt, page 171.
$
Figure 5.91: Access Cover
4. Tension the knife drive belt. For instructions, refer to
Tensioning Timed Double-Knife Drive Belts, page 167.
5. Install access cover (A) and secure with bolt.
6. Close the endshield. For instructions, refer to Closing
Endshields, page 38 .
MAINTENANCE AND SERVICING