4-10
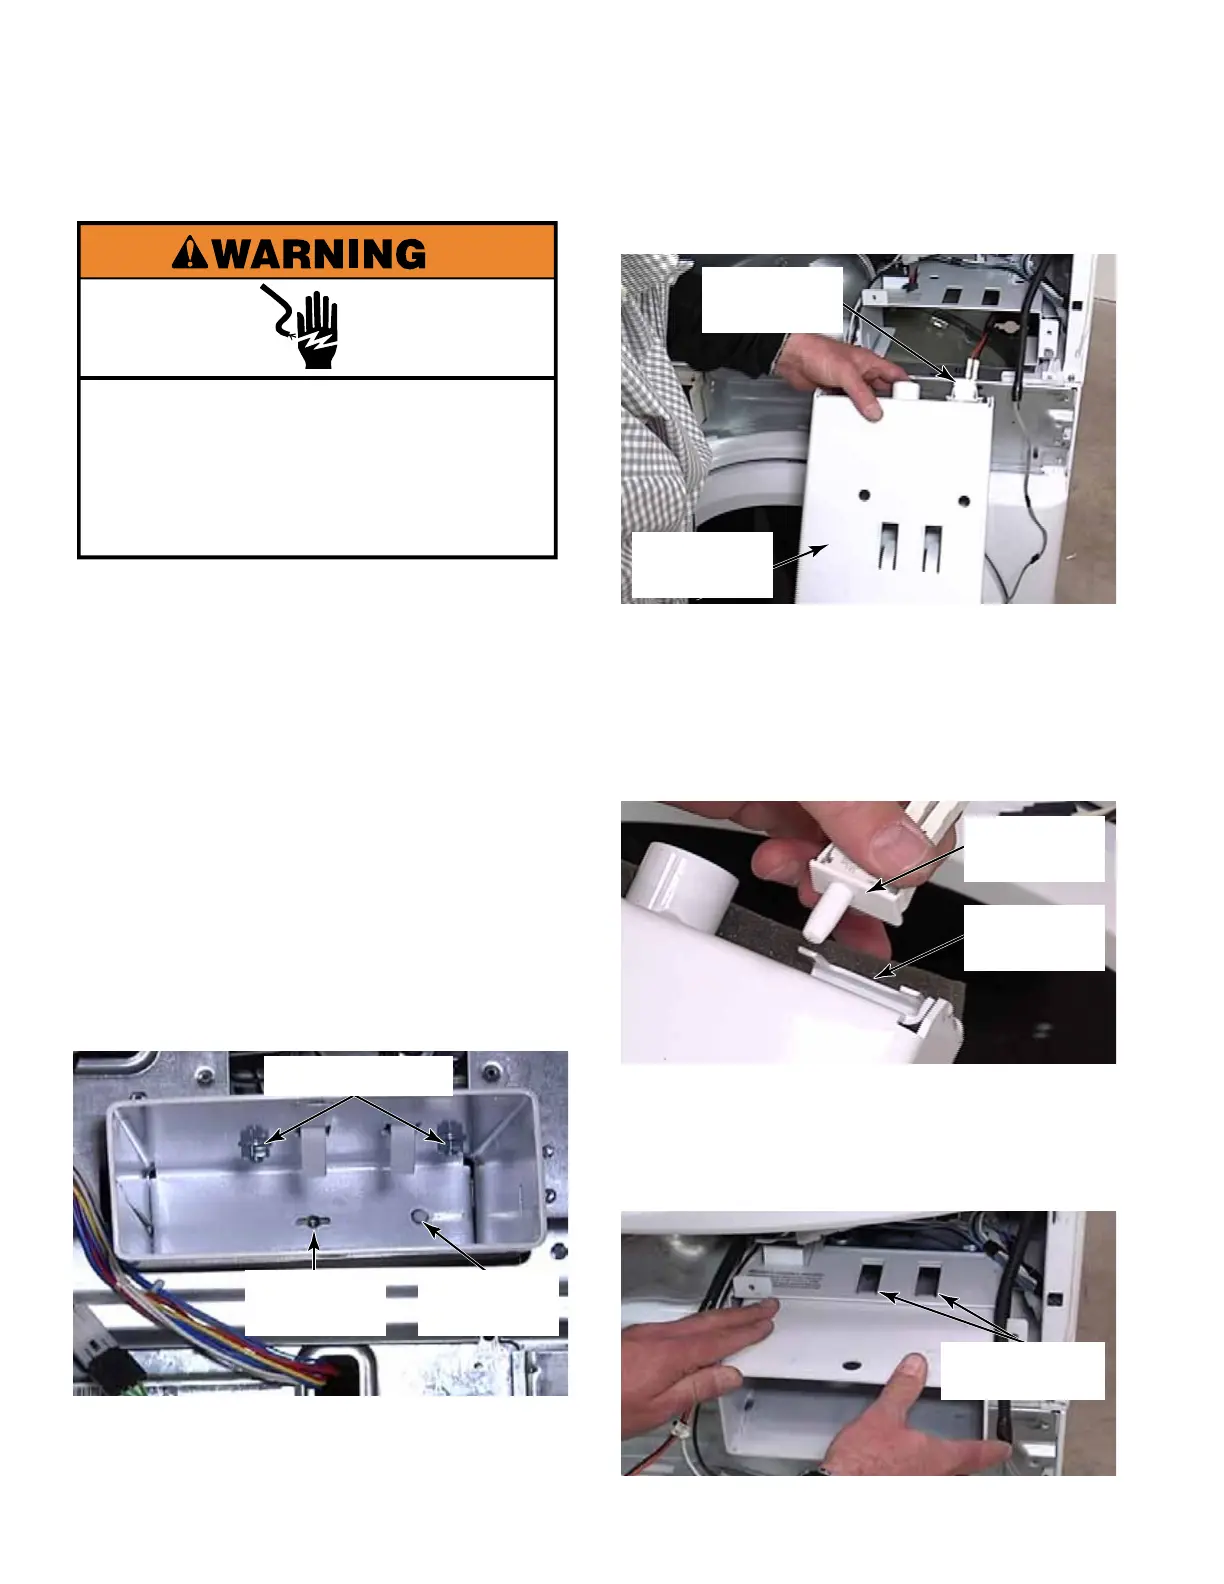
1. When fully installed, the owner will have to
provide the key for the coin box. When the
coin box is removed, a switch behind the
coin box will change state and indicate that
the box was removed.
The slot next to the coin vault switch is for
the long 1/4 turn “T” bolt shaft that passes
through this hole and locks behind the vault.
2. Remove the control panel bracket
(See page 4-8).
3. Unlock and remove the coin box from the
coin vault.
4. Remove two 14mm (9/16”) nuts from the
inside top of coin vault.
5. Lift the mounting bracket, with bolts
attached, from the top of the coin vault.
6. Slide coin vault out of its support bracket.
7. To remove the coin vault switch, reach into
the coin vault compartment and press the
switch plunger in as far as possible.
8. Slide the switch up out of the bracket on the
back of the coin vault to remove it.
TECH TIP: When reinstalling the coin vault,
make sure the vault openings in the bracket
are aligned with the openings in the top of
the coin vault. Then tighten nuts inside the
coin vault.
T-Bolt Lock
Hole
Coin Vault
Switch
Two 14mm Nuts
Coin Vault
Coin Vault
Switch
COIN VAULT AND COIN VAULT SWITCH
Electrical Shock Hazard
Disconnect power before servicing.
Replace all parts and panels before
operating.
Failure to do so can result in death or
electrical shock.
Coin Vault
Switch
Switch
Bracket
Vault Openings
Aligned