8-5
8.4 Installing Recorder Paper
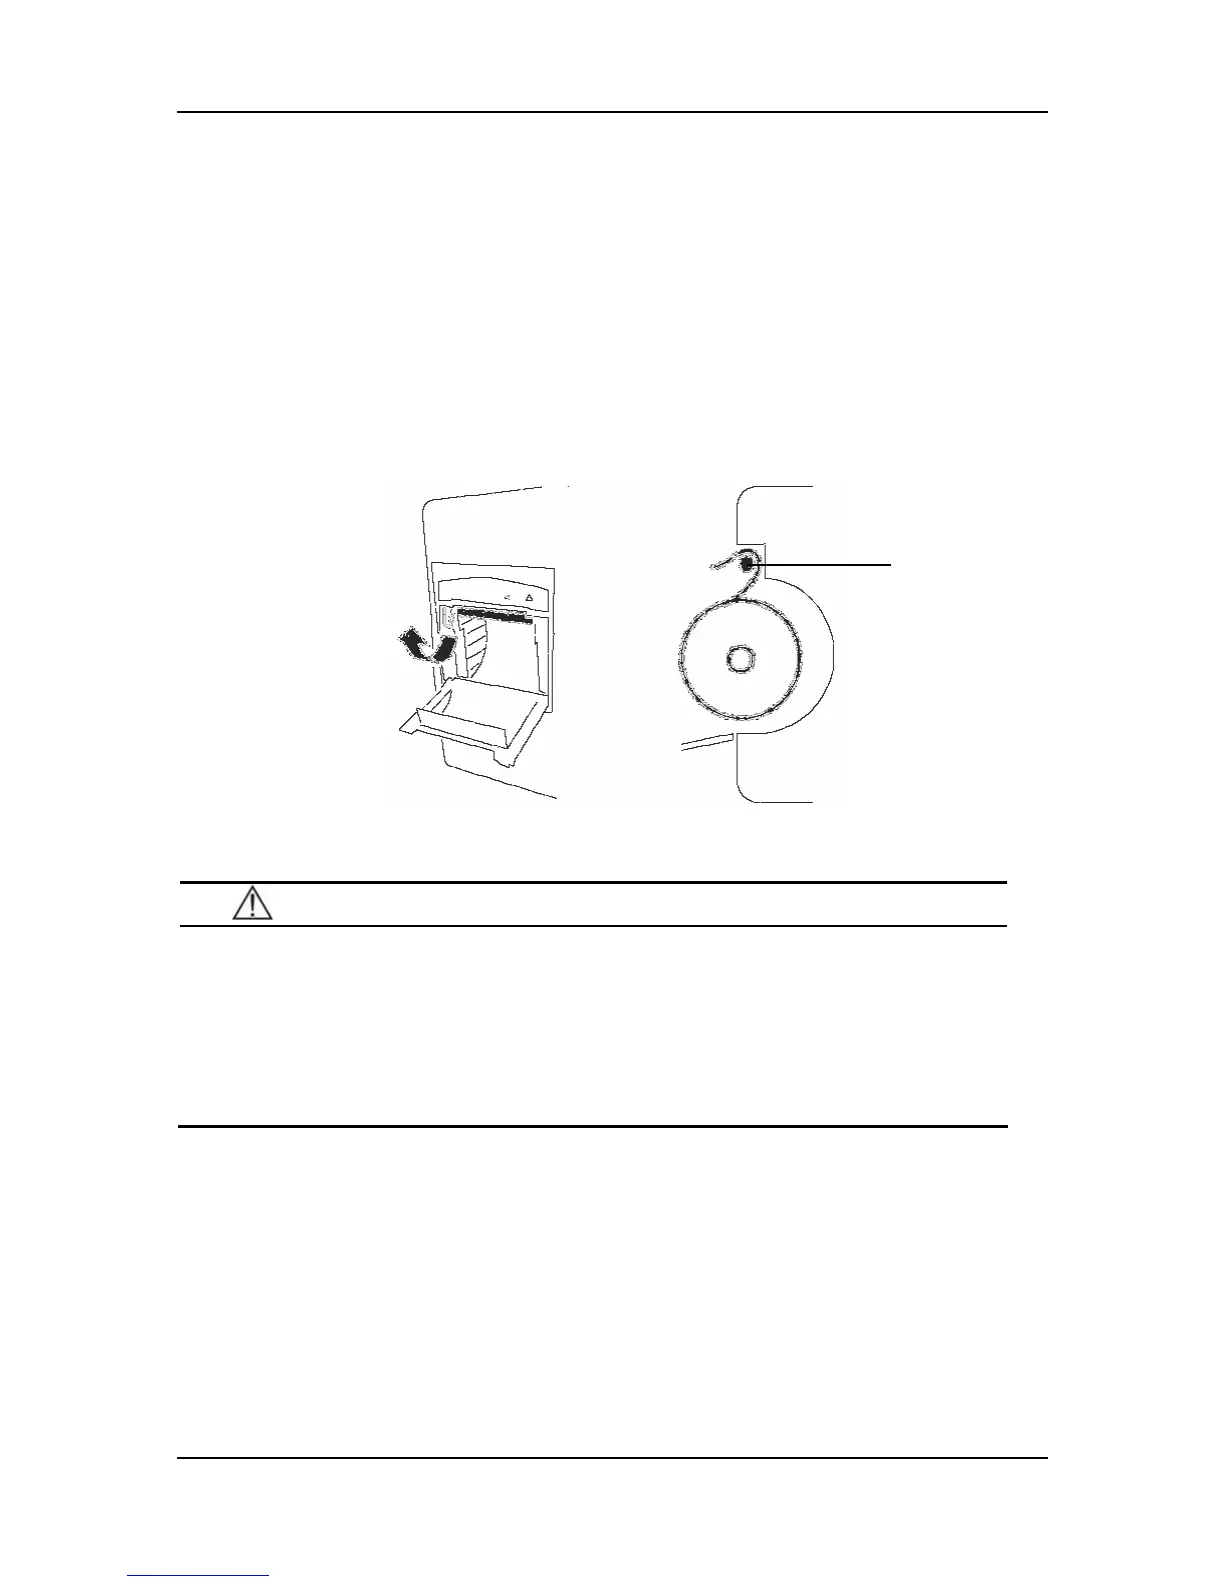
Installing Procedure
1. Press the latch at the upper right of the paper compartment door to releases the door.
2. Lift the roller lever located at the upper left of the paper compartment as shown in the
following figure.
3. Insert a new roll of recorder paper into the compartment as shown below.
4. The roller of the recorder scrolls automatically, and the paper comes out of the
compartment.
5. Push down the roller lever.
6. Close the recorder door.
Figure 8-1 Installing Recorder Paper
CAUTION
z Use the specified recorder paper only. Other recorder paper may cause the
recorder to print with poor quality, function improperly or not at all, or bring
damage to the thermal print head.
z Do not pull the recorder paper with force when the printing is in process.
Otherwise, damages to the recorder may be incurred.
z Do not leave the recorder door open except you are replacing the recorder paper
or removing a fault.
Removing the Paper Jam
If the recorder does not function properly or produces unusual sound, open the recorder door to
check for a paper jam. You can follow the operations below to remove the paper jam.
1. Open the recorder door.
2. Tear the paper off from the leading edge at the paper outlet.
3. Lift the lever on the upper left of the recorder.
4. Pull the paper from the paper inlet.
5. Re-insert the paper.
Roller