Step Action Information
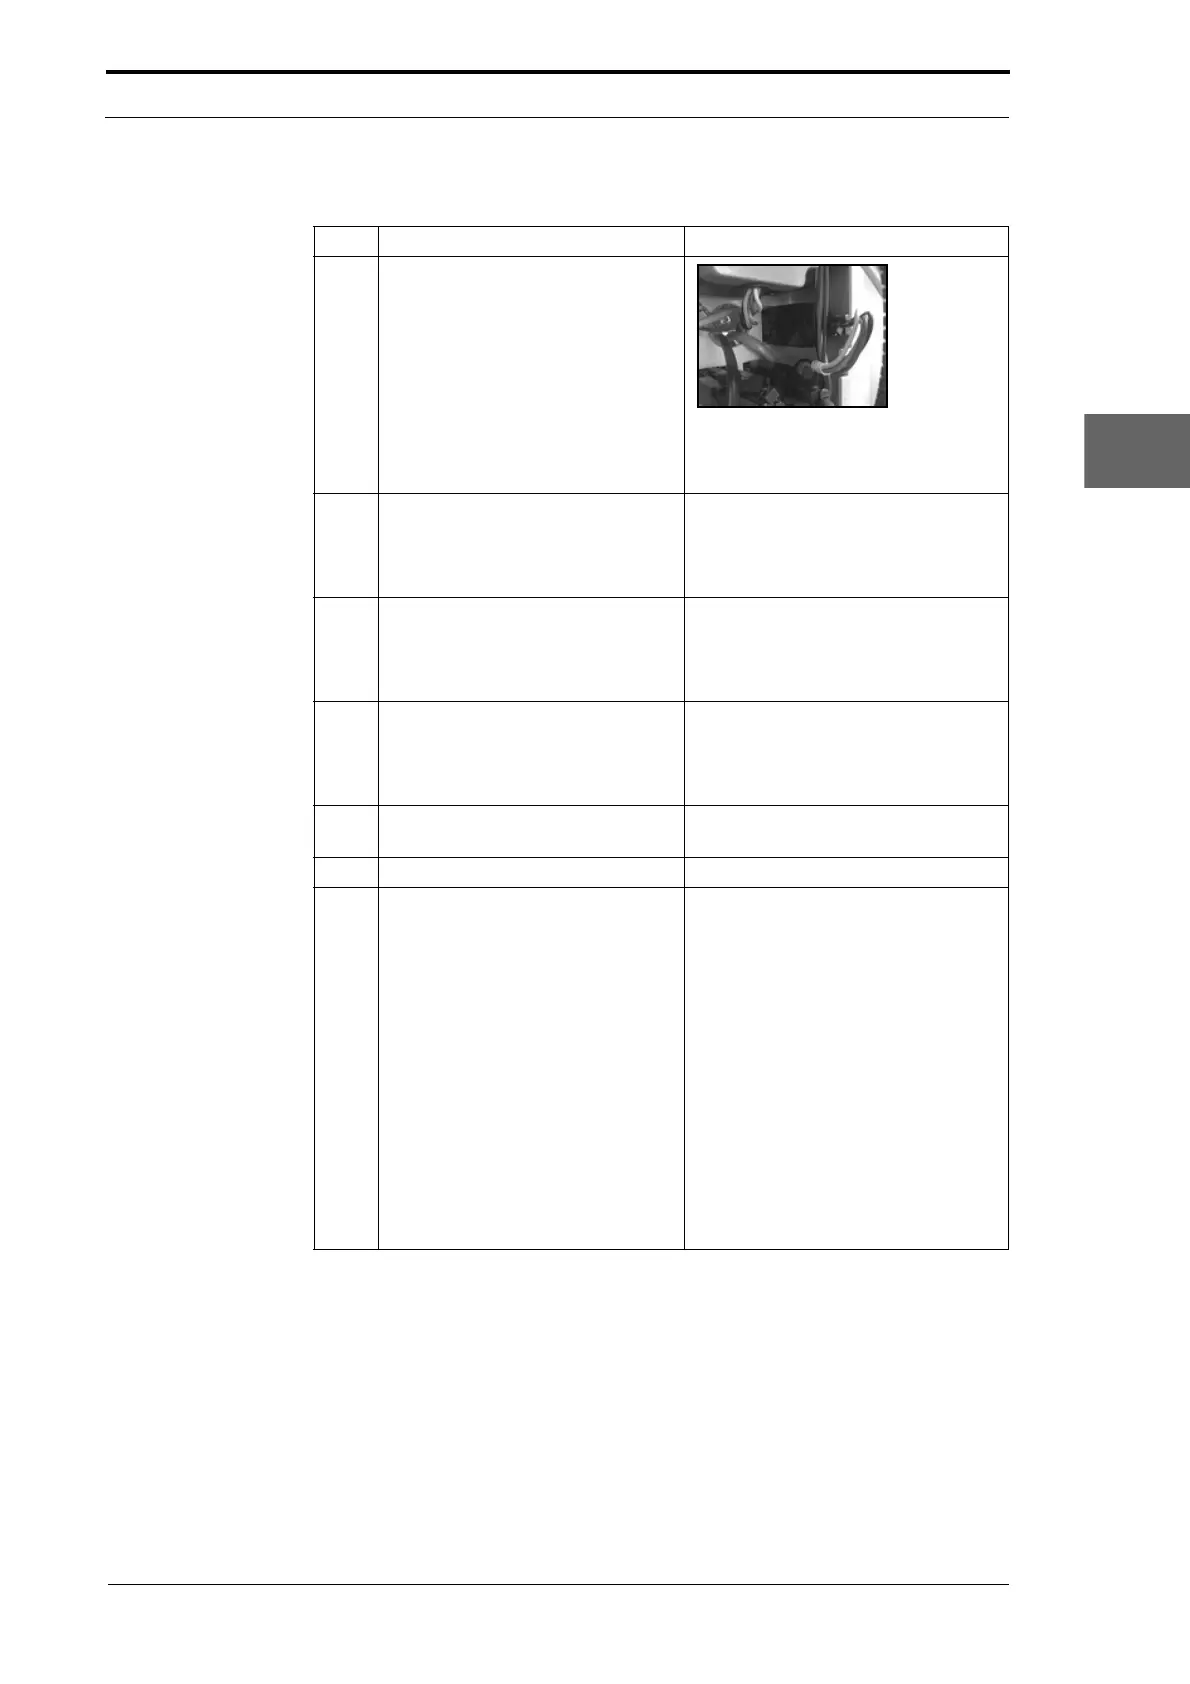
1 Disconnect the drive motor cable
from the creaser module.
Figure 4.101 Drive Motor Connector
Cut the cable ties that attach the
drive motor cable to the MFC.
2 Remove the main drive-belt from
the drive
pulley.
• Loosen the main drive-belt
tension (see Section 4.5.2).
• Lift the main drive belt off the
drive pulley.
3 Remove the drive motor.
• Remove the four bolts that attach
the drive motor to the side plate.
• Move the drive motor out of the
rear of the drive module.
4 Remove the drive pulley from the
drive motor.
• Loosen the two set-screws that
attach the drive pulley to the
drive motor shaft.
• Pull the drive pulley off the shaft.
5 Attach the drive pulley to the
replacement drive motor.
Do not tighten the set-screws.
6 Install the replacement drive motor.
7 Install the main drive-belt.
• Put the main drive-belt onto the
drive pulley.
• Pre-tension the main drive-belt.
• Put a straight-edge against both
faces of the drive pulley and the
primary drive pulley (see Figure
4.100).
• Adjust the position of the drive
pulley so that it is aligned with
the primary drive pulley.
• Tighten the set-screws that
attach the drive pulley to the
drive motor shaft.
• Adjust the main drive-belt
tension (see Section 4.5.2).
Morgana DocuMaster MFC - Service Manual 113
4. Service Procedures - Replace Components - DRV Module