4. Service Procedures - Covers
42 Morgana DocuMaster MFC - Service Manual
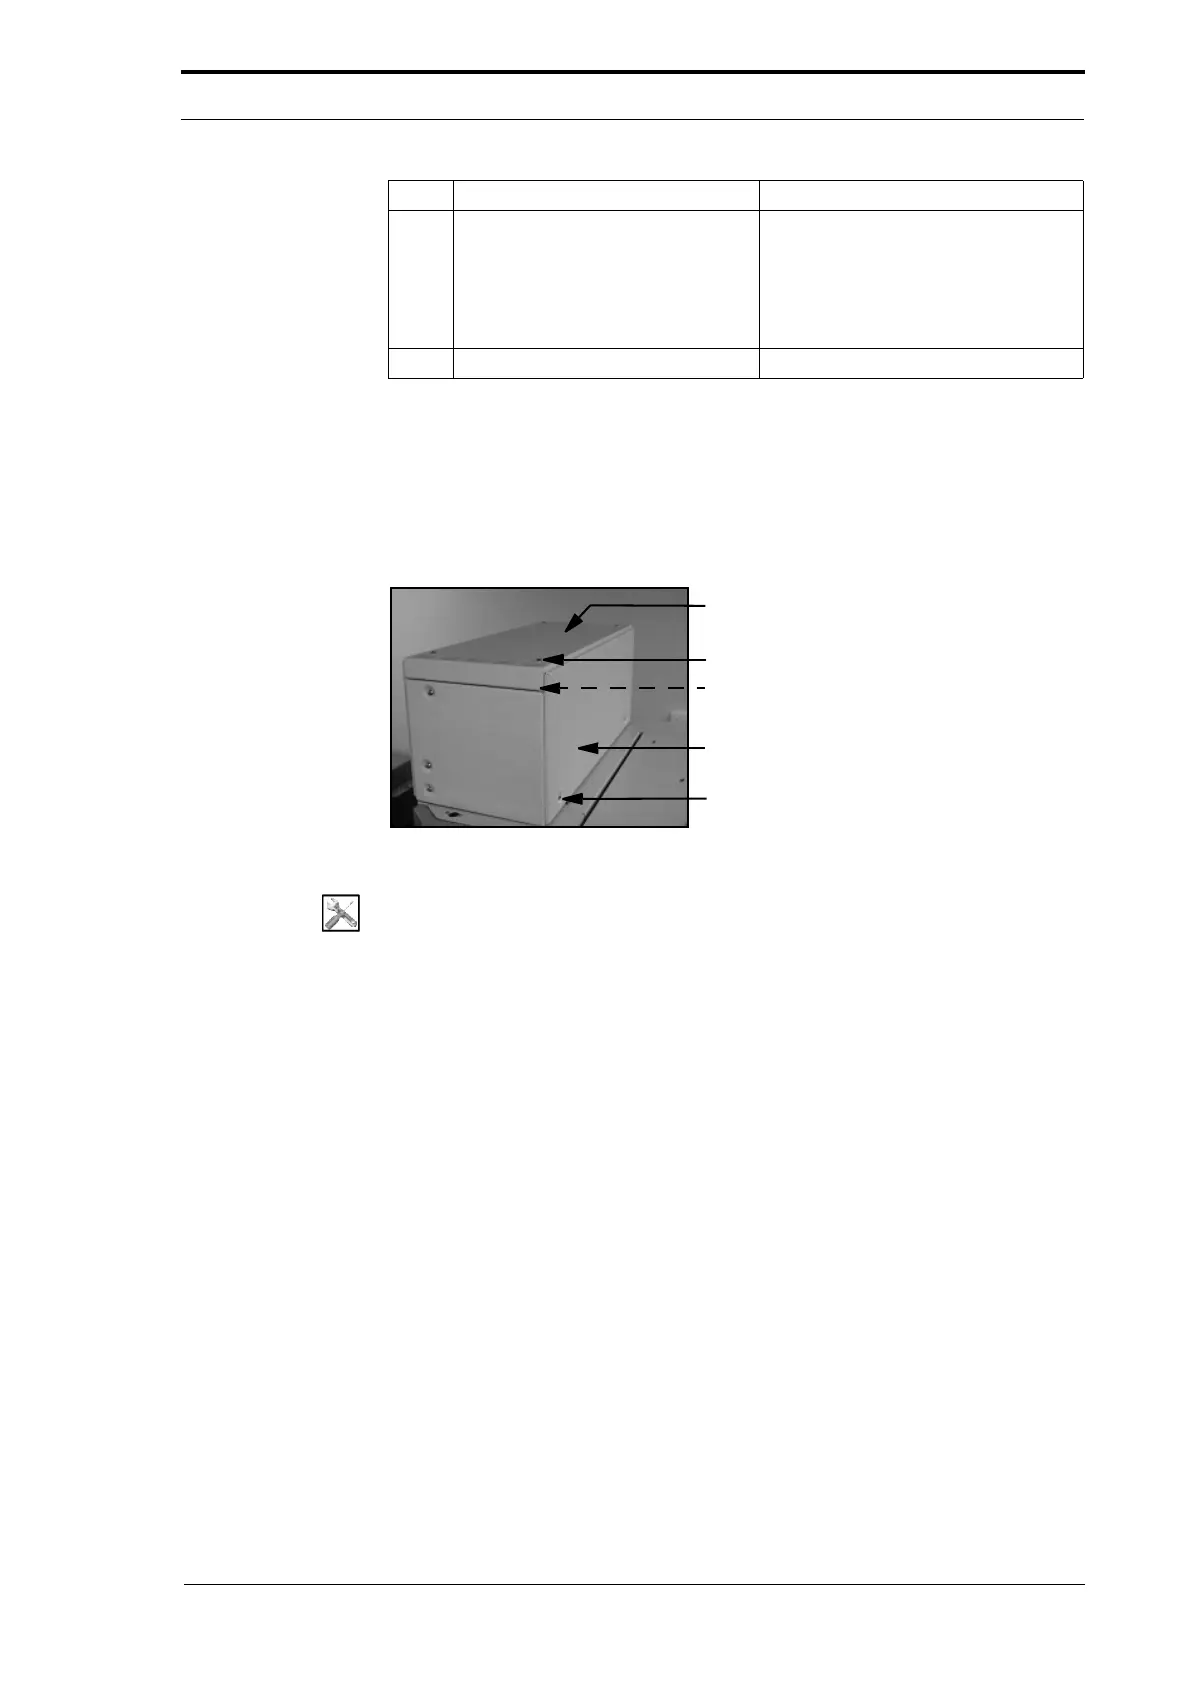
4.2.2 Remove the CAP Top Cover and Front Panel
You will need to remove the CAP top cover and front panel to replace components
inside the CAP. The front panel top fixing screws are below the top cover, so the top
cover must be removed first.
Screw (4)
Screw (2) (Hidden)
Front Panel
Screw (2)
Top Cover
Figure 4.3 CAP Top Cover and Top Panel
Tools:
• Allen Key: 3mm.
Before you start:
• Remove the CAP rear panel from the MFC (See Figure 4.2).
To remove the top cover:
(1) Remove the four screws that attach the top cover to the CAP.
(2) Lift the top cover up and remove it from the CAP.
To remove the front panel:
(1) Remove the two screws that attach the front panel to the top of the CAP.
(2) Loosen the two retained screws at the bottom of the front panel.
(3) Lift the front panel and pull it towards you.
4.2.3 Open the Hinged Front Panel and the Hinged Top Panel
You must open the hinged front panel and the hinged top panel to gain access to the
DRV module electrical system.
3 Disconnect the electrical cables.
• vacuum pump
• cooling fan
• transformer
• Windjammer PCB
• earth terminal.
4 Remove the CAP rear panel.
Step Action Information