June 11, 2003 6881096C73-O
8-28 Disassembly/Reassembly Procedures: Replacement Procedures
14. Hold the headbridge with one hand, and squeeze the center of the long span.
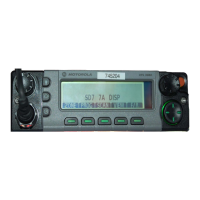
15. Align the headbridge with the transceiver, thread the control-head flex through the
headbridge, and push the headbridge into place. You might hear a small snap as the
alignment tabs engage. If the headbridge does not align properly on the first try, do not try to
slide it back and forth on the transceiver. This will cause the seal to roll out of place. Instead,
remove the headbridge and try again, taking care to align it properly before fully seating it.
Figure 8-34. Installing the Headbridge on the Transceiver
16. Verify that the headbridge seal and all the seal tabs are properly in place.
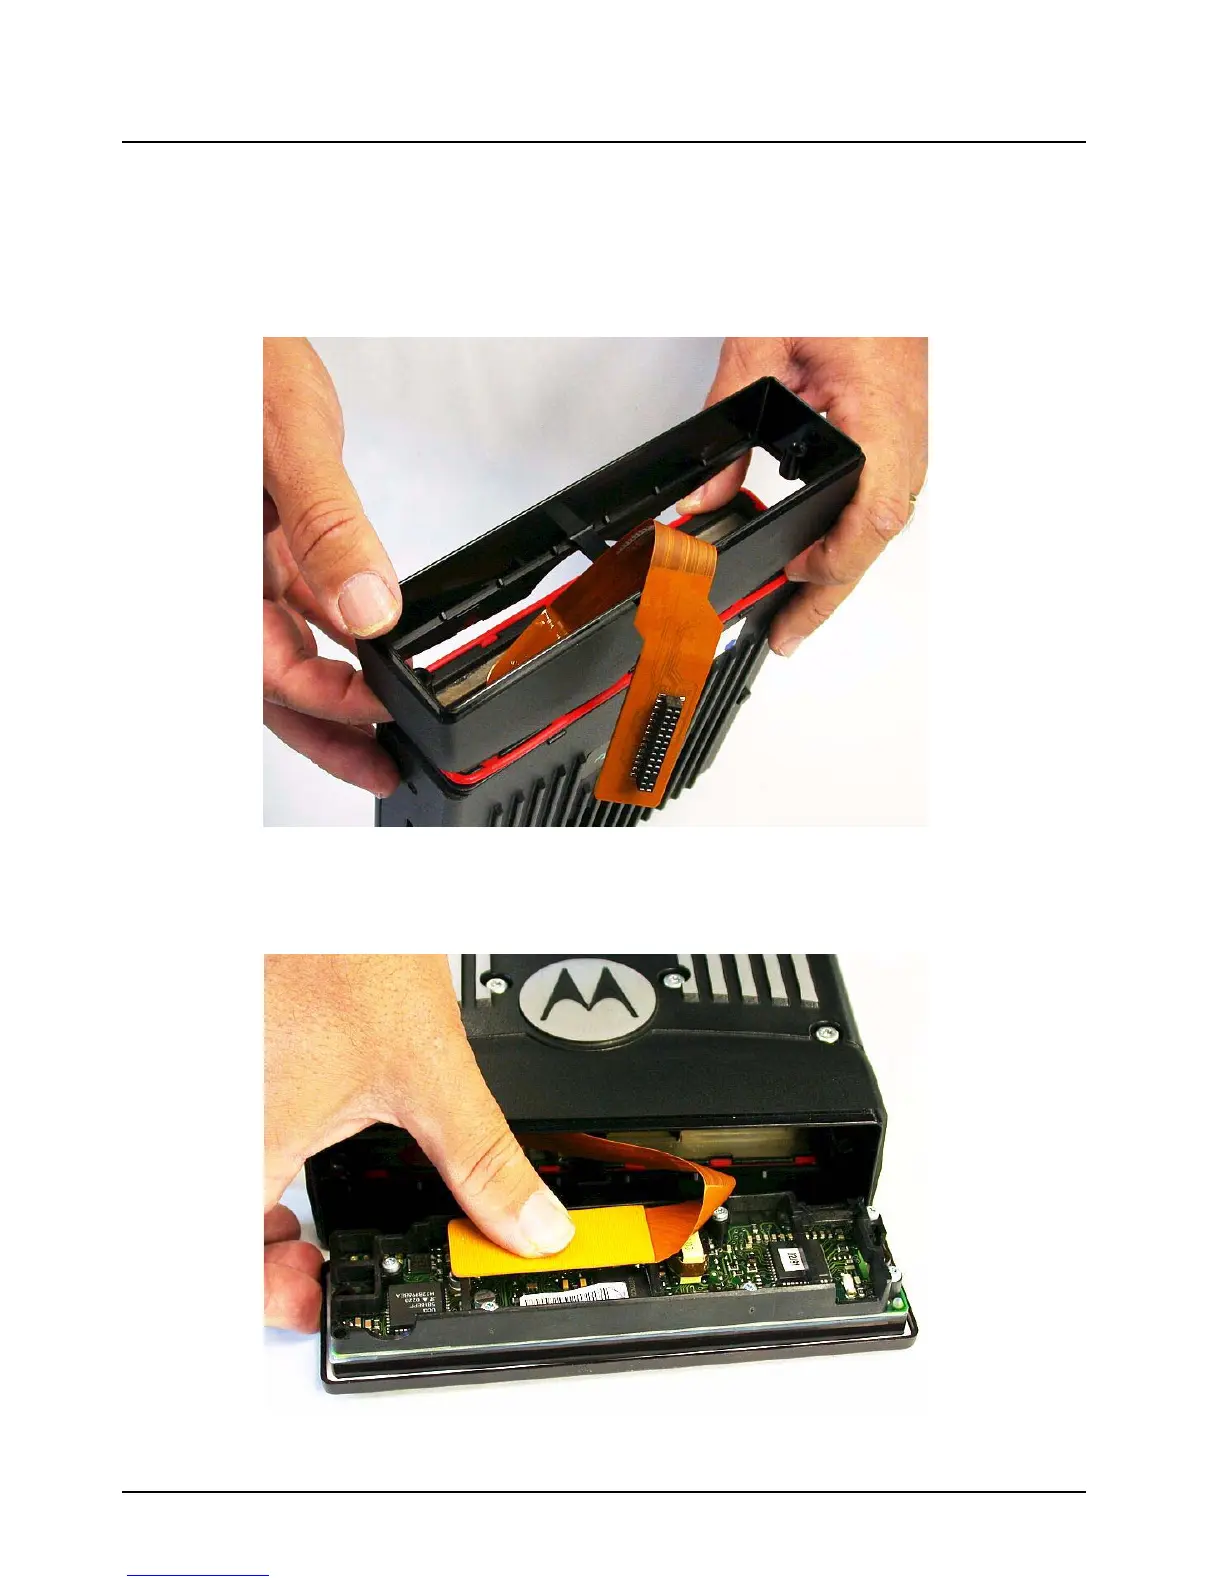
17. Reinstall the control-head flex onto the control-head connector or remote interface plate.
Figure 8-35. Installing the Control-Head Flex on the Control Head

 Loading...