GENESYS User Manual Issue 1
FILING
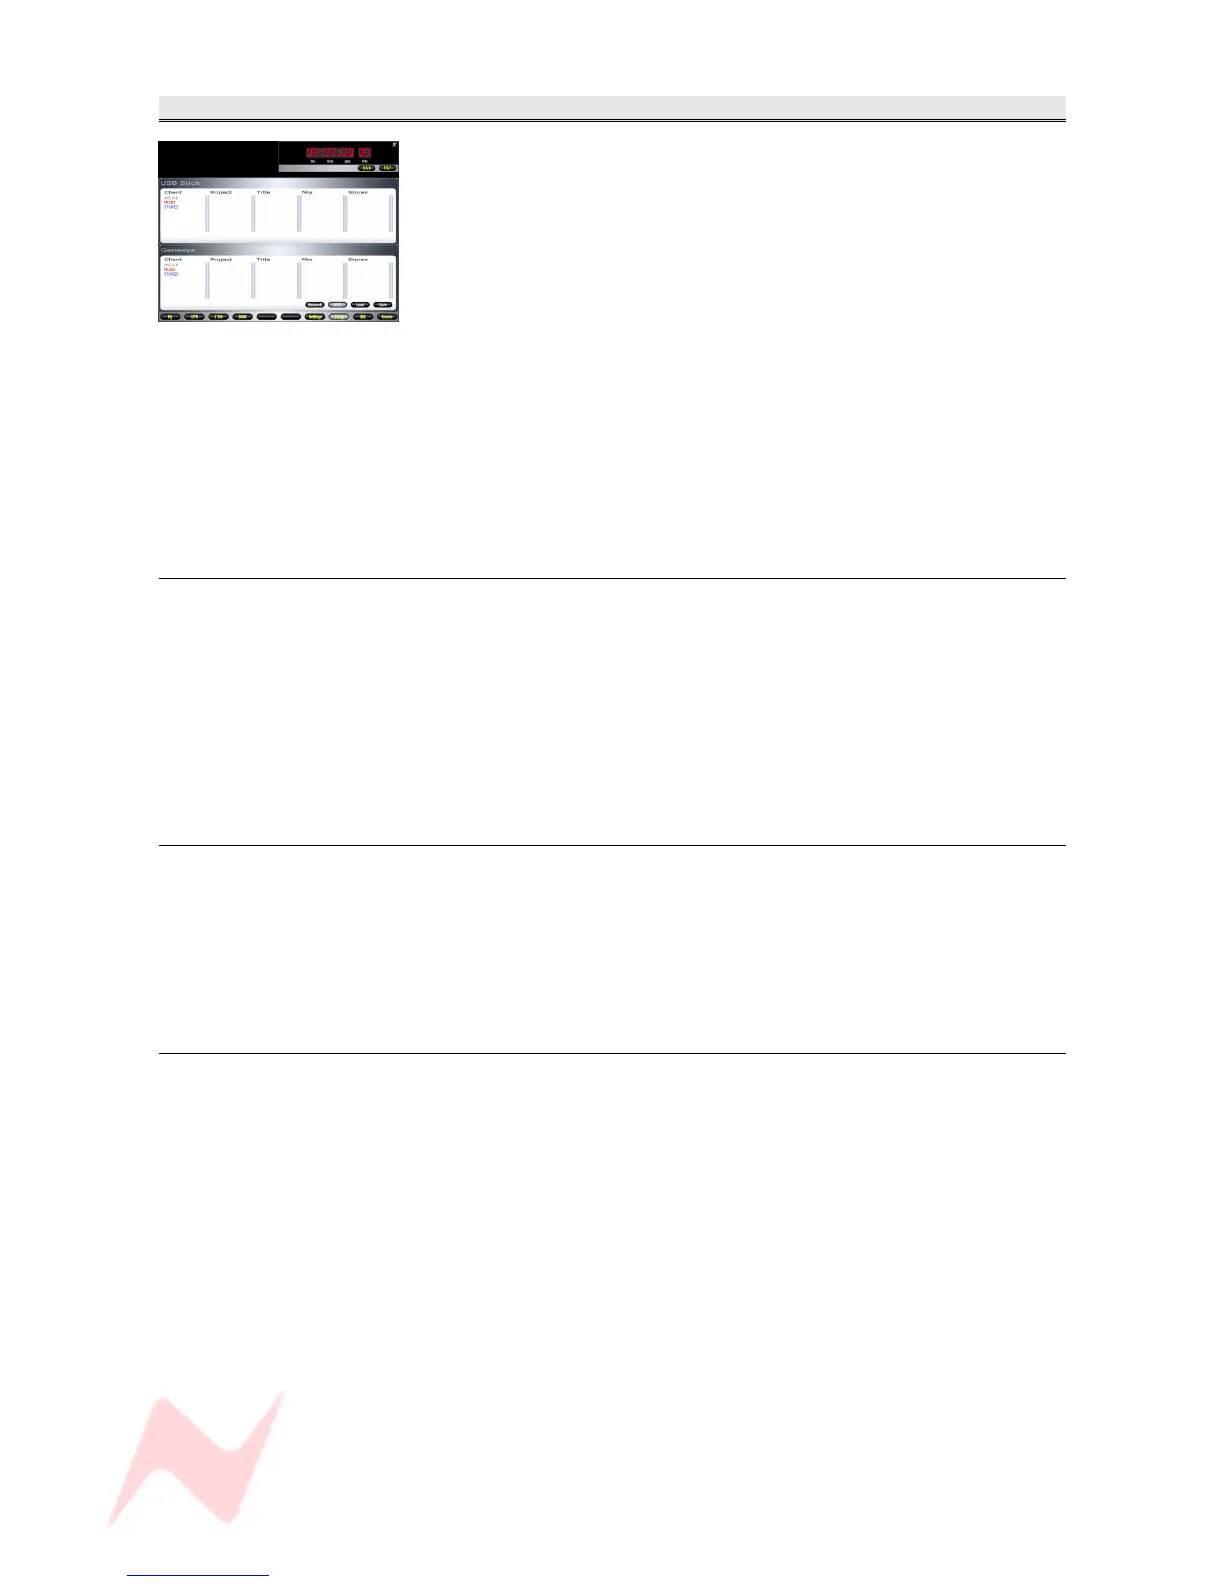
Provides facility to Save and Load Automation and Recall files, either
to/from the local hard-drive, local USB port or from any location on a
network that the console may be attached to.
• The upper half of the screen is the Destination drive, and can be set
to different locations.
• The lower half of the screen is the Genesys drive, and allows you to
name/select files. This is the Source drive where all Genesys
Automation and Recall files are saved to by default.
If you are logged on to Automation and you create a Recall file, it will use
the same Client / Project / Title / Mix filing hierarchy, so that Recall Store
files are always kept with the Automation files in the same folder.
This is for ease of use, especially when backing up files.
For more information on the Filing Structure, please see the chapter on
the Automation System.
NB. Filing can also be selected from the monitor panel.
Load
> To Load an automation file, under the Client heading, double-click a
Client and a list of Projects within that Client will be displayed in the next
column.
> Double-click the Project and a list of Titles in that Project will be
displayed in the next column.
> Continue to select the Title and Mix in the same way.
> Click LOAD. The selected file will load.
NB. Load can also be selected from the monitor panel.
Save
> On the Genesys drive, navigate down to the desired level in which you
wish to save the Automation (or Recall Store) files, either by selecting
existing Client / Project / Title / Mix etc or by creating new folders as you
go.
> Click SAVE. The current Automation will be saved to that location.
NB. Save can also be selected from the monitor panel.
Copy
It is vitally important that safety copies of all Automation and Recall files
are made on a regular basis.
The first thing to set when copying files from the Genesys drive is the
Destination location.
• Pressing the NETWORK button opens another screen that allows you
to navigate to any location on an attached network.
• Pressing the USB button opens another screen that allows you to
navigate to any location on whatever is plugged into the USB port.
To move files between locations, use the NETWORK and USB buttons to
set the upper window to the desired destination location.
> In the lower window, navigate to the desired file & location.
> Drag and drop the relevant file between the two windows.
It is the same operation regardless of whether you are backing up from,
or restoring to the Genesys drive.
- 75 -
 Loading...