DMTA-10026-01EN, Rev. D, January 2015
Instrument Overview
19
1. Instrument Overview
This chapter provides a brief overview of all common operational requirements of the
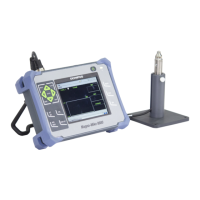
Magna-Mike 8600 instrument.
1.1 Operating Principle
The Olympus Magna-Mike 8600 is a small, lightweight thickness gage designed to
make fast, accurate, and repeatable measurements of nonmagnetic materials such as
plastics, glass, composites, aluminum, and titanium. It is based on the Hall Effect
principle. Wall thickness is measured by placing a small steel target (ball, disk, or
wire) on one side of the test piece and the magnetic probe on the opposite side. The
Magna-Mike 8600 precisely measures the distance between the probe tip and the
target, which corresponds to the thickness of the wall.
The probe contains a strong magnet and an electronic semiconductor device known as
a Hall Effect sensor, which responds to changes in a magnetic field by varying a
voltage that the instrument tracks. A target such as a small steel ball bends the
magnetic field generated by the probe magnet, with the effect increasing as it comes
closer. As the test piece thickness and thus the distance between the target and the
probe tip changes, the voltage through the Hall Effect sensor also varies in a
predictable way. Once the instrument has been calibrated for a particular probe and
target, these voltage changes can be converted to thickness readings through a
software algorithm that utilizes the established calibration curve. Measurements are
accurate up to ± 1 % of thickness (depending on probe and target type) when the
Magna-Mike 8600 is used according to the instructions in this manual.
 Loading...
