DMTA-10026-01EN, Rev. D, January 2015
Chapter 4
88
ball to fall away from the center line of the probe. In these cases, the MIN capture
mode should be used to insure measurements of true minimum thicknesses.
Wire targets
When using the wire target, the probe must be positioned at least 25 mm (1 in.)
from the end of the wire. The wire must be pressed securely against the test piece
at the point of measurement, since as with any other target, the Magna-Mike 8600
is actually measuring the distance to the target, not the wall thickness directly.
The angular alignment between the probe tip and the wire (typically
perpendicular) must be maintained, since wire tilt can affect readings. The wire
target should not be kinked or bent.
4.8.2 Maintaining Accuracy
Once the Magna-Mike 8600 is calibrated and processing thickness measurements, it is
important to maintain the gage’s accuracy in order to produce consistent, reliable
readings. Users are encouraged to perform maintenance procedures to obtain the best
accuracy and productivity available from the gage (see “Periodic Verification” on
page 89).
4.8.3 Q-CAL
The Magna-Mike 8600 incorporates a “quick calibration” or Q-CAL feature. Q-CAL
compensates for drifts caused by moderate changes in temperature or ambient
magnetic fields. Q-CAL works best when the probe is stationary and positioned
upright in the stand.
To ensure that the Magna-Mike 8600 operates properly, begin each new measurement
session or day by performing a standard calibration or recall a stored calibration, and
then verify the accuracy using the calibration fixtures.
If the probe is moved, has a different orientation between measurements, or is
exposed to wide variations in temperature, the user will need to perform a Q-CAL.
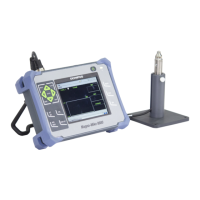
To perform a manual Q-CAL, simply remove the target ball from the probe tip and
press the Q-CAL button located on the instrument keypad or by pressing the button
on the side of the probe, if the probe button is set to Q-CAL. The user may resume
 Loading...
