Symbol Dental unit network settings Connection between Planmeca
Romexis and dental unit
Romexis connection enabled Off
No symbol Romexis connection disabled Off
The settings for the Planmeca Romexis connection can only be changed by
a qualified Planmeca service technician. If, for example, your dental unit
configuration includes the Planmeca Romexis Clinic Management module,
but the connection is disabled (no symbol displayed on control panel),
contact your Planmeca dealer.
For information on how to use Planmeca Romexis Clinic Management
software, see
Planmeca Romexis user’s manual
.
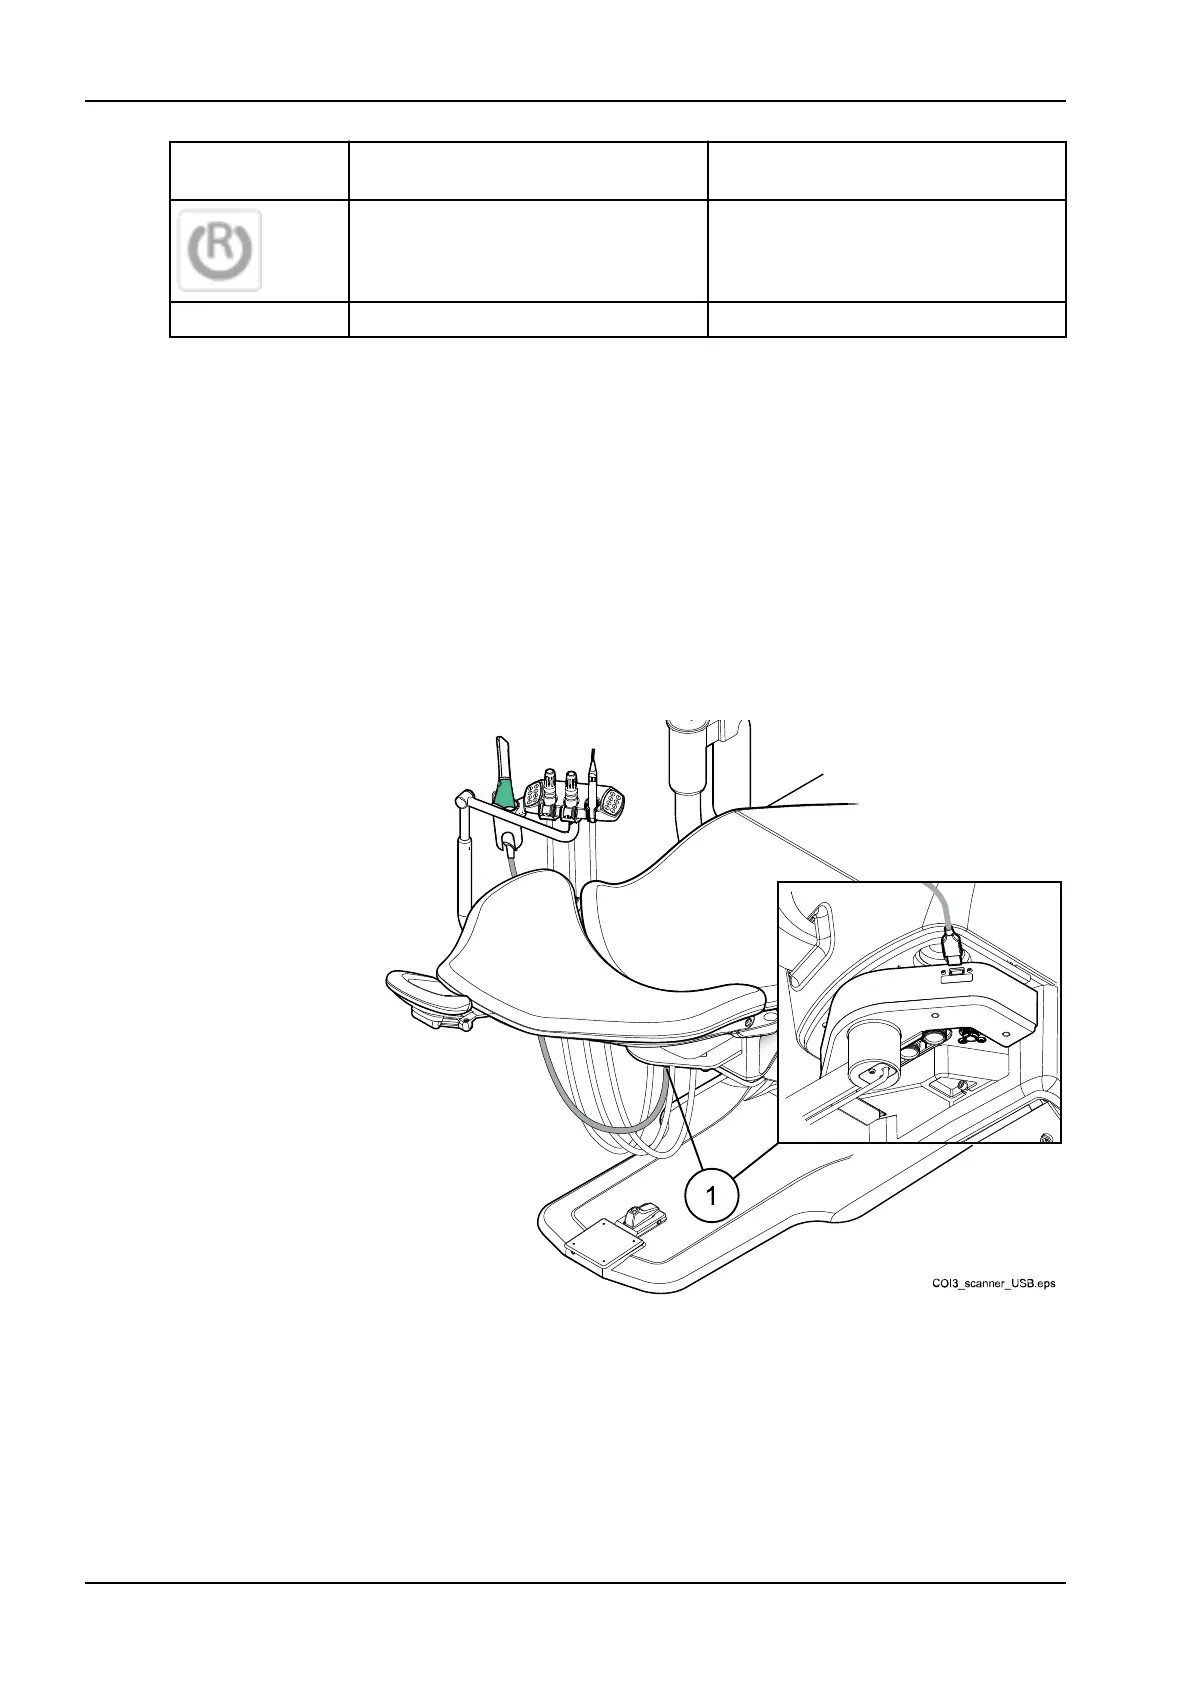
8.8 Planmeca intraoral scanner
The intraoral scanner can be placed in the Flexy-holder.
Before using the scanner you must connect it to the dental unit. The
connector on the scanner must be carefully attached to the port for the
scanner on the suction element (1).
CAUTION
Make sure that you attach the intraoral scanner connector the right way into
the port for the scanner. If the connector is turned the wrong way, it will not
go into the port. Use of unnecessary force will break the connector.
NOTE
To avoid splashes on the scanner, remove it from the dental unit after use
and place it on the table stand.
8 Planmeca Compact i3 dental unit
22 Planmeca Compact i3 User's manual