Home
Planmeca
Dental equipment
Compact i3
Planmeca Compact i3 User Manual
5
of 1
of 1 rating
252 pages
Give review
Manual
Specs
To Next Page
To Next Page
To Previous Page
To Previous Page
Loading...
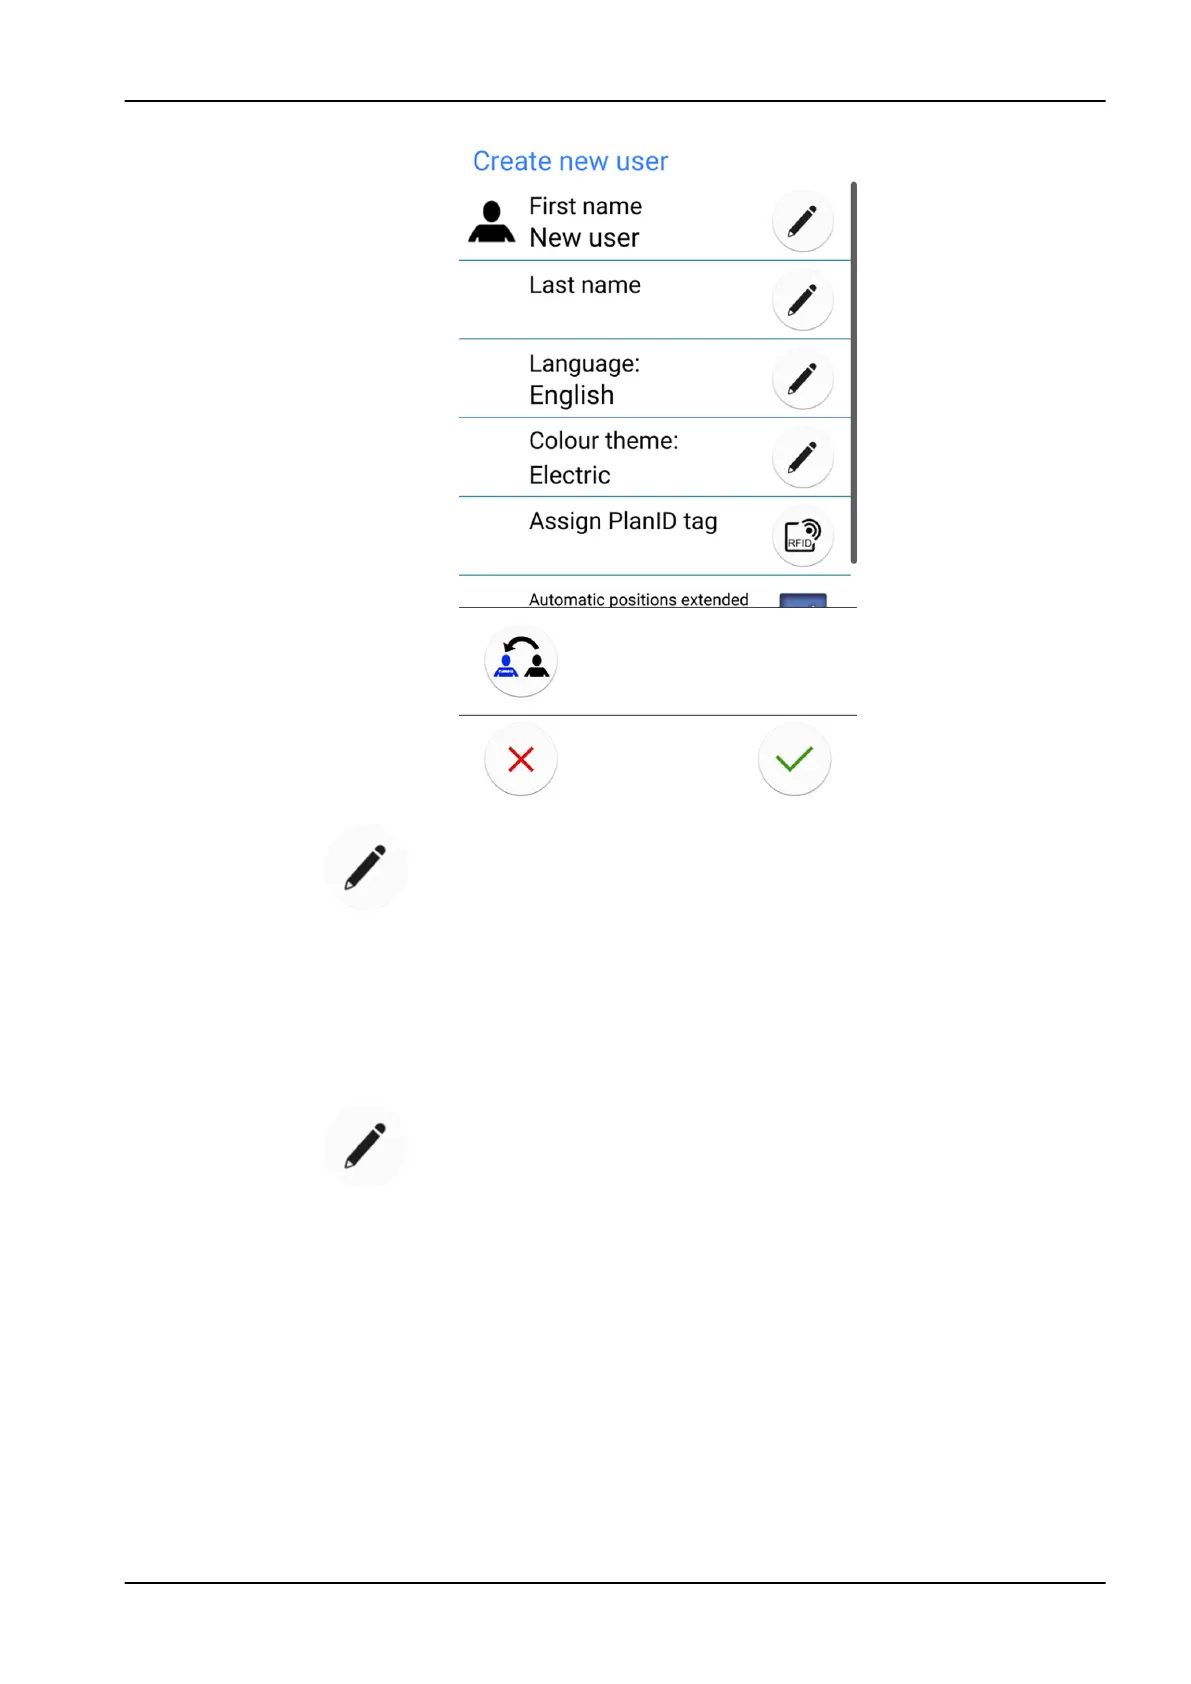
2.
Edit the user settings by pressing the
Edit
button.
For information on how to edit the user settings, see section "Editing
user settings" on page 66.
1
7
.
3
D
e
l
e
t
i
n
g
u
s
e
r
S
t
e
p
s
1.
In the
Sign in
window, press
Edit
next to the user that you want to delete.
17
Managing users and personal settings
User's manual
Planmeca Compact i3
65
72
74
Table of Contents
1 Introduction
9
2 Associated documentation
10
3 Training
12
4 Registering your product
13
5 Annual maintenance
14
6 Symbols on product labels
15
7 For your safety
17
7.1 Safety precautions
17
7.2 Safety switches
20
7.3 Stopping chair movements quickly
21
8 Planmeca Compact i3 dental unit
23
8.1 Unit configuration
23
8.2 Detachable parts
24
8.3 Applied parts
27
8.4 Monitor
27
8.5 Tablet holder
27
8.6 USB connectivity
28
8.6.1 Instrument console
28
8.6.2 Suction element
29
8.7 Planmeca Romexis connection
29
8.8 Planmeca intraoral scanner
30
9 Planmeca Solanna and Planmeca Solanna Vision operating lights
32
10 Instrument system
33
10.1 Over-the-Patient (OP) delivery arm
33
10.2 Instrument console
34
10.2.1 Instrument console with balanced instrument arms
34
10.2.2 Instrument console with hanging-tube instruments
36
10.3 Quick-connector hoses
36
10.4 Instrument functions
38
10.4.1 Instrument spray
39
10.4.2 Automatic chip blow
39
10.4.3 Instrument light
39
10.4.4 Reverse rotation of micromotor
39
10.4.5 Quickstart of air driven instruments
39
10.4.6 Instrument speed/power limit
39
10.4.7 Torque limit
39
10.4.8 Apical action
40
10.5 Tray tables
40
10.5.1 Quick-connect tray table
40
10.5.2 Integrated tray table
41
10.5.3 Top tray table
41
10.6 Sterile water system
42
10.6.1 Introduction
42
10.6.2 Setting up sterile water system
43
10.6.3 Extending sterile water tube
45
10.6.4 Adjusting sterile water flow rate
46
10.6.5 Adjusting sterile water volume
47
10.6.6 Removing sterile water bag holder (OP deliveries)
47
11 Suction system
48
11.1 Suction arm
48
11.2 Flexy-holder
48
11.3 Removing and replacing suction tubes
52
12 Patient chair
54
12.1 Patient recognition
54
12.2 Trendelenburg position
54
12.3 Armrests
55
12.4 Manual headrest
56
12.4.1 Adjusting height of headrest
56
12.4.2 Adjusting headrest angle
57
12.4.3 Adjusting headrest for children or short patients
57
13 Control panel
60
13.1 Control panel on instrument console
60
13.1.1 Touchpad functionality
61
13.2 Control panel on Flexy-holder
63
14 Foot control
64
14.1 Introduction
64
14.2 Foot control pedal
65
14.3 Foot control functions
66
14.3.1 Centre knob functions
66
14.3.2 Left-side and right-side knob functions
66
14.3.3 Pedal functions
66
15 Switching unit on and off
68
16 Signing in and out
69
16.1 Signing in
69
16.2 Signing out
71
17 Managing users and personal settings
72
17.1 Introduction
72
17.2 Creating new user
72
17.3 Deleting user
73
17.4 Editing user settings
74
17.4.1 Editing user name
75
17.4.2 Editing language
77
17.4.3 Editing colour theme
78
17.5 Resetting personal settings
79
18 Assigning PlanID card to user
81
19 Checking dental unit details
84
19.1 About this unit
84
19.2 Unit type
85
19.3 Unit serial number
85
19.4 Unit software version
85
19.5 Service
85
19.5.1 Service contact details
85
19.5.2 Yearly maintenance
85
19.5.3 Storage information
85
19.5.4 GUI diagnostics
86
19.5.5 PlanID
86
19.5.6 Clock calibration
86
19.5.7 Product registration
86
19.5.8 Peripherals
86
19.5.9 Dental unit model
86
19.5.10 Screensaver
86
19.6 Network settings
86
19.7 Message history
87
19.8 Bluetooth
87
19.9 Licences
87
20 Operating patient chair
88
20.1 Swivelling chair
88
20.2 Manual operation
88
20.3 Automatic operation
90
20.3.1 Overview
90
20.3.2 Extended vs. traditional view
91
20.3.3 Selecting automatic position
92
20.3.4 Selecting entry/exit position
93
20.3.5 Stopping chair movements
94
21 Operating dental unit
95
21.1 Language
95
21.2 Timer
96
21.3 Door open / assistant call
96
21.4 Planmeca Solanna and Planmeca Solanna Vision operating light
97
21.4.1 Indicator lights
98
21.4.2 Switching operating light on/off
99
21.4.3 Switching composite mode on/off
100
21.4.4 Adjusting intensity of operating light
102
21.4.5 Adjusting intensity of operating light in composite mode
103
21.4.6 Changing light tone of operating light
105
21.5 Planmeca Solanna Vision camera
106
21.5.1 Starting to use cameras
107
21.5.1.1 Activating camera from Planmeca Romexis
107
21.5.1.2 Activating camera from dental unit
107
21.5.2 Adjusting camera settings from dental unit
108
21.5.2.1 Selecting camera and zoom level
108
21.5.2.2 Adjusting video settings
109
21.5.3 Switching video streaming on/off
110
21.5.4 Recording video
111
21.5.5 Capturing image
112
21.6 X-ray film viewer
113
22 Operating instruments
114
22.1 Instrument logic
114
22.2 Micromotor
115
22.2.1 Speed/power
115
22.2.2 Reverse rotation
116
22.2.3 Speed/power limit
116
22.2.4 Instrument spray
116
22.2.5 Momentary spray
118
22.2.6 Automatic chip blow
118
22.2.7 Manual chip blow
118
22.2.8 Instrument light
119
22.3 Bien-Air MCX micromotor
120
22.3.1 Torque limit
120
22.3.2 RPM limit
121
22.4 Bien-Air MX2 micromotor
121
22.4.1 Torque
122
22.4.2 RPM
123
22.4.3 Presets
123
22.5 Morita TORX micromotor
124
22.5.1 Torque
124
22.5.2 RPM
125
22.5.3 Apical action
125
22.5.4 Presets
126
22.6 Apex locator
128
22.6.1 Before using apex locator
129
22.6.2 Using apex locator
132
22.6.3 Testing apex locator function
134
22.7 Turbine
136
22.7.1 Speed/power
137
22.7.2 Quickstart
137
22.7.3 Instrument spray
137
22.7.4 Speed/power limit
139
22.7.5 Momentary spray
139
22.7.6 Automatic chip blow
140
22.7.7 Manual chip blow
140
22.7.8 Instrument light
140
22.8 Scaler
141
22.8.1 Speed/power
141
22.8.2 Instrument spray
142
22.8.3 Momentary spray
143
22.8.4 Satelec Newtron scaler
143
22.8.5 LM scaler
144
22.8.6 EMS No Pain scaler
144
22.8.7 Instrument light
145
22.9 Planmeca Lumion Plus polymerisation light
145
22.10 Intraoral camera and Planmeca Romexis
146
22.10.1 Intraoral camera placed in instrument console
147
22.10.2 Intraoral camera placed in suction holder
149
22.11 Planmeca intraoral scanner
151
22.11.1 Operating intraoral scanner from foot control
151
23 Operating suction handpieces
153
23.1 Saliva and high-volume suction
153
23.2 Tilting high-volume suction
154
24 Programming
155
24.1 Introduction
155
24.2 Organising items on control panel
156
24.3 Automatic chair positions
157
24.3.1 Extended view
157
24.3.2 Traditional view
159
24.4 Instrument settings
159
24.4.1 Instrument speed/power limit
159
24.4.2 Instrument spray
160
24.4.3 Enabling/disabling sterile water mode
161
24.4.4 Automatic chip blow
161
24.4.5 Instrument light
162
24.4.6 Bien-Air MCX micromotor
162
24.4.7 Bien-Air MX2 micromotor
164
24.4.7.1 Modifying preset values
164
24.4.7.2 Saving modified preset values
167
24.4.8 Morita TORX micromotor
167
24.4.8.1 Modifying preset values
167
24.4.8.2 Saving modified preset values
169
24.4.9 Planmeca Lumion Plus polymerisation light
170
24.5 Timer settings
170
24.6 Planmeca Solanna and Planmeca Solanna Vision operating lights
171
24.6.1 Intensity
171
24.6.2 Colour temperature and brightness
172
24.6.3 Gesture sensor
174
24.7 Duration of door open / assistant call
175
24.8 Clock
175
24.9 Date
176
24.10 Adjusting maintenance functions
177
25 Calibrating clock
179
26 Flushing and cleaning programs
181
26.1 When to use cleaning programs
181
26.2 Before you start
181
26.3 Short instrument flushing
183
26.4 Long instrument flushing
186
26.5 Manual suction cleaning
189
27 Cleaning and disinfection
191
27.1 Introduction
191
27.2 Dental unit surfaces
191
27.3 Instruments
194
27.4 Instrument console
194
27.4.1 Oil collector
194
27.5 Instrument flushing holder
195
27.6 Coarse filter
195
27.7 Clean-water bottle
196
27.8 Suction system
197
27.8.1 In the morning
197
27.8.2 After each patient
197
27.8.3 After each working day
197
27.8.4 Cleaning suction handpieces
198
27.9 Planmeca intraoral scanner
199
27.10 External PC
199
28 Clean water system
201
28.1 Introduction
201
28.2 Waterline cleaning
202
28.2.1 After the working day
203
28.2.2 In the morning
206
29 Help and error messages
209
29.1 Overview
209
29.2 Help messages in short form
210
29.3 Error messages in short form
219
29.3.1 General error messages
219
29.3.2 Power supply related error messages
221
29.3.3 Control panel related error messages
222
29.3.4 Instrument related error messages
223
29.3.5 Instrument multiplexer related error messages
223
29.3.6 Suction holder related error messages
225
29.3.7 Foot control related error messages
226
29.3.8 Operating light related error messages
227
29.3.9 Separator system related error messages
227
29.3.10 Patient chair related error messages
228
29.3.11 Main CPU related error messages
228
29.3.12 Headrest related error messages
229
29.3.13 Water leak related error messages
230
29.3.14 Maintenance related errors
230
29.3.15 Software upgrade error messages
230
29.3.16 Error messages generated by control panel
231
29.4 Viewing help and error message history
231
30 Consumables
235
31 Disposal
239
32 Technical information
240
32.1 Technical specifications
240
32.2 Instrument classifications
242
32.3 Dimensions
243
32.3.1 Positioning of patient, dentist and assistant
243
32.3.2 Patient area
244
32.3.3 Over-the-patient delivery with balanced instrument arms
246
32.4 Planmeca Compact i dental unit water consumption
247
33 Certifications
248
33.1 CE
248
33.2 EU Declaration of Conformity for PlanID RFID-reader
248
33.3 FCC Class B Notice for PlanID RFID-reader
248
33.4 Industry Canada (IC) Compliance Statement
248
33.5 Industrie Canada (IC) Déclaration de conformité
249
33.6 RF Exposure
249
Other manuals for Planmeca Compact i3
Installation Manual
106 pages
5
Based on 1 rating
Ask a question
Give review
Questions and Answers:
Need help?
Do you have a question about the Planmeca Compact i3 and is the answer not in the manual?
Ask a question
Planmeca Compact i3 Specifications
General
Brand
Planmeca
Model
Compact i3
Category
Dental equipment
Language
English
Related product manuals
Planmeca Compact i5
326 pages
Planmeca Chairside PlanScan
180 pages
Planmeca Chairside PlanMill 40
180 pages
Planmeca Sovereign
184 pages
Planmeca Viso
112 pages
Planmeca ProScanner
62 pages
Planmeca Sovereign Classic
298 pages
Planmeca Viso G7
112 pages
Planmeca ProScanner 2.0
68 pages