7.10 Inputs and outputs, local
Overview
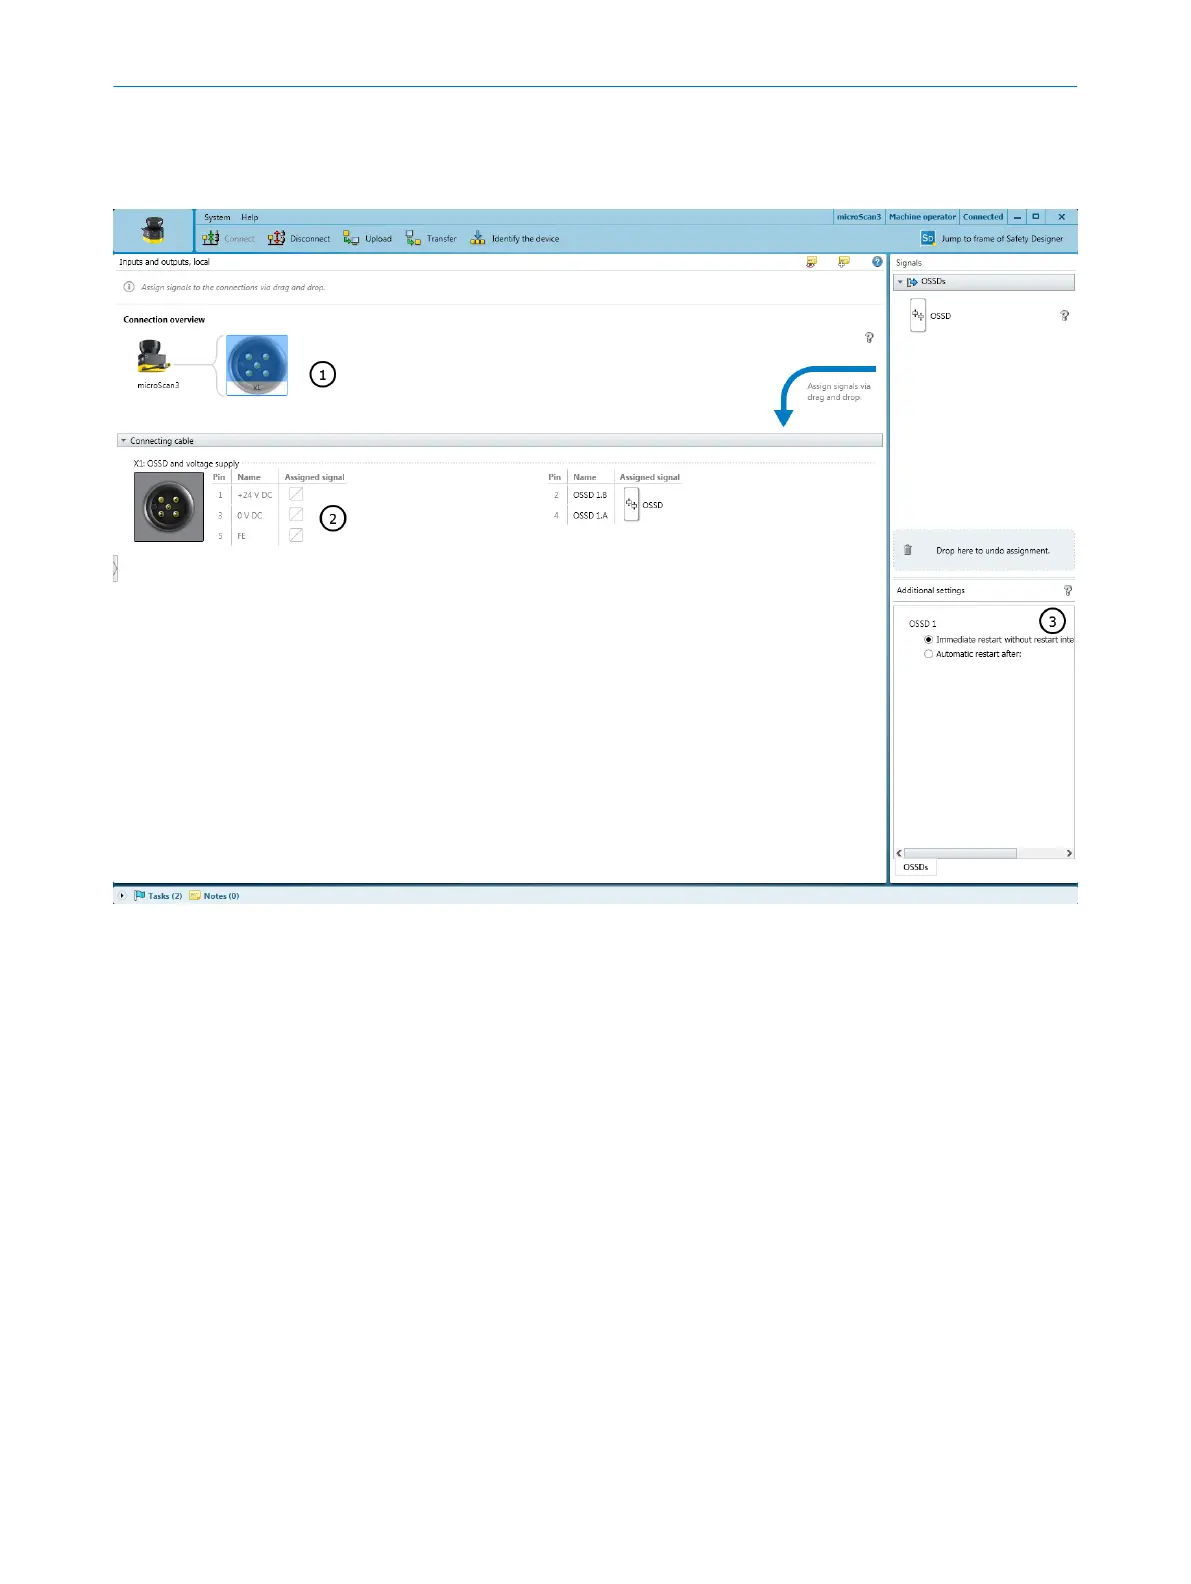
Figure 57: Inputs and outputs, local
1
Overview: Plug connectors of the safety laser scanner
2
Pin assignment
3
Further settings for some signals
Assign the required signals to the safety laser scanner connection in the In
puts and
outputs, local dialog box.
Connection overview
S
afety Designer shows the plug connector of the safety laser scanner.
Pin assignment
S
afety Designer displays the plug connector with its individual pins.
Assigning signals to the pins
S
afety Designer shows the available signals on the right under Signals.
b
Drag the signal towards the pins.
✓
Possible pins for the connection are highlighted.
b
Drop the signal on the pin.
✓
The signal name is shown on the right next to the pins.
7 C
ONFIGURATION
90
O P E R A T I N G I N S T R U C T I O N S | microScan3 Core I/O AIDA 8017784/1ELL/2022-01-21 | SICK
Subject to change without notice

 Loading...