Service and maintenance
11.3 Service and maintenance for Chassis format components
AC Drive
Manual, (GH6), 04/2014, 6SL3097-4AL00-0BP4
475
● Disconnect the drive line-up.
● Make sure the power block is accessible.
● Remove the front cover.
The steps for the removal procedure are numbered in accordance with the previous diagram.
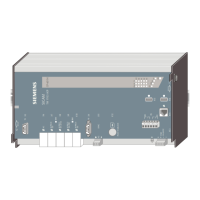
1. Remove the retaining nuts of the supporting plate for the Control Unit and remove the
supporting plate (3 nuts).
2. Disconnect the plug-in connections of the fiber-optic cables and signal cables (5
connectors).
3. Remove DRIVE-CLiQ cables and connections at –X41/–X42/–X46 (6 connectors).
The DRIVE-CLiQ cables should be marked to ensure that they are subsequently correctly
inserted.
4. Take out the retaining screws for the IPD card (2 screws) and remove the IPD card from
-X45 connector on the Control Interface Module.
5. Remove the retaining screws for the Control Interface Module (2 screws).
When removing the Control Interface Module, 5 additional connectors (2 at the top, 3 at
the bottom) must be removed one after the other.
Damage to signal cables while removing the power block
The power block might damage signal cables when it is removed.
• Remember that the power block is very heavy.
To reinstall, perform the above steps in reverse order.
Note
Connecting fiber-optic cables
The fiber
-optic cable plugs must be re-inserted at their original slot. Fiber-optic cables and
sockets are accordingly labeled for correct assignment (U11
, U21, U31).
Material damage caused by loose power connections
Insufficient tightening torques can result in faulty electrical connections. This can cause fire
damage or functional faults.
• Tighten all power connections with the specified tightening torques, e.g. line supply
connection, motor connection.
 Loading...