74
To select multiple items, place a check mark for the target
items for operation.
Select All checkbox
To select or deselect all items, use the Select All
che
ckbox.
When there are items selected in a list, a blue square is
di
splayed in the Select All checkbox.
To select all items, place a check mark in the Select All
che
ckbox.
To deselect all items, clear the check mark from the Select
Al
l checkbox.
Selecting by entering a list number
If a number selection button is displayed below the list,
you can enter a list number to select an item.
Press the number selection button to display the numeric
key
pad window.
Enter the number of the target item and press [Enter].
When selecting multiple items, use a hyphen or comma to
spec
ify numbers.
Example:
To select list items 1 to 5, enter “1-5”.
To select list items 1, 3, and 5, enter “1,3,5”.
Button operations in a list
When setting items in a list, operation buttons may be
displayed in the list depending on the menu.
In this manual, list item button operations use the
fo
llowing convention.
Example:
Operating a button in the [Tally Assign] row for an item
in
the list using the Home > Setup > Router/Tally > Tally
> Parallel Tally menu (19106.26).
1 Open
the Home > Setup > Router/Tally > Tally >
Parallel Tally menu (19106.26).
2 Se
lect the target parallel output port to set.
3 P
ress the [Tally Assign] button and select the type of
tally from the pull-down list.
When there is only one target item
Selection of the item is not required.
In step 2 of t
he procedure above, check that the target
item in the list is displayed on the menu screen. If the item
is not displayed, move the display position in the list.
In subsequent procedure steps, you can configure settings
by
pressing buttons displayed in the row of the target
item.
When there are multiple target items
In step 2 of t
he procedure above, place check marks in
individual checkboxes or in the Select All checkbox to
select target items.
Changes to the setting of one of the check marked items
wi
ll apply the same change in setting to the other target
items.
Changes to the setting of a parameter in the analog
cont
rols section are applied only to the item selected as
the target, even if multiple items are selected. Also, you
may not be able to change other settings simultaneously.
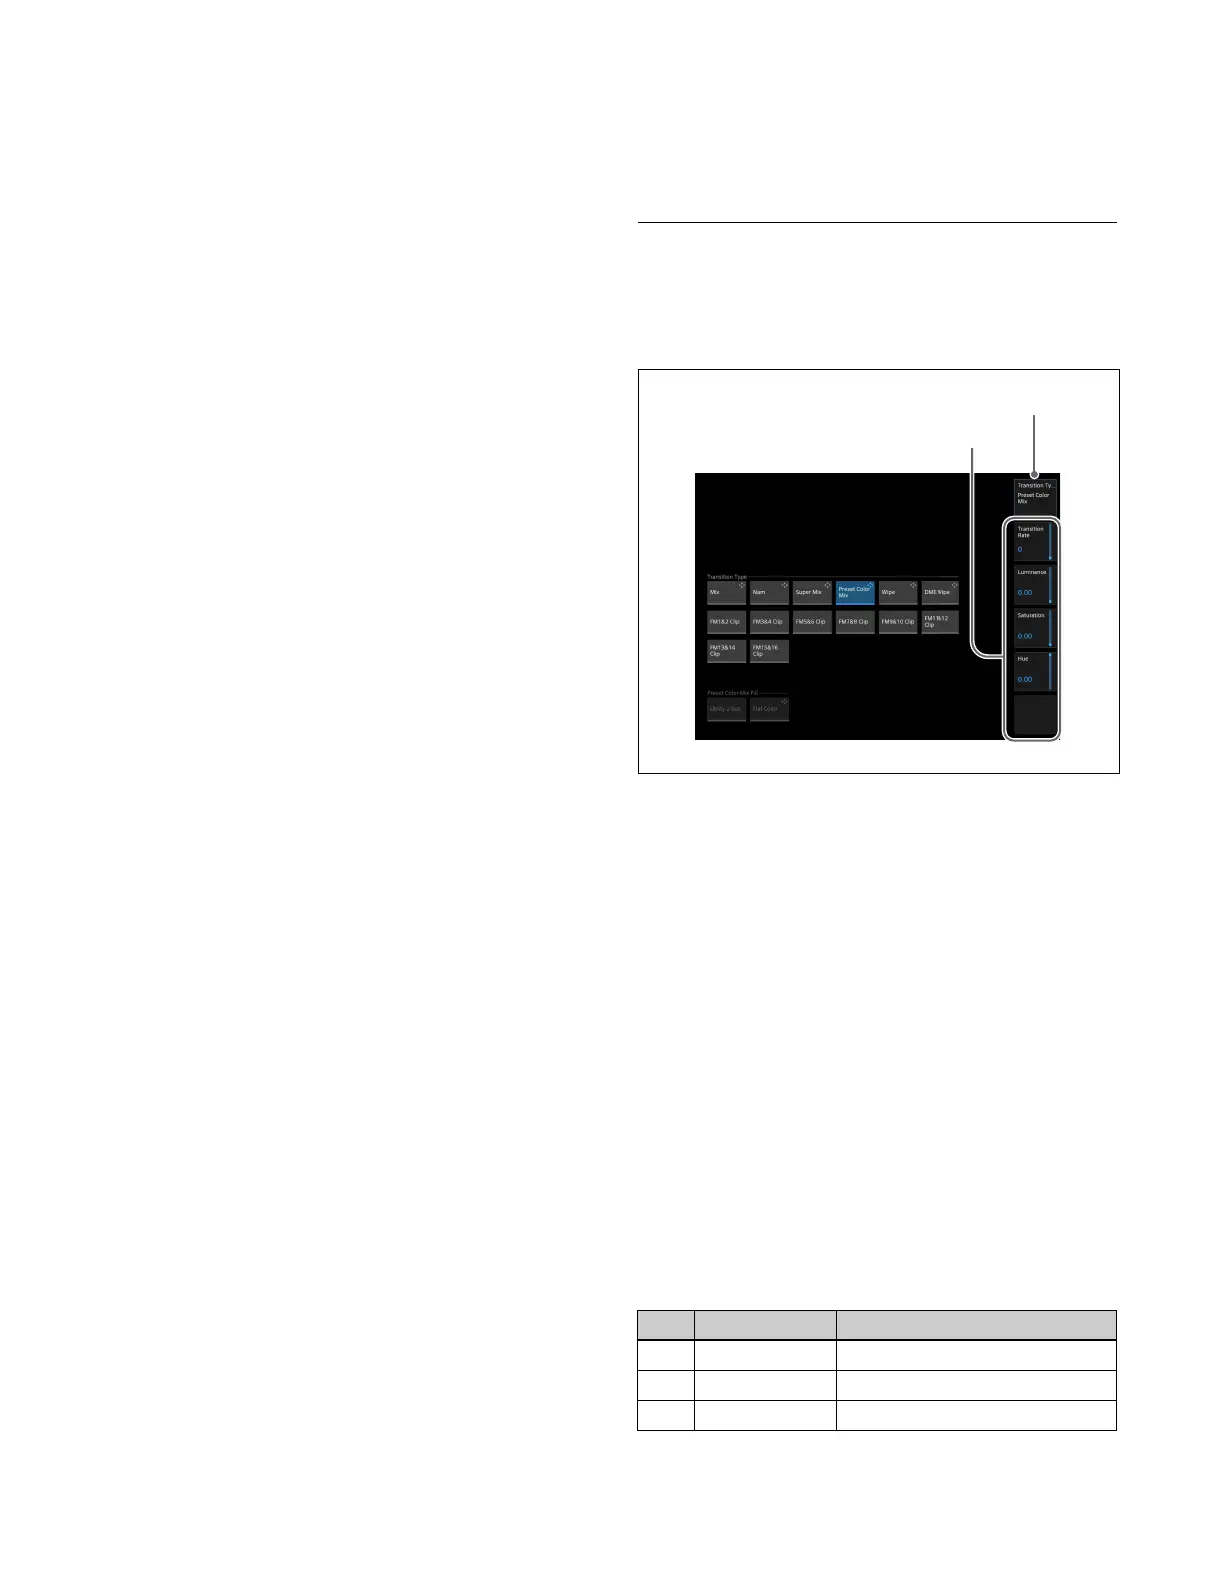
Setting Parameters
Pressing a parameter setting button displays an analog
controls section on the right side of the menu display area
for adjusting parameters.
Analog controls section
This section is comprised by a parameter display button
and up to five parameter buttons (numbered 1 to 5 from
the top).
The target button name/group name to set is displayed on
th
e parameter display button. If there are six or more
parameters, a page number (“1/2” or “2/2”) is displayed
on the parameter display button, and pressing the button
switches between page 1 and page 2.
The parameter name and current setting value are
di
splayed on each of the parameter 1 to 5 buttons.
Pressing a parameter button displays an analog controls
window for setting parameters.
In this manual, parameter setting operations are
r
epresented by the parameter button number and
parameter name.
For parameters on two pages, the number is in “page
numbe
r - parameter button number” format.
Example:
Parameters on one page only
No. Parameter Adjustment
1 Width Width
2 Position Position
3 Density Density
Parameter display button
Parameter 1 to 5 buttons
 Loading...


