104
2
Press the [AUTO TRANS] button.
Manual Transitions (Fader Lever)
You can switch from the current image to the new image
using the fader lever on the transition control block/
transition control block (simple type).
This executes a transition with the set transition type.
To execute the transition completely
Move the fader lever over the full range of its travel.
To pause a partly executed transition
Stop moving the fader lever.
To resume a paused transition
Resume moving the fader lever.
Changing from manual transition to auto
transition
Stop fader lever operation and press the [CUT] button to
instantaneously complete the transition.
Stop the fader lever operation and press the [AUTO
TR
ANS] button/[TAKE] button to complete the
execution of the rest of the transition with the preset
transition rate. For example, if the transition rate is set to
100 frames, and the fader lever has moved through 1/4 of
the transition, then the remaining 3/4 of the transition is
executed in 100 frames.
Fader Lever Operation
Non-sync
If the fader lever is stopped in an intermediate position
and an auto transition is executed, then the fader lever
position will not match the current position of the
transition when the transition is completed. This is termed
non-sync state.
You can check for non-sync state by whether the top and
bo
ttom LEDs of the transition indicator are lit or flashing.
For details about LED light/flashing settings, see
“Setting the transition indicator display in non-sync
state” (page 418).
Non-sync state and LED display
• If a non-sync state occurs after moving the fader lever
f
rom top to bottom, the top two LEDs light/flash.
• If a non-sync state occurs after moving the fader lever
f
rom bottom to top, the bottom two LEDs light/flash.
• Moving the fader lever toward the position of the lit/
fl
ashing LEDs does not execute a transition. When the
fader lever reaches the end position, the non-sync state
is released and the LEDs turn off.
• If the fader lever is moved in the direction away from
t
he lit/flashing LEDs, a 100% transition is executed
over the remaining part of the fader lever travel and the
LEDs turn off.
• Even in non-sync state, you can execute an auto
t
ransition. During auto transition execution, the
transition indicator shows the transition progress in the
usual way, but when the transition completes, the
indicator once again indicates non-sync state.
Flip-flop mode and bus fixed mode
Cross-points can be switched by a transition in flip-flop
mode and bus fixed mode.
For details about setting flip-flop mode/bus fixed mode,
see “Setting Flip-Flop Mode” (page 394).
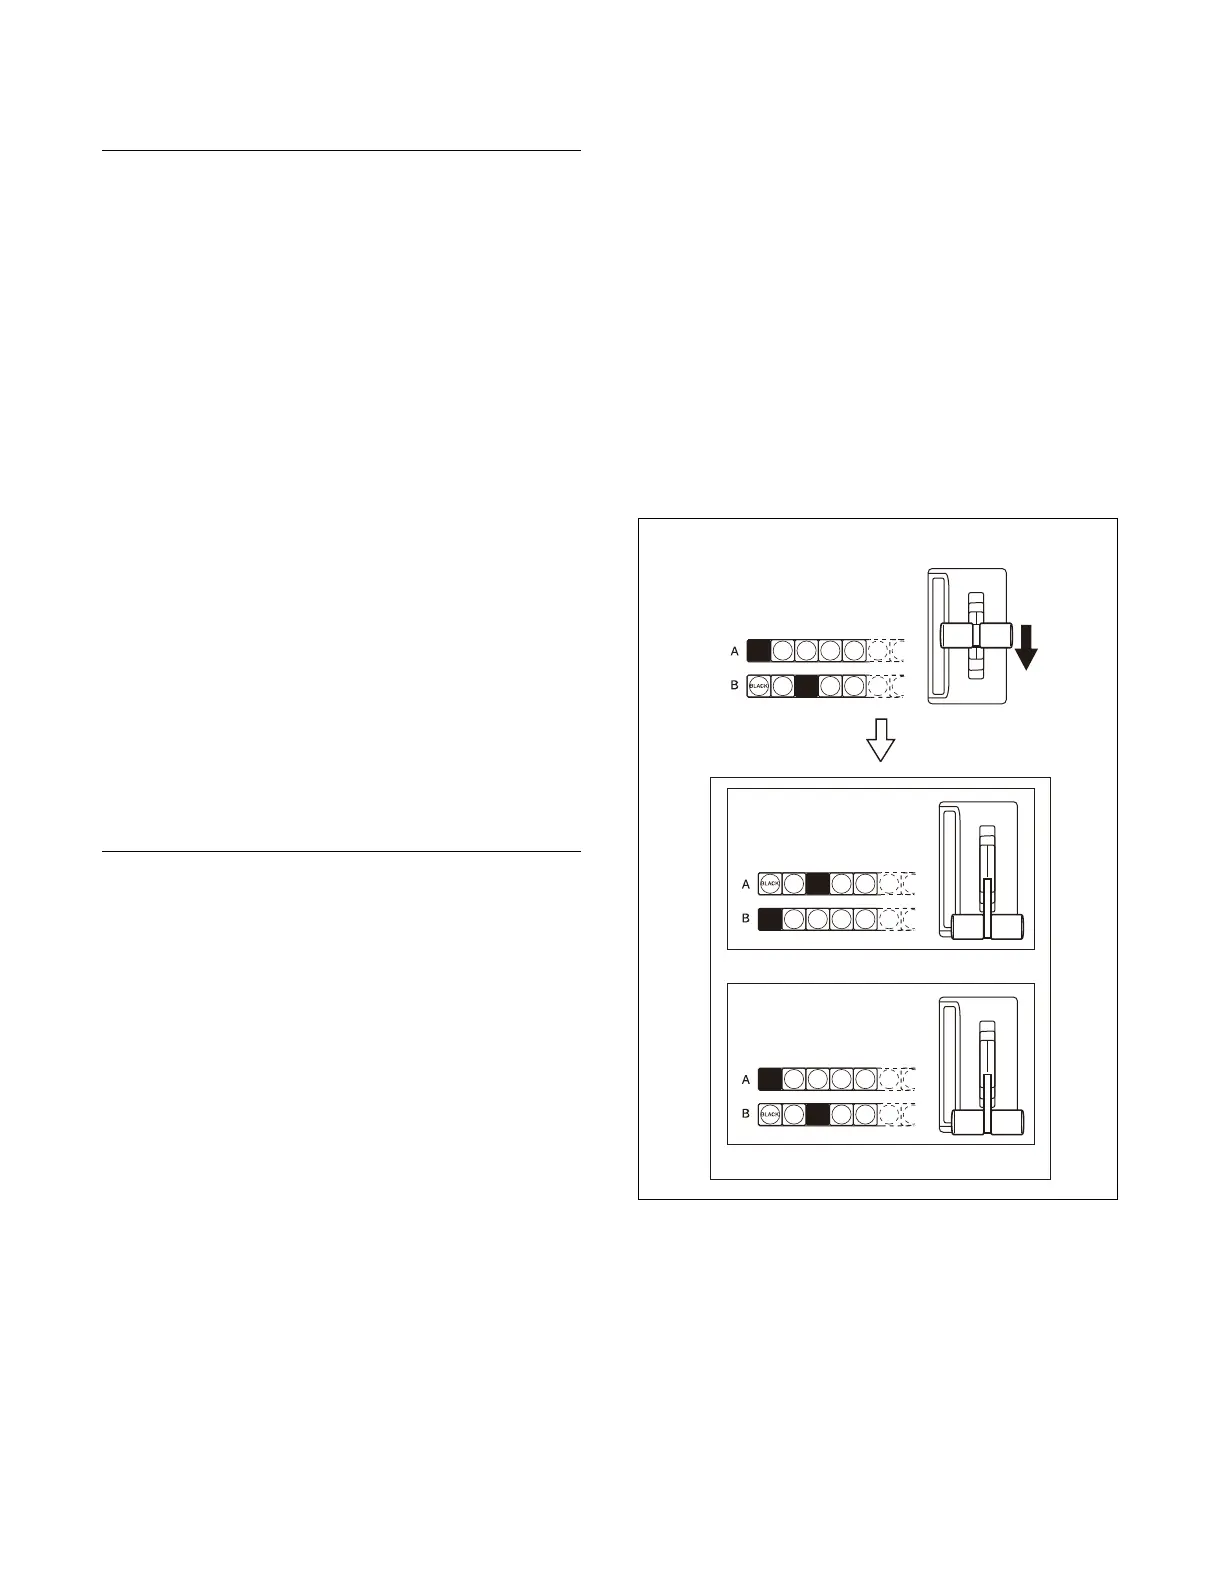
Flip-flop mode
The signal selected on the background A bus is the current
i
mage, and the signal selected on the background B bus is
the new image. The background always switches from
background A to background B. When the transition
completes, the cross-points of the background A bus and
background B bus interchange.
Lit buttons
Fader lever
Flip-flop mode
Bus fixed mode
 Loading...


