8.2 Replacing the Drum Cartridge
189
Daily Care
8
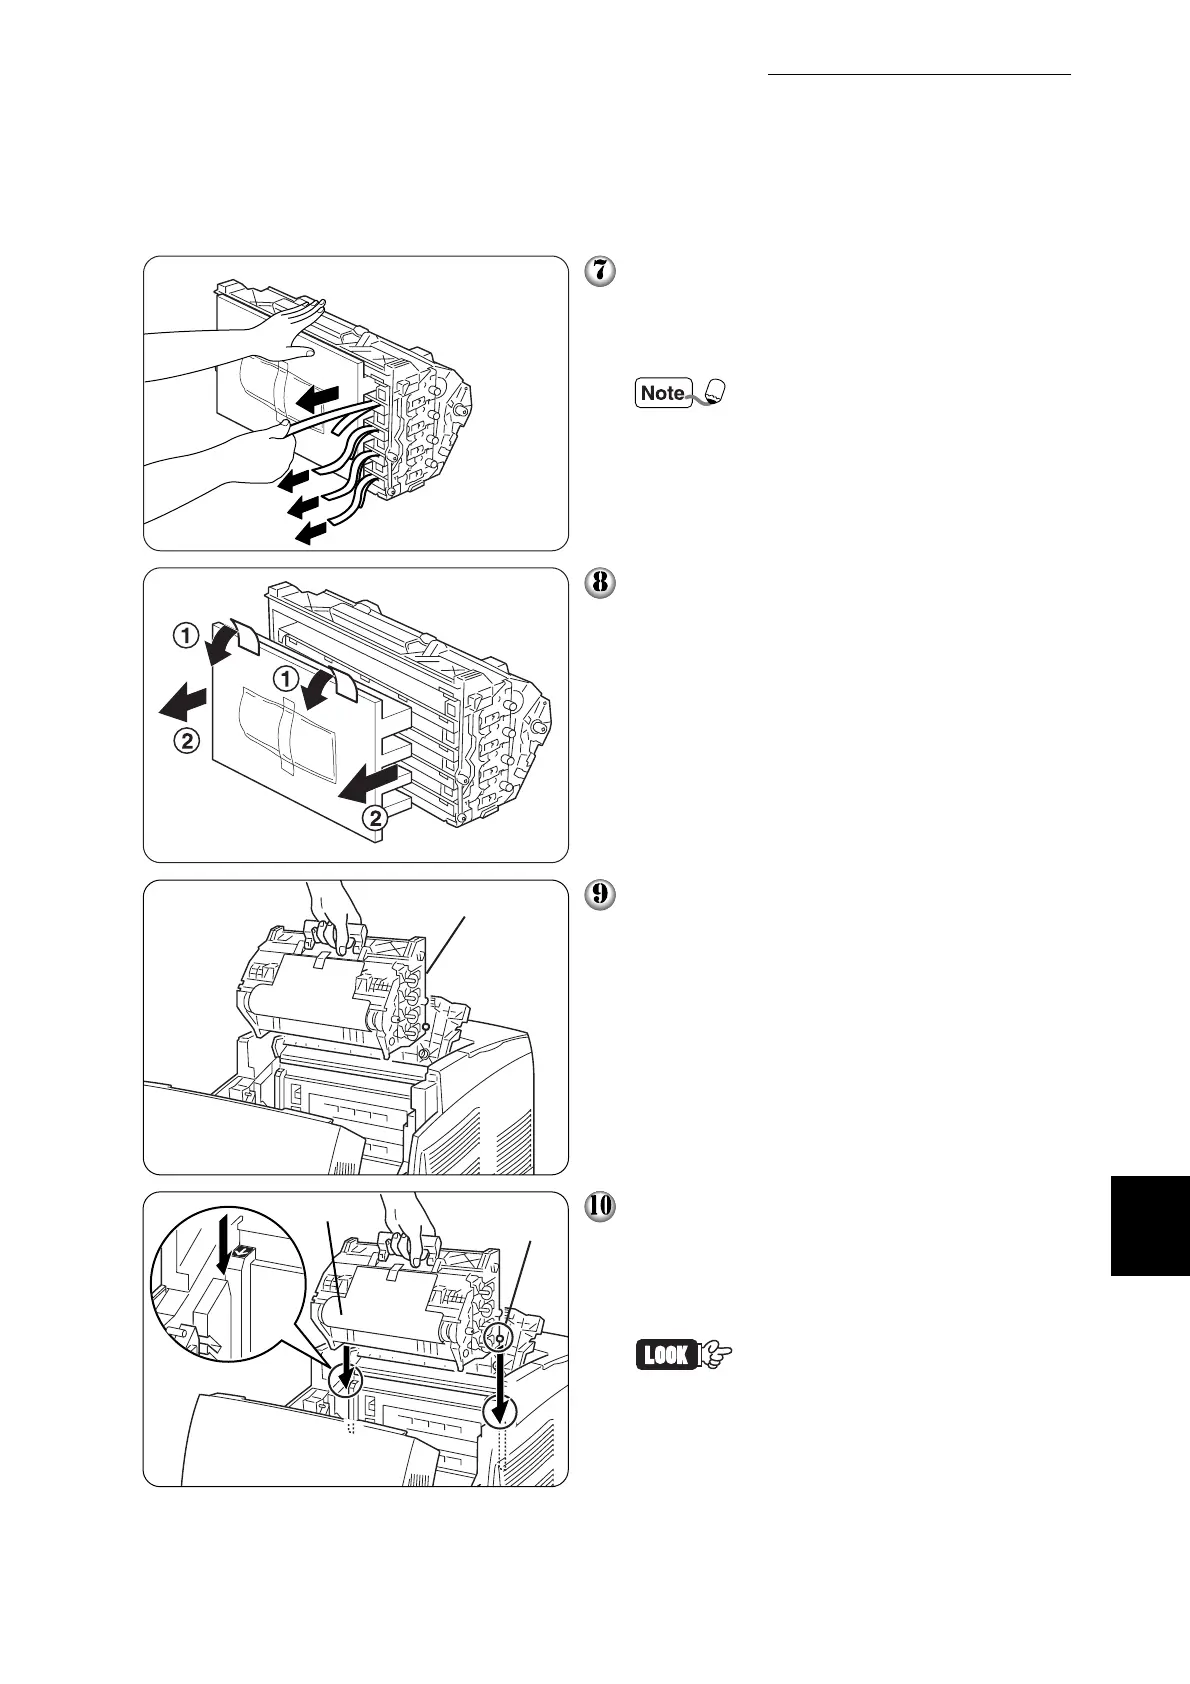
Take the new drum cartridge out of its
package and pull on the longer of the
paired seals horizontally toward you.
Repeat this for the other 3 tapes.
Keep the drum cartridge poly-
styrene packing, aluminum
package, and box in case you
need to transport the printer
over long distances in the
future.
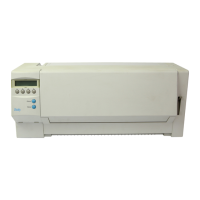
Remove the tape from the top of the car-
tridge ➀, hold the protective cover on
both sides and remove it from the drum
cartridge ➁.
Grip the handle on top of the drum car-
tridge and face the flat part towards the
back of the printer.
With the flat part of the cartridge facing
the rear, align the orange rollers on both
sides of the drum cartridge with the slots
in front of the arrows on the printer, and
gently lower the cartridge into the printer.
• Lowering the cartridge into
the printer without correctly
aligning the rollers with the
slots can damage the car-
tridge.
• Do not allow the surface cov-
ered with a protective sheet
to come into contact with any-
thing.
Flat side faces the rear
Protective sheet
Orange rollers