LED 13 01 (wait)
LCD PANEL SETTINGS→PGM SETTINGS→USE PGM 1 AS (wait)
Change for settings:
LED 13 01 <Value> "√"
LCD PANEL SETTINGS→PGM SETTINGS→USE PGM 1 AS Select using B(left) and
<PGM Tipi> "√" C(right) buttons).
Shown/Entered value: <Value>, number from the table
Factory default: 0 (Free)
Example: Power of fire detector is connected to PGM
13 01 5 √
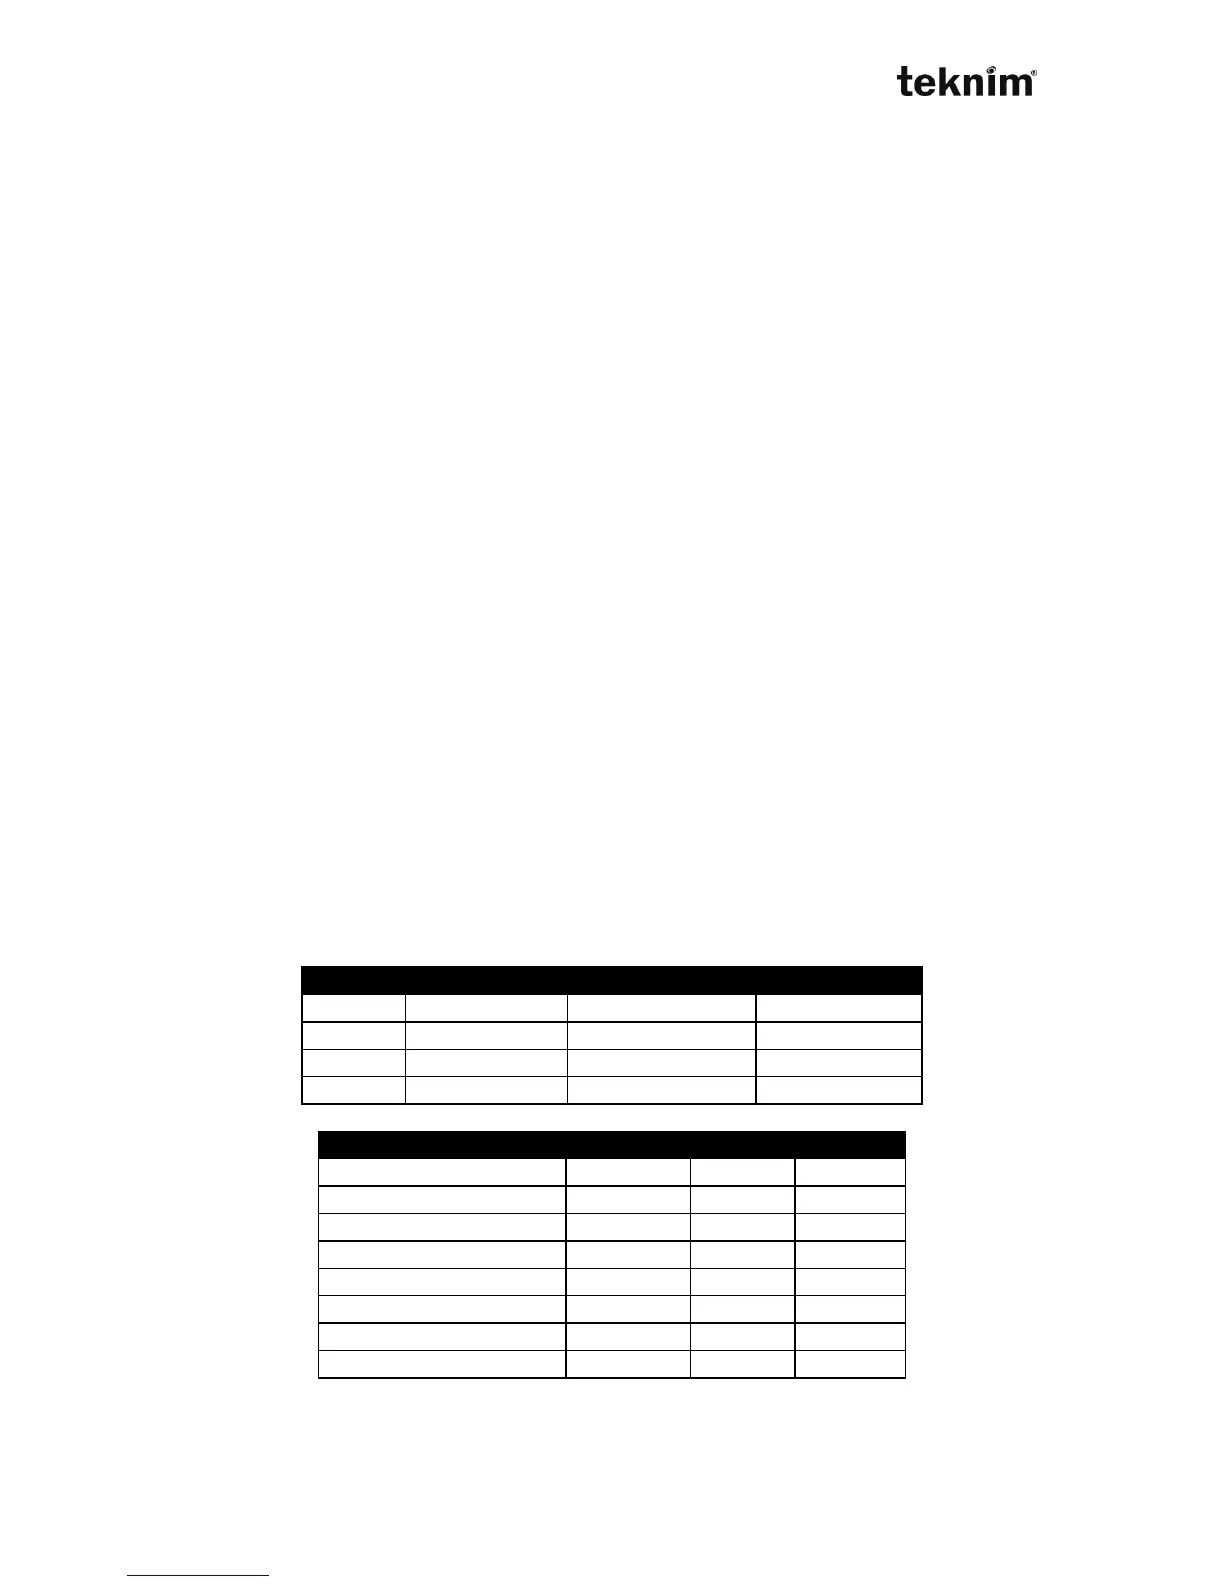
PGM1 Parameters
Address 13 02. < IP >
Display for settings:
LED 13 02 (wait)
LCD PANEL SETTINGS→PGM SETTINGS→PGM 1 SETTING (wait)
Change for settings:
LED 13 02 <Value> "√"
LCD PANEL SETTINGS→PGM SETTINGS→PGM 1 SETTING
<Value> "√"
Shown/Entered value: <Value>, Value between 0...255 as number
Factory default: 0
Example: To configure parameter as 5 do
13 02 5 √
Note: Programming and factory settings of all other PGM’s are like PGM1.
8.2.4.2 Timer Settings
The PGM's can be controlled by week the week by using timers. The PGM can be
matched any timer. Timer can be active or passive PGM. Timers can be programmed
like this. Please look at the below table.
 Loading...