5-74 4203780 First Edition
HYDROSTATIC POWER TRAIN
5
1. Remove both drive axle reducer assemblies. (See
“Drive Axle Reducer Assembly” on page 5-69.)
2. Remove the input bevel pinon assembly. (See “Input
Bevel Pinion Assembly” on page 5-65.)
NOTES
Remove the breather (3), plugs (10), drain plug (16), and
seal (15) only if replacement is required.
3. Disassemble the differential assembly as shown.
4. Place parts in assembly order on a clean work area
as they are removed.
NOTICE
Inspection Notes
• Keeping parts in assembly order, clean and air dry
each item for inspection.
• If replacing the ring gear, the pinion shaft must also
be replaced. These parts are a matched set.
• Inspect for worn or defective parts.
• Inspect all parts for cracks, nicks, burrs, and
excessive wear. Inspect for scoring, galling, and
scratches on surfaces. Replace parts as necessary.
Assembly
See Figures 5-81 through 5-83.
Figure 5-81
1. Assemble the differential (3) and ring gear (2) using
eight hex head bolts (4). Apply Loctite 242 to hex
head bolts (4) before assembly. Install hex head bolts
and tighten to 37 lb-ft (51 N·m).
2. Press ball bearings (1) onto the differential assembly.
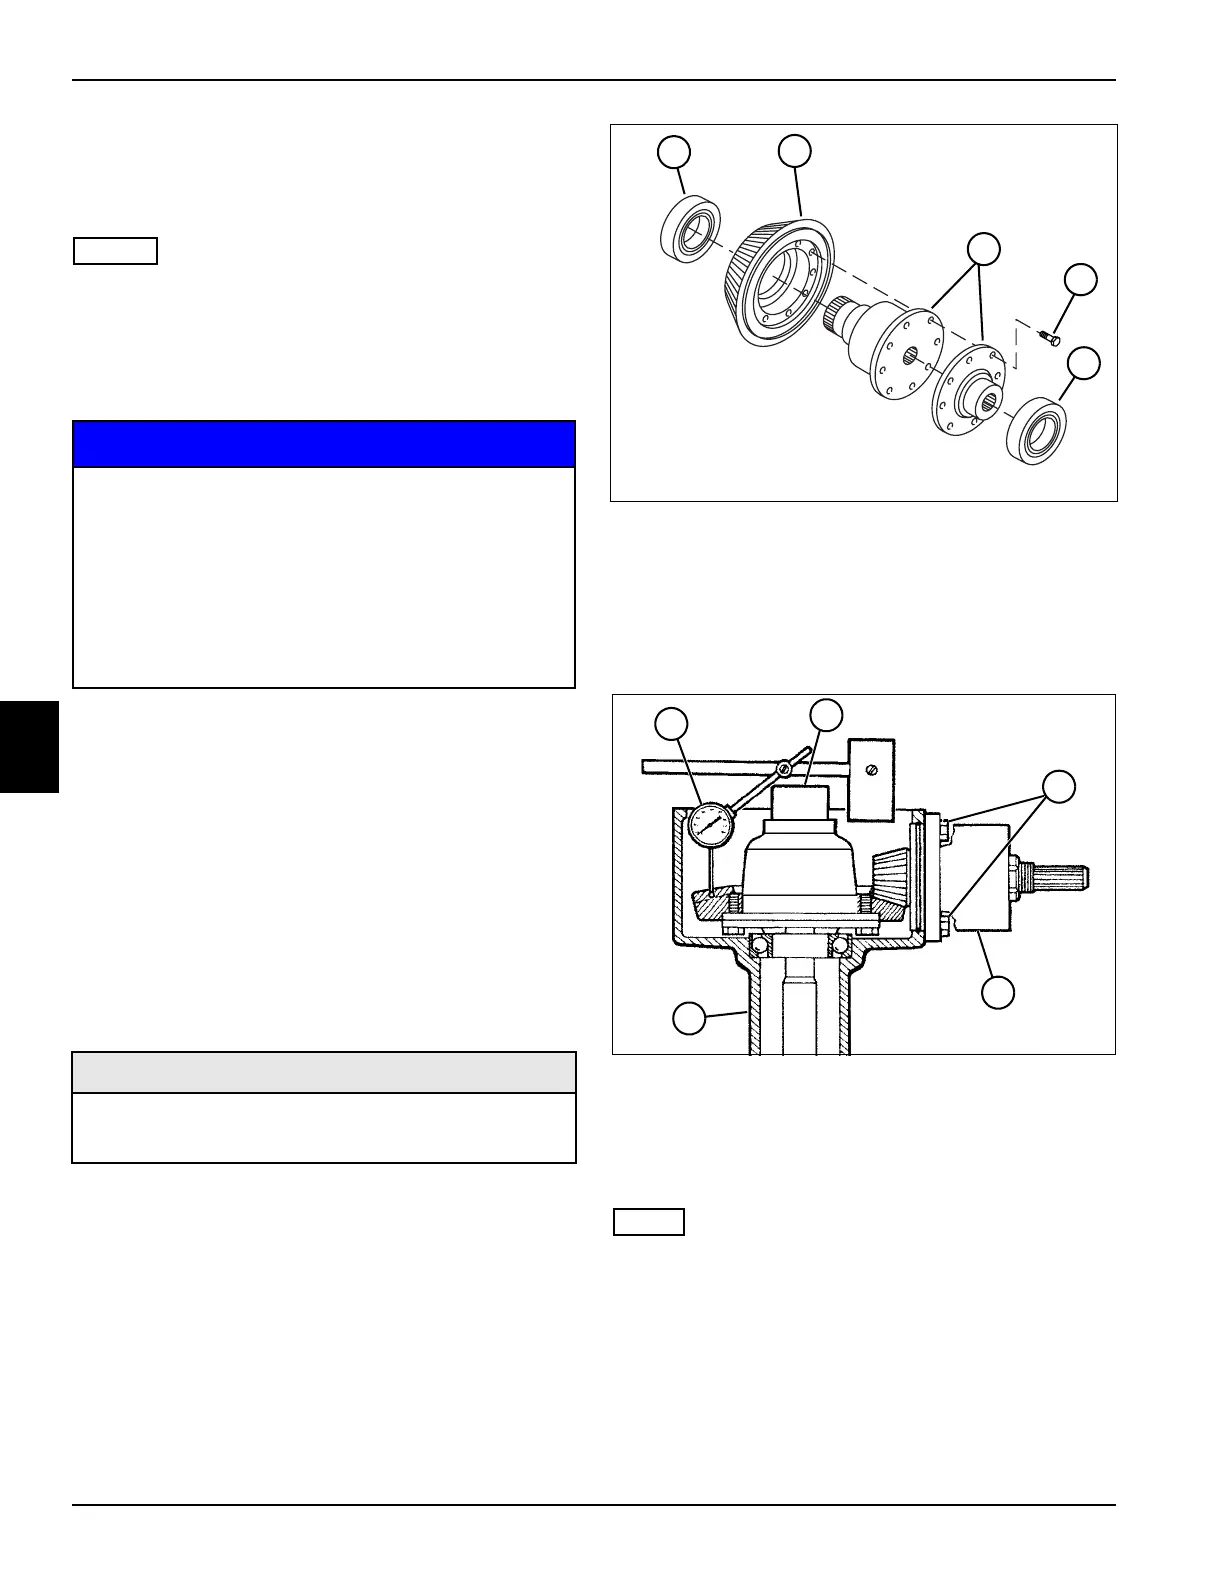
Figure 5-82
3. Install the differential assembly (6) in the left
differential housing (9). Do not install shims at this
time. Make sure the differential assembly is fully
seated in the bearing bore.
NOTE
Do not apply Loctite to the input bevel pinion housing
bolts at this time.
4. Install input bevel pinion assembly (8). (See
“Assembly” on page 5-67.)
5. Using a dial indicator (5) against the pinion tooth,
check the gear backlash.
6. Subtract 0.008 in. (0.2 mm) from the measurement
obtained. Build a shim pack equal to the final
dimension.
• It is important that parts are marked and
placed in assembly order to aid in assembly.
• It is important that all parts are absolutely
clean, as contamination can result in serious
damage and/or improper operation.
• Never use shop towels or rags to dry parts
after cleaning, as lint may clog passages. Dry
parts using compressed air.
Required Materials
•Loctite
®
Primer
•Loctite
®
518 Gasket Eliminator
TN1932
1
3
4
1
2
TN1933
9
8
5
6
7

 Loading...


