6-58 4203781 First Edition
HYDRAULICS
6
Repair
Hydraulic Oil Tank—Drain Procedure
See Figure 6-61.
1. Park the mower safely. (See “Park Mower Safely” on
page 1-6.)
2. Block both sides of rear wheels using suitable wheel
blocks.
3. Raise and support front of mower with jackstands.
Figure 6-61
NOTES
• Label all hydraulic hoses and tubes before
disconnecting to aid in installation.
• Close all openings with caps or plugs to prevent
contamination.
• Have a #8 cap available to seal the 90° control valve
fitting.
• The hydraulic oil tank capacity is 17 gal (64.3 L). Use
appropriate containers when draining hydraulic oil.
4. Place a suitable container beneath control valve (2)
and hose (1).
5. Disconnect hose (1), and plug the 90° control valve
fitting.
6. Loosen the hydraulic oil tank cap to provide a vent for
draining oil.
Installation Notes
• Ensure new O-ring is in place before installing hose
on fitting.
• Connect hose (1).
• Replace hydraulic oil return filter. (See “Hydraulic Oil
Return Filter” on page 6-67.)
• Replace charge pressure filter. (See “Charge
Pressure Filter” on page 6-67.)
• Refill hydraulic tank. (Refer to “Safety, Operation, and
Maintenance Manual” for oil specifications.)
• Start engine. Check hydraulic system for leaks.
Repair as necessary.
• Check hydraulic oil level and add if necessary.
Gear Pump
Removal and Installation
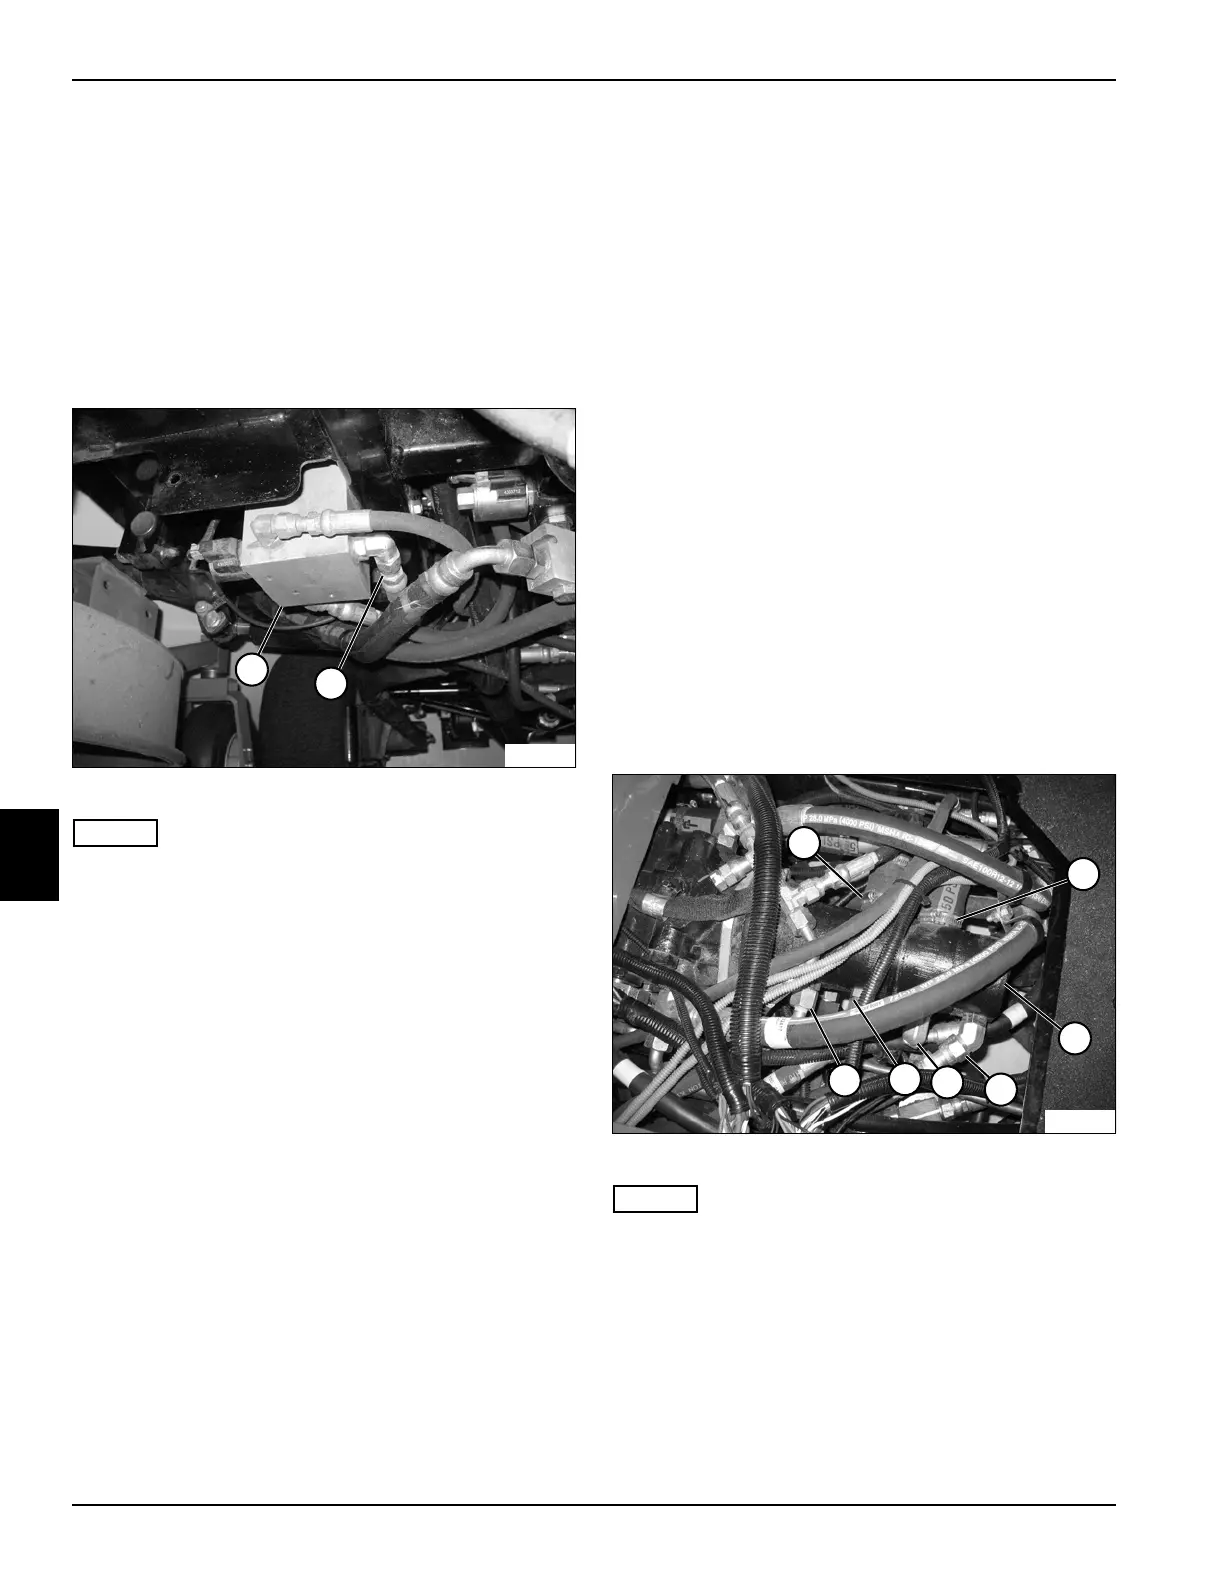
See Figures 6-62 and 6-63.
1. Park the mower safely. (See “Park Mower Safely” on
page 1-6.)
2. Raise the seat and seat platform.
3. Drain hydraulic oil tank. (See “Hydraulic Oil Tank—
Drain Procedure” on page 6-58.)
Figure 6-62
NOTES
• Label all hydraulic hoses and tubes before
disconnecting to aid in installation.
• Close all openings with caps or plugs to prevent
contamination.
4. Disconnect hoses (1 and 2).
5. Disconnect hoses (4 through 7).
6. Support gear pump (3).
TN2275
1
2
TN2276
1
2
4
5
7
6
3

 Loading...

