STEERING
4203781 First Edition 7-17
7
Steering Cylinder
Removal and Installation
See Figures 7-24 through 7-26.
1. Park the mower safely. (See “Park Mower Safely” on
page 1-6.)
2. Thoroughly clean the area surrounding the steering
cylinder, especially the hydraulic hose fittings.
Figure 7-24
NOTES
• Label all hydraulic hoses and record their locations to
ensure correct installation.
• Plug hydraulic hoses after disconnecting to prevent
loss of hydraulic oil.
3. Disconnect hydraulic hoses (1 and 2) from steering
cylinder (5).
4. Support the steering cylinder (5).
5. Remove cotter pin (4) and castle nut (3) from
steering cylinder (5).
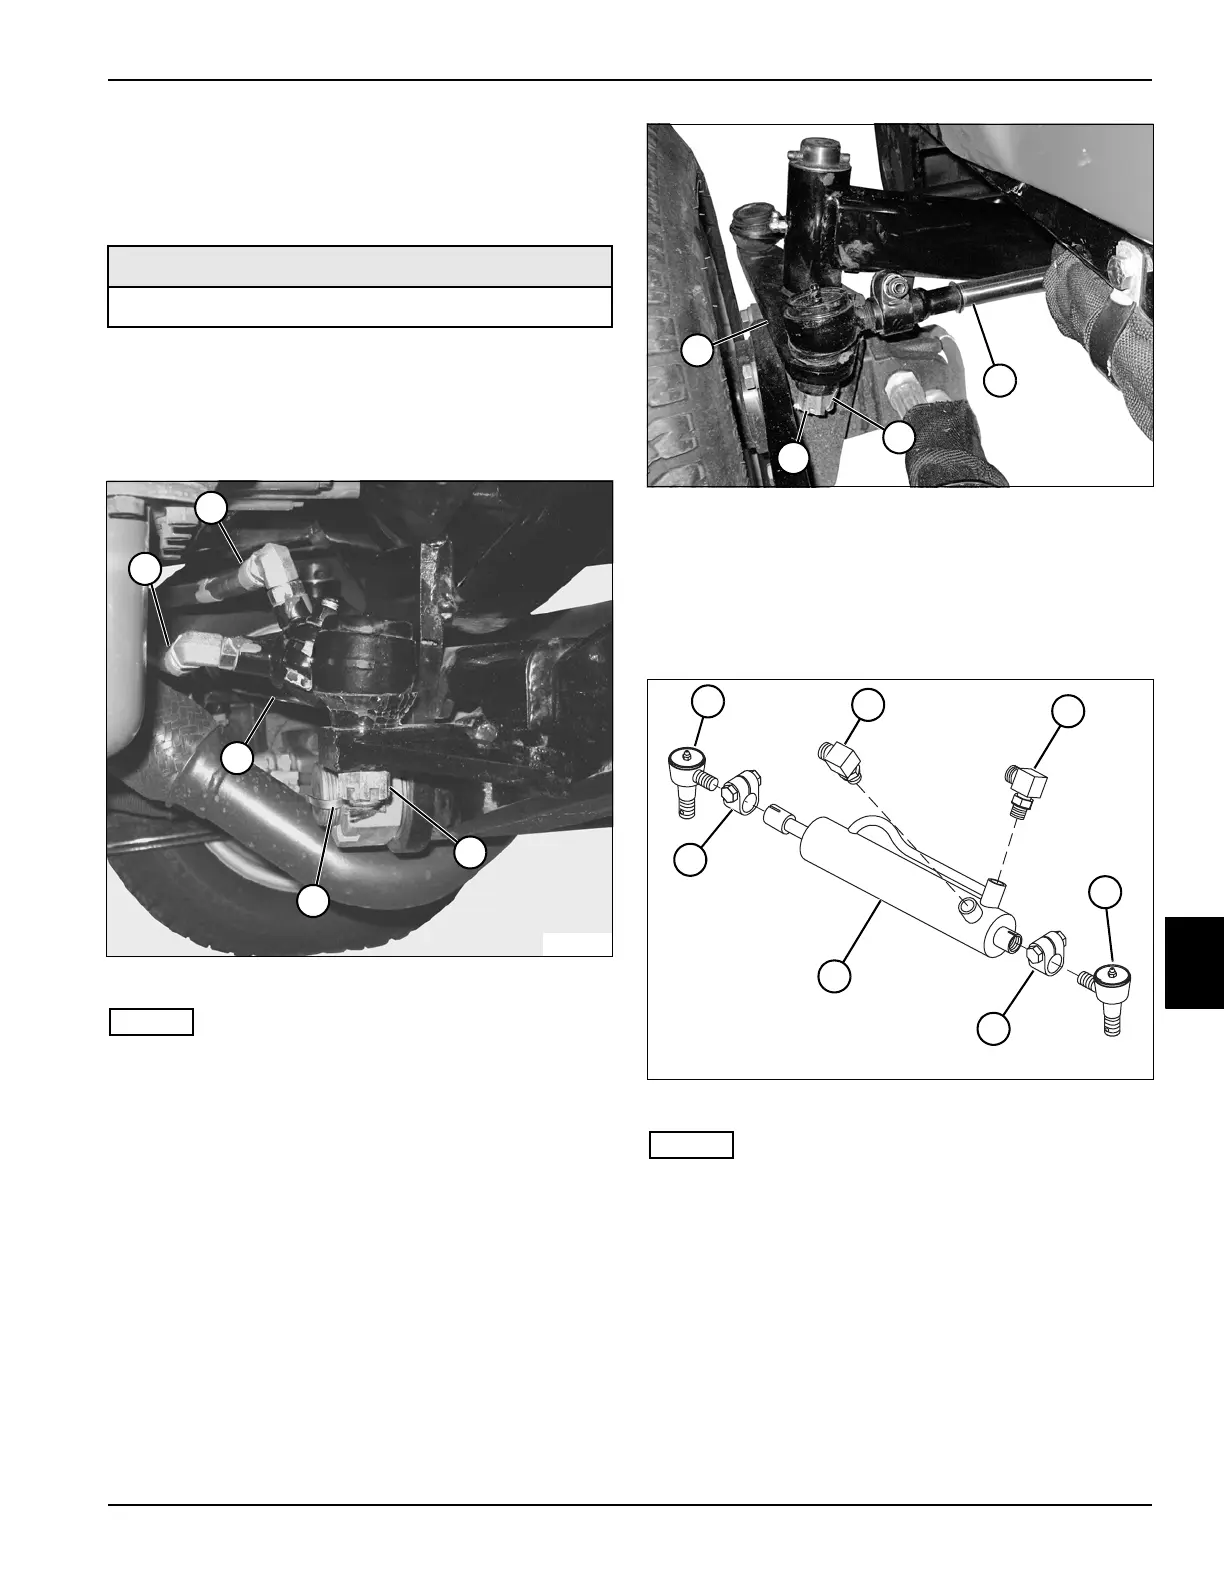
Figure 7-25
6. Remove cotter pin (8) and castle nut (9) from
steering cylinder (7).
7. Using a ball joint removal tool, remove the ball joint
from the steering arm. Remove the steering cylinder
(7) from the steering arm (6) and rear axle.
Figure 7-26
NOTES
• Record the location and orientation of the fittings
(11 and 12) before removing to ensure correct
installation.
• Record the orientation of the clamps (14 and 16)
before removing to ensure correct installation.
• Record the orientation of the ball joints (10 and 13)
before removing to ensure correct installation.
• Record the number of turns required to remove each
ball joint.
8. Remove fittings (11 and 12) from steering cylinder
(15).
Required Tools or Equipment
Ball Joint Removal Tool
TN2192
3
1
2
4
5
TN1799
9
8
6
7
TN1802
14
15
16
10
11
12
13

 Loading...

