7-20 4203781 First Edition
STEERING
7
NOTICE
8. Clean all parts using clean solvent, and dry using
compressed air.
9. Inspect all parts for excessive wear, cracks, broken
parts, and damaged threads.
10. Inspect the barrel for dents, score lines, or grooves
inside.
Assembly Notes
• Assemble the steering cylinder by reversing the order
of disassembly.
• Lubricate all parts with clean hydraulic oil before
assembly.
• Always install new seals and O-rings for assembly;
used parts may leak.
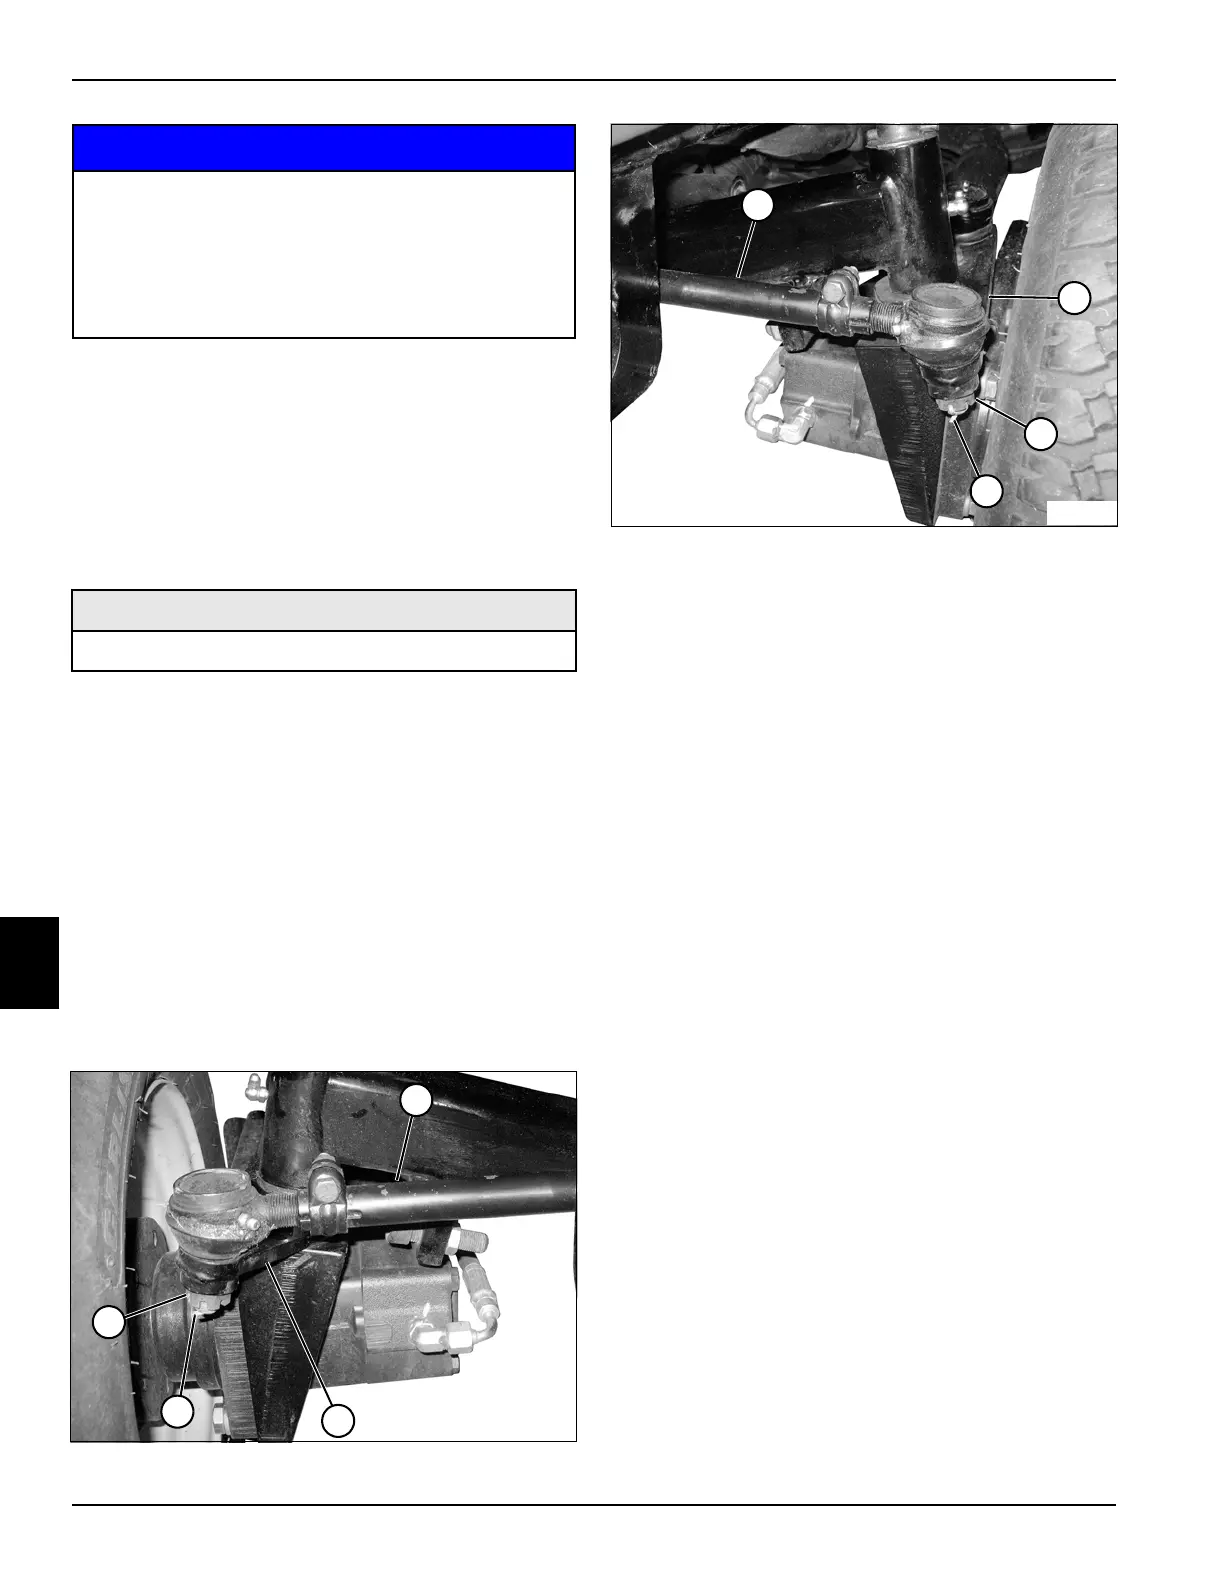
Tie Rod Assembly
Removal and Installation
See Figures 7-28 and 7-29.
1. Park the mower safely. (See “Park Mower Safely” on
page 1-6.)
Figure 7-28
Figure 7-29
2. Support the tie rod assembly (1).
3. Remove cotter pins (3 and 7) and castle nuts
(4 and 6) from both steering arms (2 and 5), and
remove the tie rod assembly (1).
Installation Notes
• Install the tie rod by reversing the order of removal.
• Before installing the tie rod assembly, verify that the
ball joint tapers and the mating tapered surfaces in
the steering arms are free of burrs, dirt, and debris.
DO NOT apply lubricant of any kind to these
surfaces.
• Verify that the tie rod clamps do not make contact
with anything when steering in either direction.
Reposition the clamps as needed.
• Tighten castle nuts (4 and 6) to 30 lb-ft (41 N·m).
Adjust (tighten) nuts as needed to align the slots with
the hole in the rod ends.
• Always install new cotter pins (3 and 7).
• Adjust tie rod. (See “Tie Rod Adjustment” on
page 7-4.)
It is important that all components are absolutely
clean, as contamination can result in serious
damage and/or improper operation.
Never use shop towels or rags to dry parts after
cleaning, as lint may clog passages. Dry parts
using compressed air.
Required Materials
Seal Kit (Jacobsen PN 4137139)
TN1817
4
1
2
3
TN1818
7
5
1
6

 Loading...

