ACCESSORIES AND MISCELLANEOUS REPAIR
4203781 First Edition 9-17
9
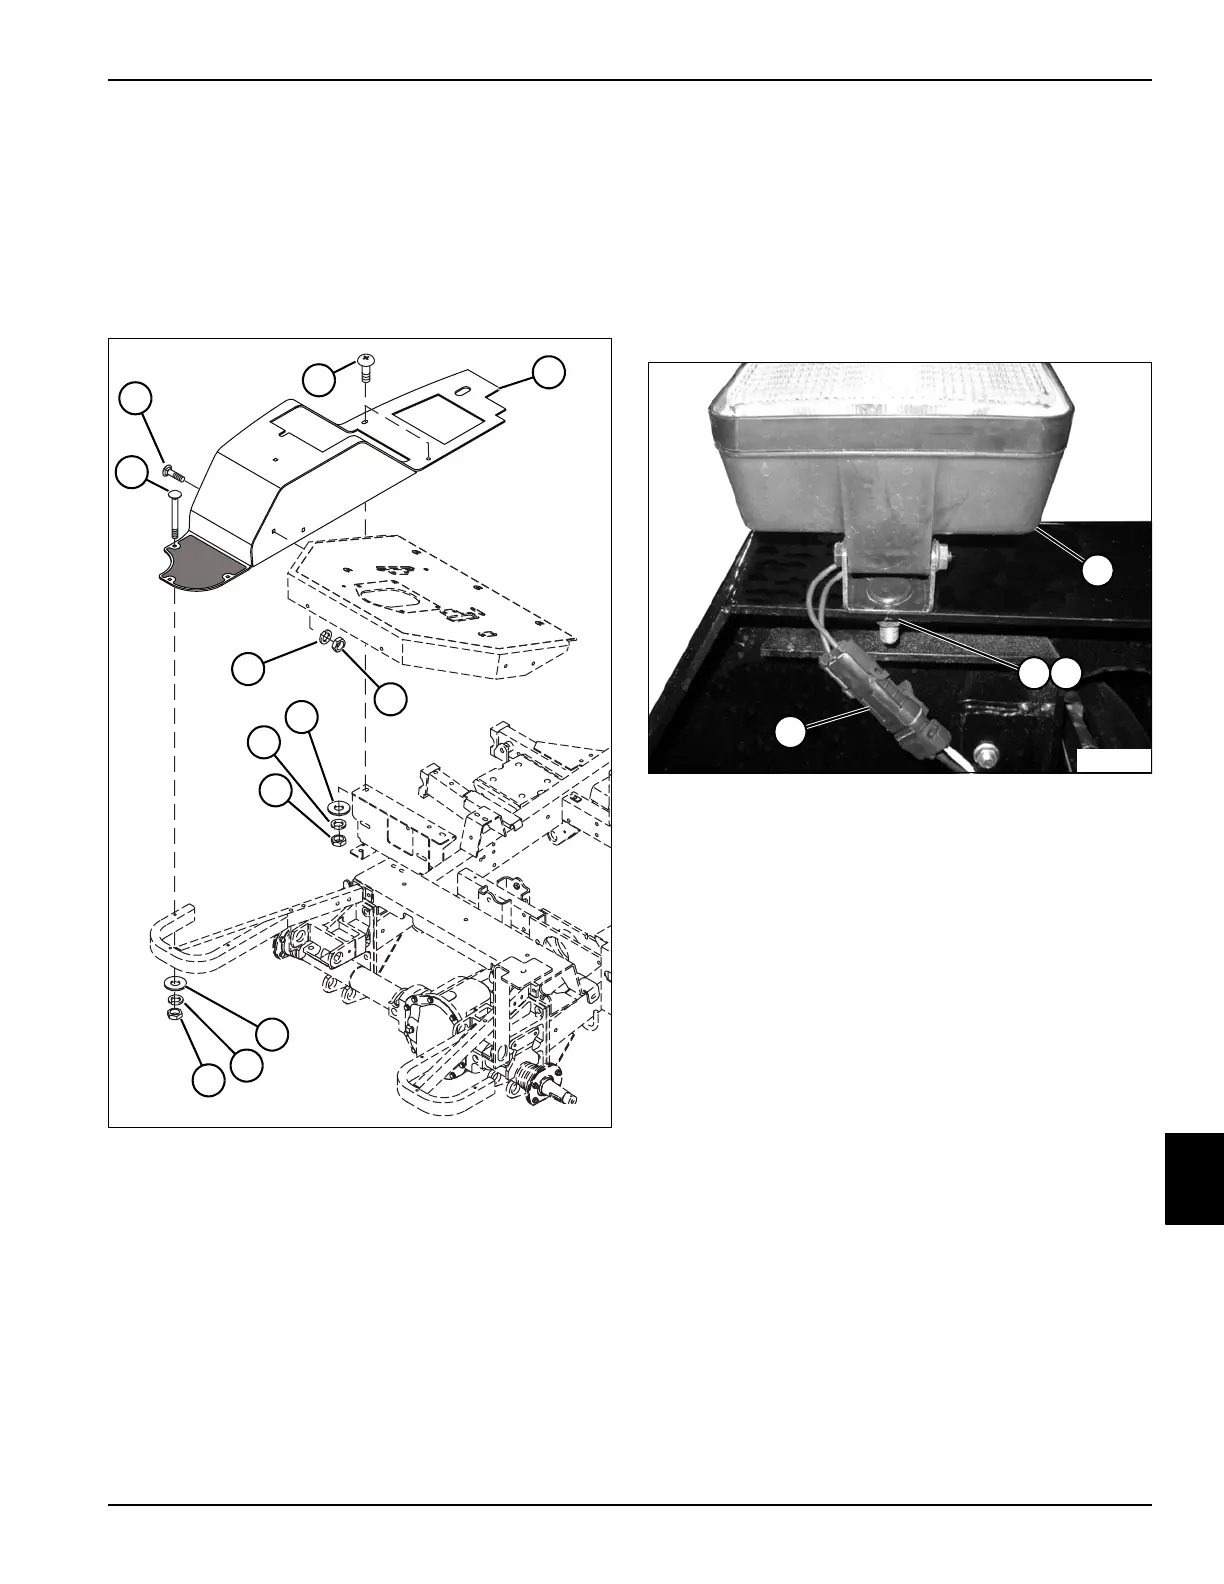
Right Fender
Removal and Installation
See Figure 9-32.
1. Park the mower safely. (See “Park Mower Safely” on
page 1-6.)
2. Remove fuel tank. (See “Fuel Tank” on page 9-7.)
Figure 9-32
3. Remove two nuts (5), lock washers (6), and carriage
bolts (2).
4. Remove three lock nuts (12), lock washers (11), flat
washers (10), and carriage bolts (1).
5. Remove two nuts (9), lock washers (8), flat washers
(7), and screws (3).
6. Remove right fender (4).
Installation Note
Install the right fender by reversing the order of removal.
Work Light Kit
Removal and Installation
See Figure 9-33.
1. Park the mower safely. (See “Park Mower Safely” on
page 1-6.)
2. Disconnect the negative (–) battery cable at the
battery.
Figure 9-33
3. Tag and disconnect work light wire connector (1).
4. Remove lock nut (2) and flat washer (3) from work
light (1).
5. Remove work light (1).
Installation Notes
• Install work light by reversing the order of removal.
• Adjust the work lights to project the desired distance
in front of the machine.
TN2208
2
3
5
6
7
8
9
10
11
12
4
1
1
TN2177
2 3
1

 Loading...

