8-18 673831-Rev A
CUTTING UNITS
8
Bedknife-to-Reel Clearance
Adjustment
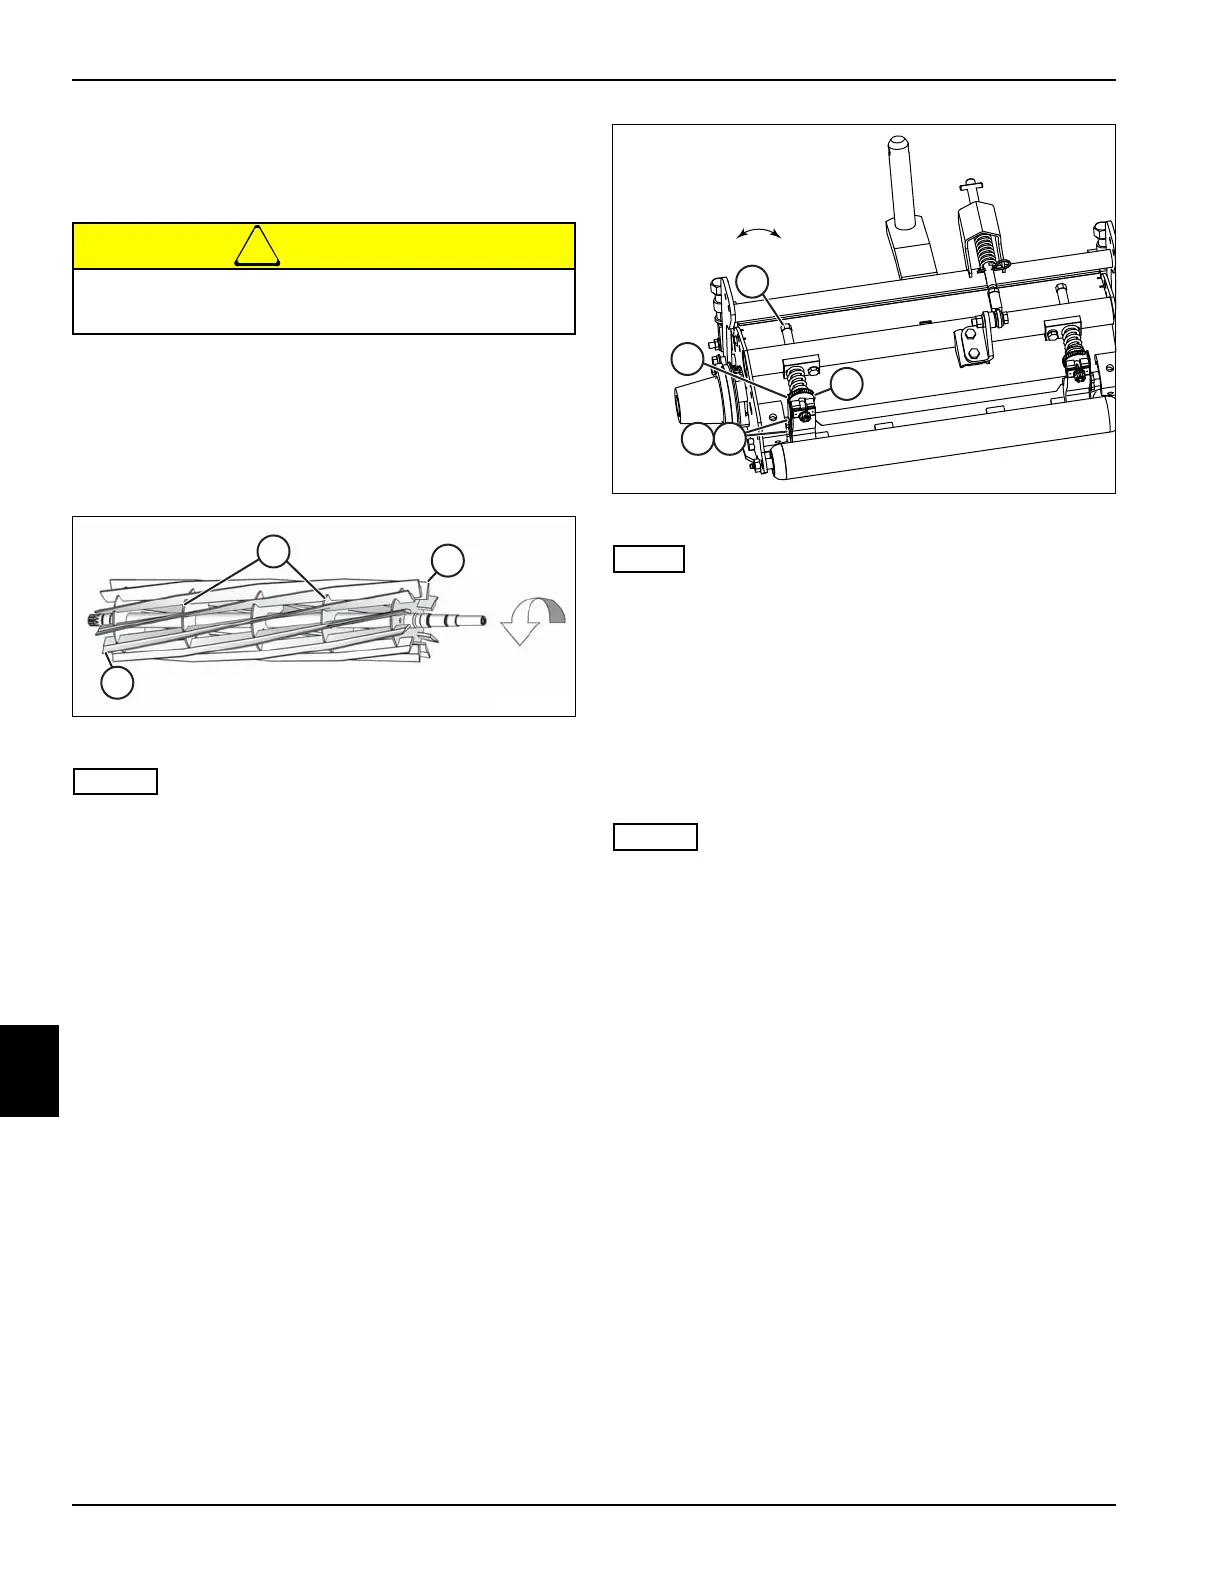
See Figures 8-5 and 8-6.
1. Park the mower safely. (See “Park Mower Safely” on
page 1-6.)
2. Inspect reel and bedknife before performing
adjustment. (See “Reel and Bedknife Inspection” on
page 8-17.)
Figure 8-5
• Clearance between the bedknife and reel should be
checked with a feeler gauge. Slide the feeler gauge
between the bedknife and reel. There should be a
slight drag on the feeler gauge. Do not turn the reel
while making the check. Clearance should be
checked at the outer ends of the reel, then at the
inner set of spiders (1), and then in the middle.
• The bedknife-to-reel adjustment should be made by
starting with the leading end (3) of the reel and
following with the trailing end (2). The leading end of
the reel blade is the end that passes over the
bedknife first during normal reel rotation.
Figure 8-6
Turn bedknife adjustment rod (4) counterclockwise (as
viewed from front of cutting unit) to increase the
clearance. Turn bedknife adjustment rod clockwise (as
viewed from front of cutting unit) to decrease the
clearance.
3. Adjust bedknife-to-reel clearance to 0.001–0.003 in.
(0.025–0.076 mm) between reel blade and bedknife
using bedknife adjustment rod (4) on both leading
and trailing edges of reel.
• Move the bedknife adjustment rods in very small
increments when making bedknife-to-reel
adjustments.
• Each click of the bedknife adjustment gear (5)
corresponds to a 0.001 in. (0.025 mm) change in the
bedknife-to-reel clearance.
• For infinite bedknife-to-reel clearance adjustment,
remove the two screws (6), two lock washers (7), and
spring detent (8) from each side of the cutting unit.
• When the reel and bedknife are properly adjusted,
the reel will spin freely and will cut a piece of
newspaper along the full length of the reel when the
paper is held at a 90° angle to the bedknife.
To prevent personal injury and damage to the
cutting edges, handle the reel with extreme care.
4
5
67
8
Increase
Clearance
Decrease
Clearance

 Loading...

