STEERING
673831-Rev A 7-21
7
Assembly Notes
• Assemble the steering cylinder by reversing the order
of disassembly.
• Lubricate all parts with clean hydraulic oil before
assembly.
• Always install new seals and O-rings for assembly;
used parts may leak.
• Check hydraulic oil level. Add oil as needed.
• Start the machine and check for hydraulic leaks and
cylinder operation. Repair as necessary.
• Check steering toe-in adjustment. (See “Tie Rod
Adjustment” on page 7-4.)
4WD Option Steering Cylinder
Removal and Installation
See Figures 7-28.
1. Park the mower safely. (See “Park Mower Safely” on
page 1-6.)
2. Thoroughly clean the area surrounding the steering
cylinder, especially the hydraulic hose fittings.
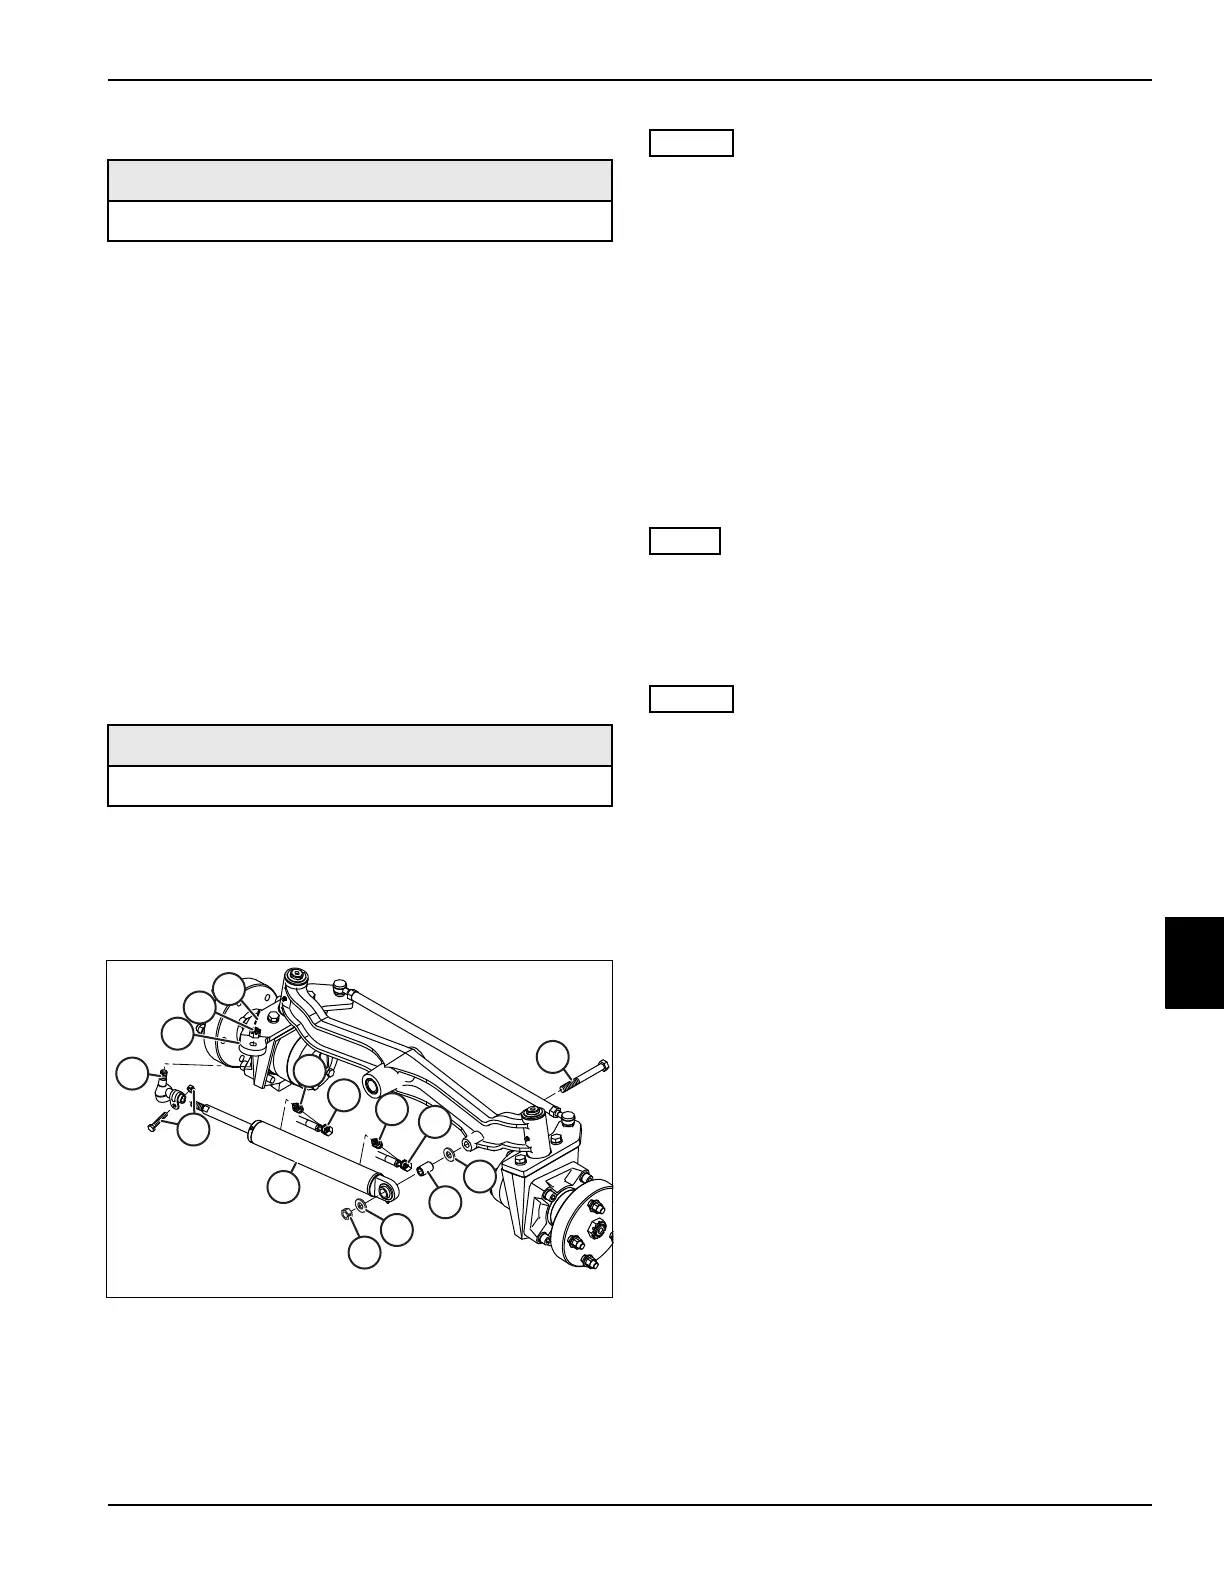
Figure 7-28
• Label all hydraulic hoses and record their locations to
ensure correct installation.
• Plug hydraulic hoses after disconnecting to prevent
loss of hydraulic oil.
3. Disconnect hydraulic hoses (1 and 2) from steering
cylinder (11). Remove fittings (3).
4. Remove screw (4), washers (5), spacer (6) and
center lock nut (7).
5. Support the steering cylinder (8).
6. Remove cotter pin (9) and nut (10). Using a ball joint
removal tool, remove the ball joint (11) from the
steering arm. Remove the steering cylinder (8) from
the steering arm (12).
Record the number of turns required to remove rod end
from steering cylinder.
7. Loosen clamp hardware (13) and remove ball joint
(11) from steering cylinder (8).
Installation Notes
• Install the steering cylinder by reversing the order of
removal.
• Inspect all ball joints for wear or torn dust seals.
• Using information recorded during disassembly,
install ball joint (11) onto steering cylinder (8) with the
correct number of turns.
• Before installing the steering cylinder assembly,
verify that the ball joint taper and the mating tapered
surfaces in the steering arm are free of burrs, dirt,
and debris. DO NOT apply lubricant of any kind to
these surfaces.
• Tighten castle nut (10) to 40-55 lb-ft (54-75 N·m).
Adjust (tighten) nut as needed to align the slots with
the hole in the rod ends.
• Always install new cotter pins (9).
• Tighten fittings (3) to 15 lb–ft (19 N·m).
• Tighten hoses (1 and 2) to 11 lb–ft (15 N·m).
• Check hydraulic oil level. Add oil as needed.
• Start the machine and check for hydraulic leaks and
cylinder operation. Repair as necessary.
• Check steering toe-in adjustment. (See “Tie Rod
Adjustment” on page 7-4.)
Required Materials
Seal Kit (Jacobsen PN TBD)
Required Tools or Equipment
Ball Joint Removal Tool

 Loading...

