ACCESSORIES AND MISCELLANEOUS REPAIR
673831-Rev A 9-5
9
Installation Notes
• Support the hood with a suitable lifting device to aid
in installation.
• Install hood by reversing the order of removal.
Fuel Tank
Removal and Installation
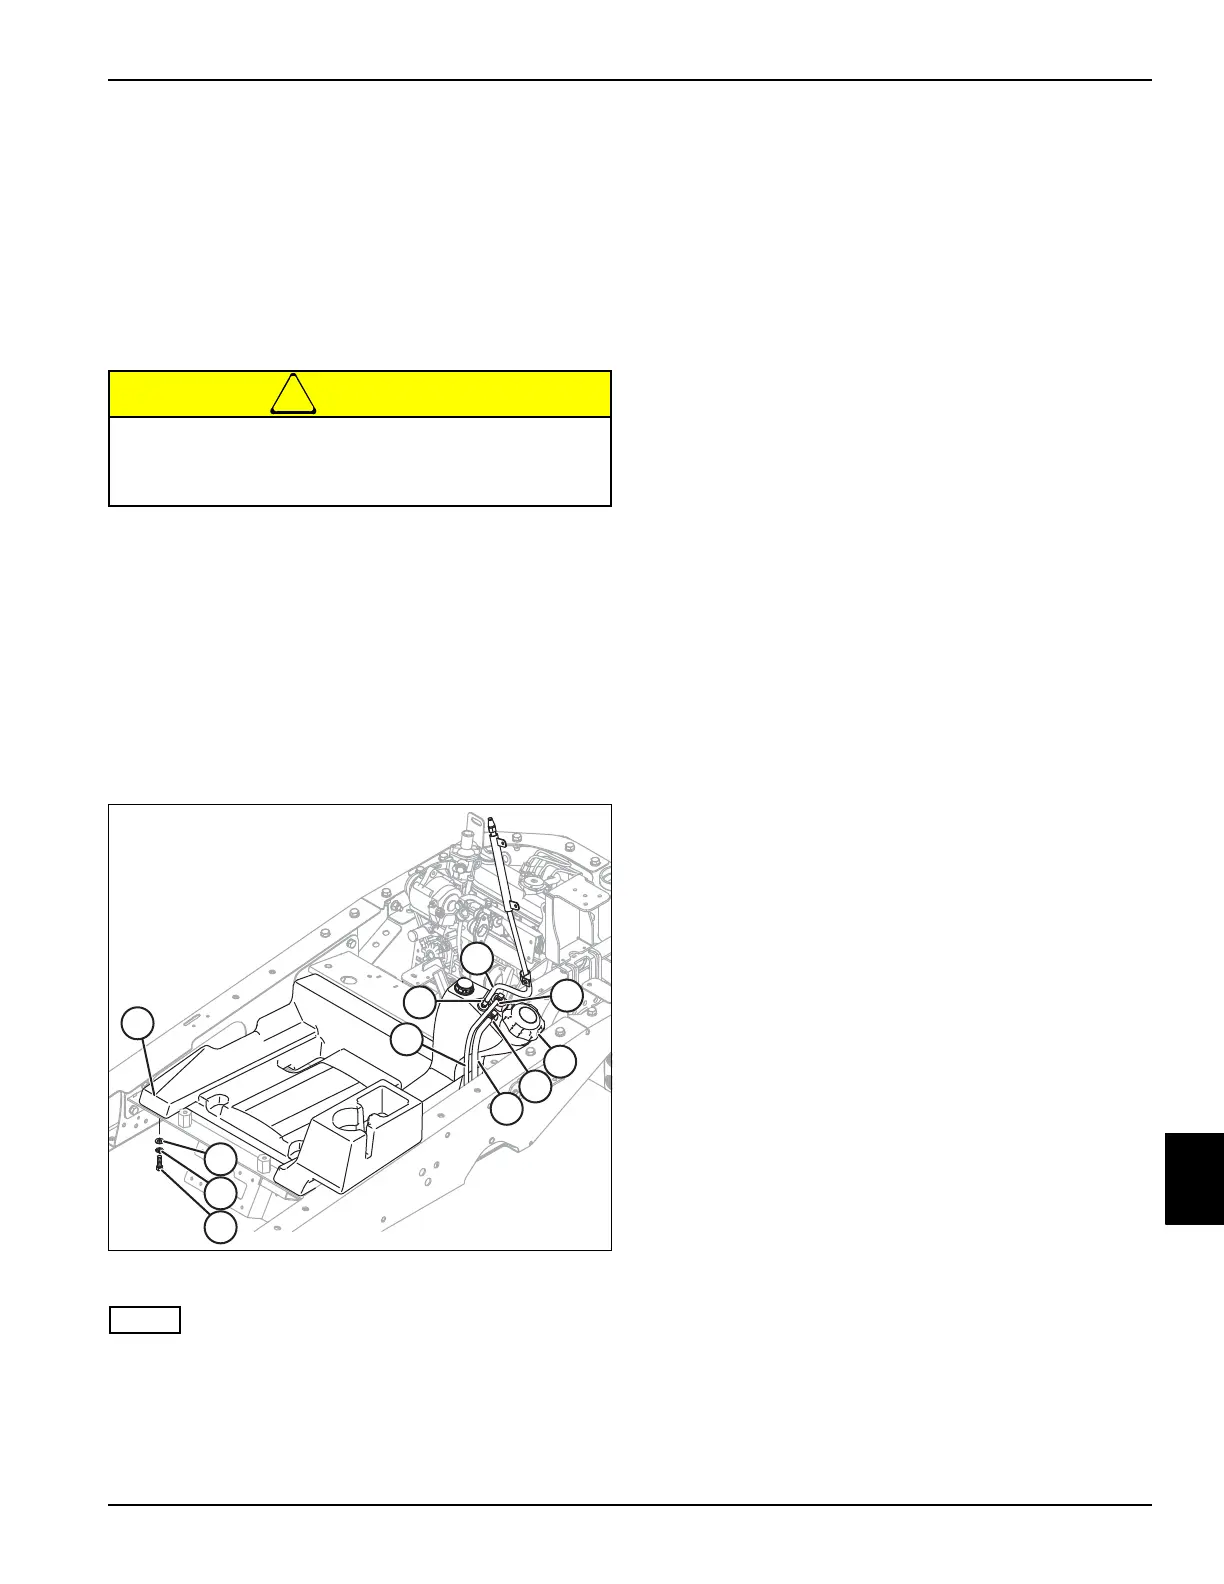
See Figure 9-4.
1. Park the mower safely. (See “Park Mower Safely” on
page 1-6.)
2. Remove instrument panel. (See “Instrument Panel”
on page 4-64.)
3. Remove the armrest. (See “Armrest” on page 9-8.)
4. Remove the seat assembly. (See “Seat Assembly” on
page 9-9.)
5. Disconnect the negative (–) battery cable at the
battery.
Figure 9-4
• Fuel tank capacity is 7.6 gal (28.7 L). Have suitable
container(s) available that can hold up to 10 gal (38
L) of fuel.
• Label all fuel hoses before disconnecting to ensure
correct installation.
6. Remove fuel tank cap (1). Use a siphon pump to
drain fuel into a suitable container
7. When fuel tank is completely empty, assemble and
tighten fuel cap.
8. Loosen clamp (2) and disconnect fuel outlet hose (3).
9. Loosen clamp (4) and disconnect fuel return hose
(5).
10. Loosen clamp (6) and disconnect tank breather hose
(7).
11. Support the fuel tank (11) and remove the two
mounting screws (8), lock washers (9) and flat
washers (10).
12. Remove the fuel tank from the machine.
Installation Notes
• Install the fuel tank by reversing the order of removal.
• Use only clean diesel fuel of the correct type (#2
diesel) from a clean, sealed container.
• If fuel was contaminated, install new pre-filter and
fuel filter at this time. (See “Fuel Filters” on
page 3-11.)
• Purge the fuel system. (See “Purging the Fuel
System” on page 3-5.)
Diesel fuel is highly flammable. Do not drain fuel
indoors. Heaters can ignite fuel vapors. Use
extreme caution when draining fuel.

 Loading...

