CUTTING UNITS
673831-Rev A 8-27
8
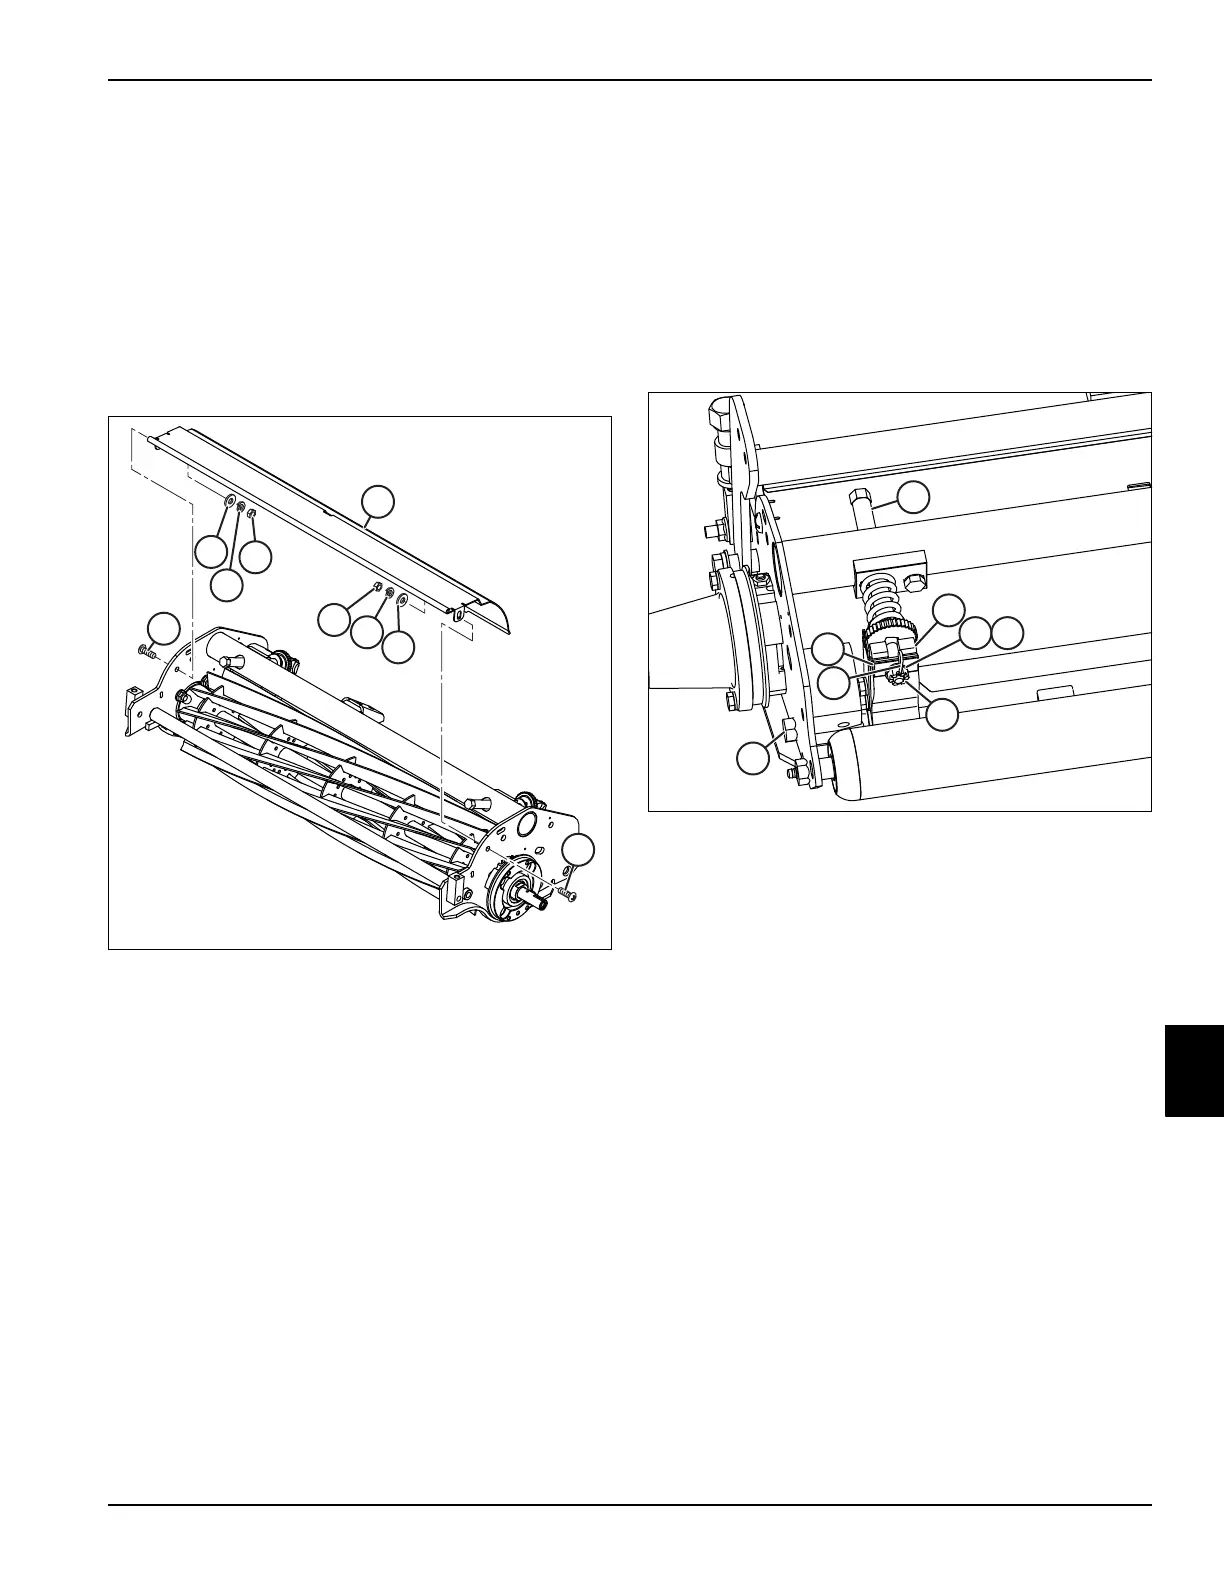
Grass Shield
Removal and Installation
See Figure 8-19.
1. Park the mower safely. (See “Park Mower Safely” on
page 1-6.)
2. Remove cutting unit from mower. (See “Cutting Unit”
on page 8-22.)
3. Remove front roller. (See “Front Roller” on
page 8-36.)
Figure 8-19
4. Remove nut (2), lock washer (3), flat washer (4), and
screw (5) from each side of cutting unit.
5. Remove grass shield (1) from cutting unit.
Installation Notes
• Install grass shield by reversing the order of removal.
• Adjust the grass shield. (See “Grass Shield
Adjustment” on page 8-20.)
Bedknife Backing Assembly
Removal
See Figure 8-20.
1. Park the mower safely. (See “Park Mower Safely” on
page 1-6.)
2. Remove cutting unit from mower. (See “Cutting Unit”
on page 8-22.)
3. Place cutting unit on a solid work surface.
Figure 8-20
4. Turn bedknife adjustment rod (1) counterclockwise
(as viewed from front of cutting unit) 1–2 turns to
increase the bedknife-to-reel clearance. Repeat for
other side of cutting unit.
5. Remove hair pin (7).
6. Remove slotted nut (6), shim washer (5) (if
equipped), Belleville washer (4), and half trunnion
(3).
7. Repeat steps 5 and 6 for other side of cutting unit.
8. Remove the bedknife backing mounting screw (8) on
each side of cutting unit.
9. Remove bedknife backing assembly (2).
1
2
3
4
5
2
3
4
5

 Loading...

