9-12 673831-Rev A
ACCESSORIES AND MISCELLANEOUS REPAIR
9
Chassis
Removal and Installation
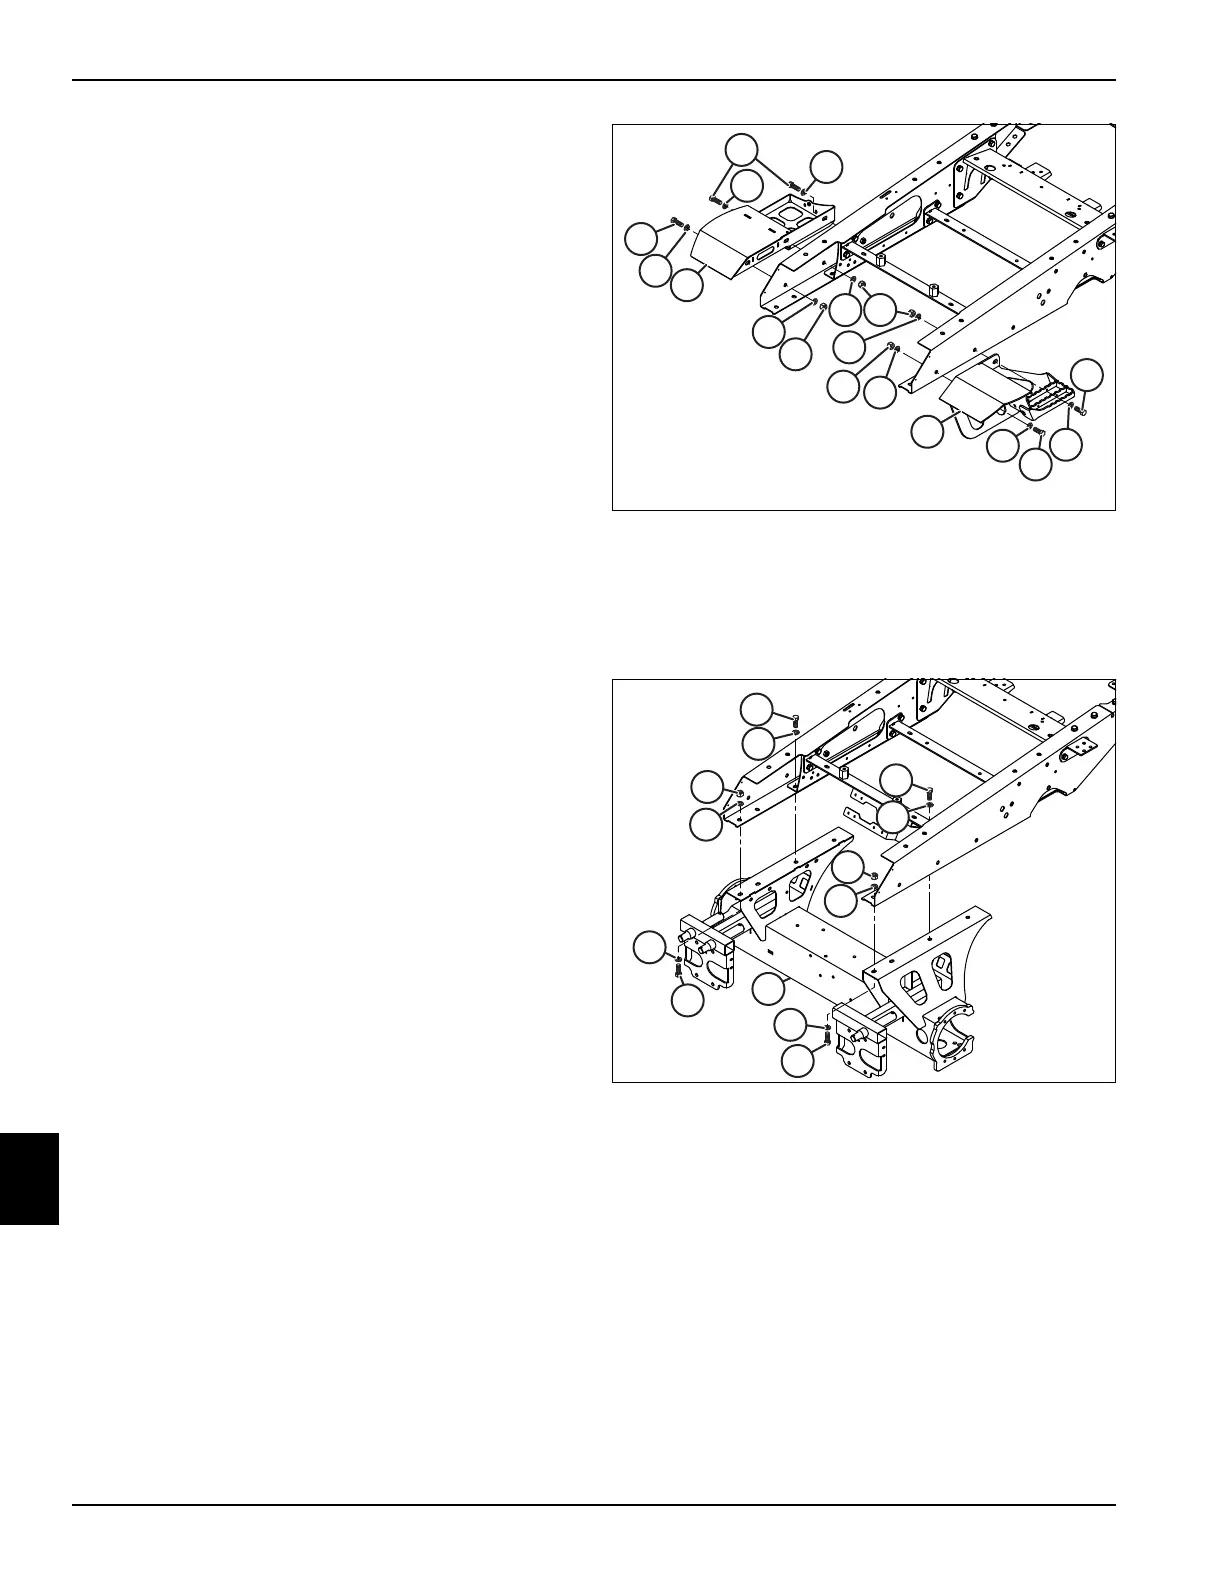
See Figures 9-14 through 9-19.
1. Park the mower safely. (See “Park Mower Safely” on
page 1-6.)
2. Remove the cutting units. (See “Cutting Unit” on
page 8-22.)
3. Remove the front and rear lift arms. (See “Lift Arms”
on page 8-23.)
4. Remove the spring arms. (See “Spring Arms” on
page 8-23.)
5. Remove the operator platform. (See “Operator
Platform” on page 9-10.)
6. Remove the ROPS. (See “ROPS” on page 9-4.)
7. Remove the hood. (See “Hood” on page 9-4.)
8. Remove the fuel tank. (See “Fuel Tank” on page 9-5.)
9. Remove the hydraulic oil tank. (See “Hydraulic Oil
Tank” on page 6-62.)
10. Remove the radiator/hydraulic oil cooler. (See
“Radiator/Hydraulic Oil Cooler Assembly” on
page 3-8.)
11. Remove the engine assembly. (See “Engine” on
page 3-13.)
12. Support the chassis assembly using jack stands so
the wheels are off the ground.
13. Remove the front wheels. (See “Front Wheels” on
page 9-11.)
14. Remove the rear wheel(s). (See “Rear Wheels” on
page 9-11.)
15. Remove the rear yoke/axle. (See “3WD Option Rear
Yoke” on page 7-25.) or (See “4WD Option Rear
Axle” on page 7-26.)
16. Remove the lift valve. (See “Lift Valve” on page 6-53.)
17. Remove the front and rear reel valve. (See “Reel
Valves” on page 6-55.)
18. Remove the charge filter (See “Charge Pressure
Filter” on page 6-58.).
19. Note how hydraulic hoses and tube are routed
through the mower. Note locations of clamps.
20. Using the Parts Manual as a guide, remove the
hydraulic hoses and tubes from the mower.
21. Remove the front wheel motors. (See “Front Wheel
Motor” on page 5-47.)
22. Remove the 4WD valve. (See “4WD Valve” on
page 5-45.)
23. Note how the wire harness is routed through the
mower. Remove the wire harness.
24. Remove the battery. (See “Battery” on page 4-63.)
Figure 9-14
25. Remove two screws (1), four washers (2), two nuts
(3) and left fender (4).
26. Remove three screws (1), five washers (2), two nuts
(3) and right fender (5).
Figure 9-15
27. Support the front axle (6) using a suitable lifting
device.
28. Remove four nuts (7), eight flat washers (8) and four
screws (9).
29. Remove four screws (11) and washers (10).
30. Move the front axle away from the chassis.

 Loading...


