8-24 673831-Rev A
CUTTING UNITS
8
Motor Shields
Removal and Installation
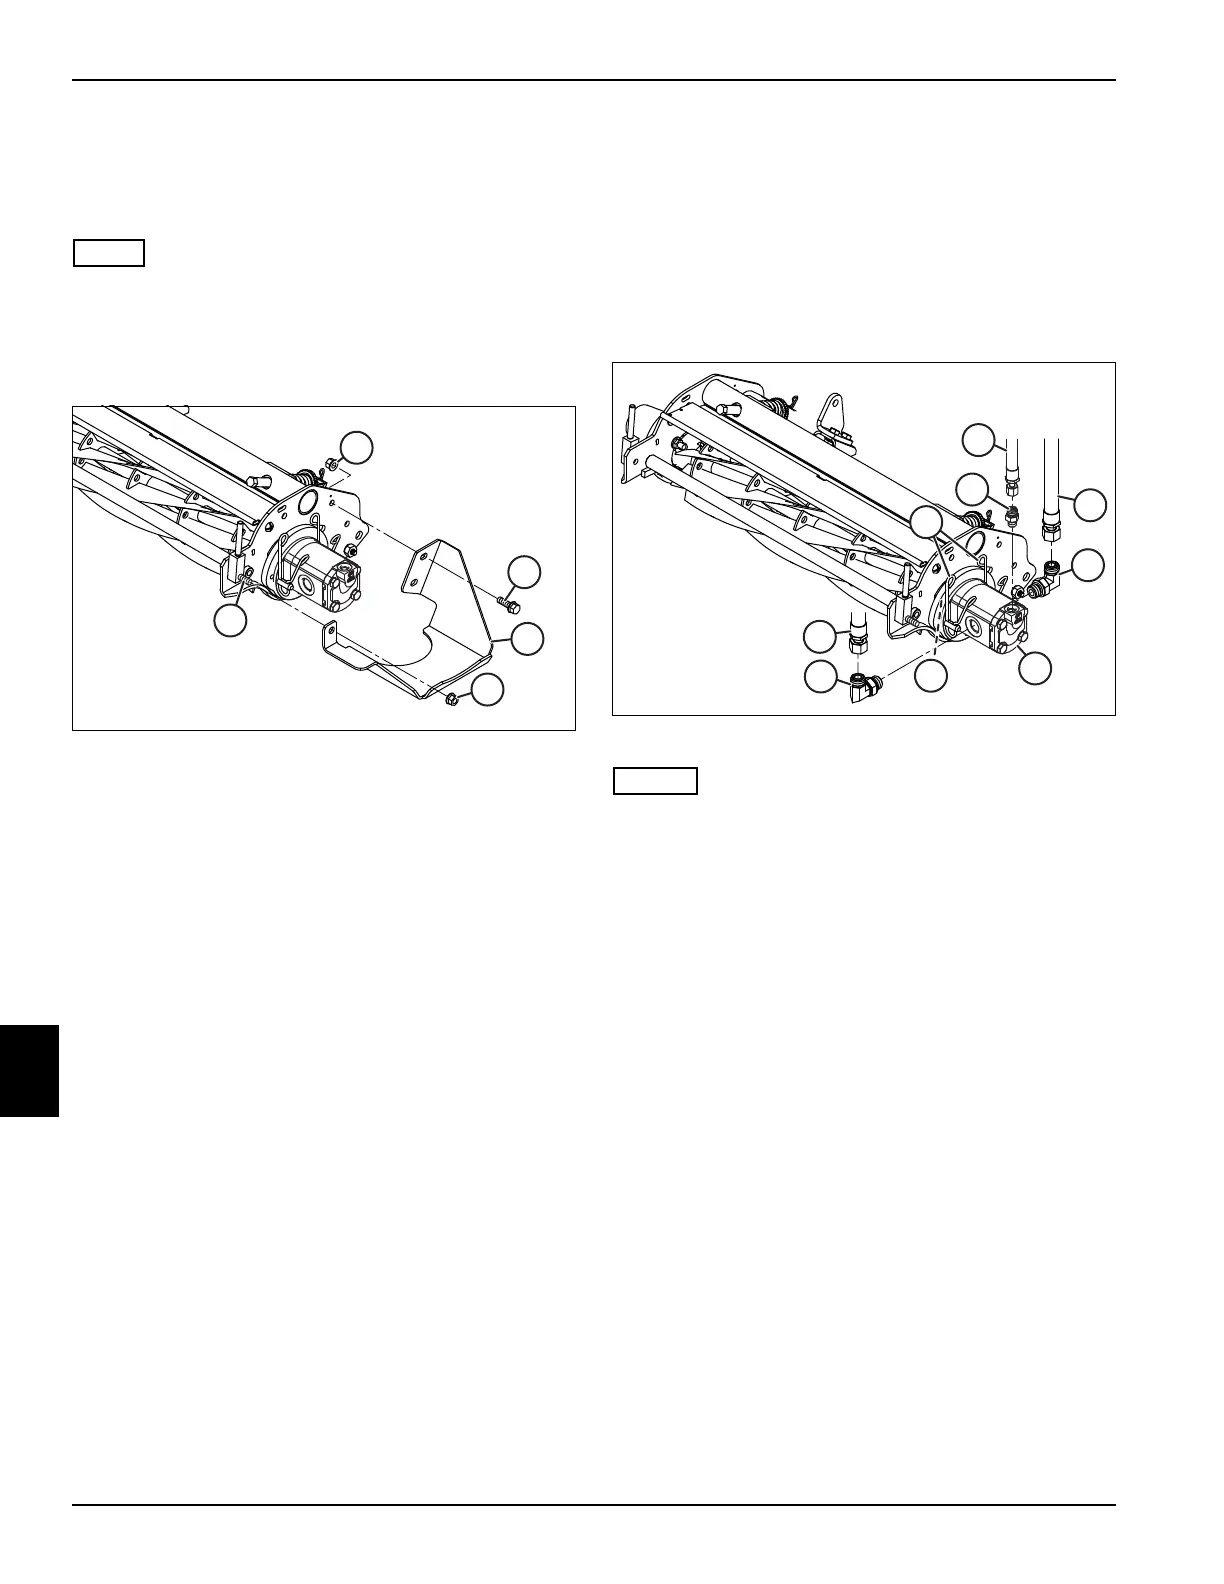
See Figure 8-15.
Motor shields are only installed on the left front reel and
the right front reel.
1. Park the mower safely. (See “Park Mower Safely” on
page 1-6.)
Figure 8-15
2. Remove two screws (1) and nuts (2).
3. Remove nut (4) and motor shield (3).
4. Thread nut (4) onto carriage bolt (5) to hold front
roller adjuster in place.
Installation Notes
Install reel motor shield by reversing the order of removal.
Reel Drive Motor
Removal and Installation
See Figure 8-16.
1. Park the mower safely. (See “Park Mower Safely” on
page 1-6.)
2. Remove the motor shield if installed. (See “Motor
Shields” on page 8-24.)
Figure 8-16
• Label all hydraulic hoses before disconnecting to
ensure correct installation.
• Plug hydraulic hoses after disconnecting to prevent
the loss of hydraulic oil.
3. Disconnect hose (1) from fitting (2). Remove fitting
(2).
4. Disconnect hoses (3 and 4) from elbow fittings (5).
Remove elbow fittings (5).
5. Remove the two motor clips (6) and remove reel
drive motor (7) from cutting unit.
6. Remove coupler (8) from reel drive motor shaft.
Installation Notes
• Install reel drive motor by reversing the order of
removal.
• Coat the reel drive motor shaft splines and coupler
with grease that meets or exceeds NLGI Grade 2 LB
specifications before installing reel drive motor.
• Tighten case drain fitting (2) to 11 lb-ft (14.9 N·m).
• Tighten elbow fittings (5) to 30 lb-ft (40.7 N·m).
• Check hydraulic oil level. Add oil as needed. (Refer to
“Parts and Maintenance Manual” for correct oil
specifications.)

 Loading...


