ENGINE
673831-Rev A 3-7
3
5. Pull air filter element from filter housing (8). Using
damp, lint-free cloths, clean inside of filter housing.
6. Inspect hose (7) for wear or damage, and replace as
necessary.
7. Make certain rain cap (4) is securely fastened to the
filter housing (8).
Installation Notes
• Install air cleaner assembly by reversing the order of
removal.
• Install dust cap with dust valve (2) located at bottom
of assembly.
• Reset air filter indicator by pressing button (5) on end
of indicator (6).
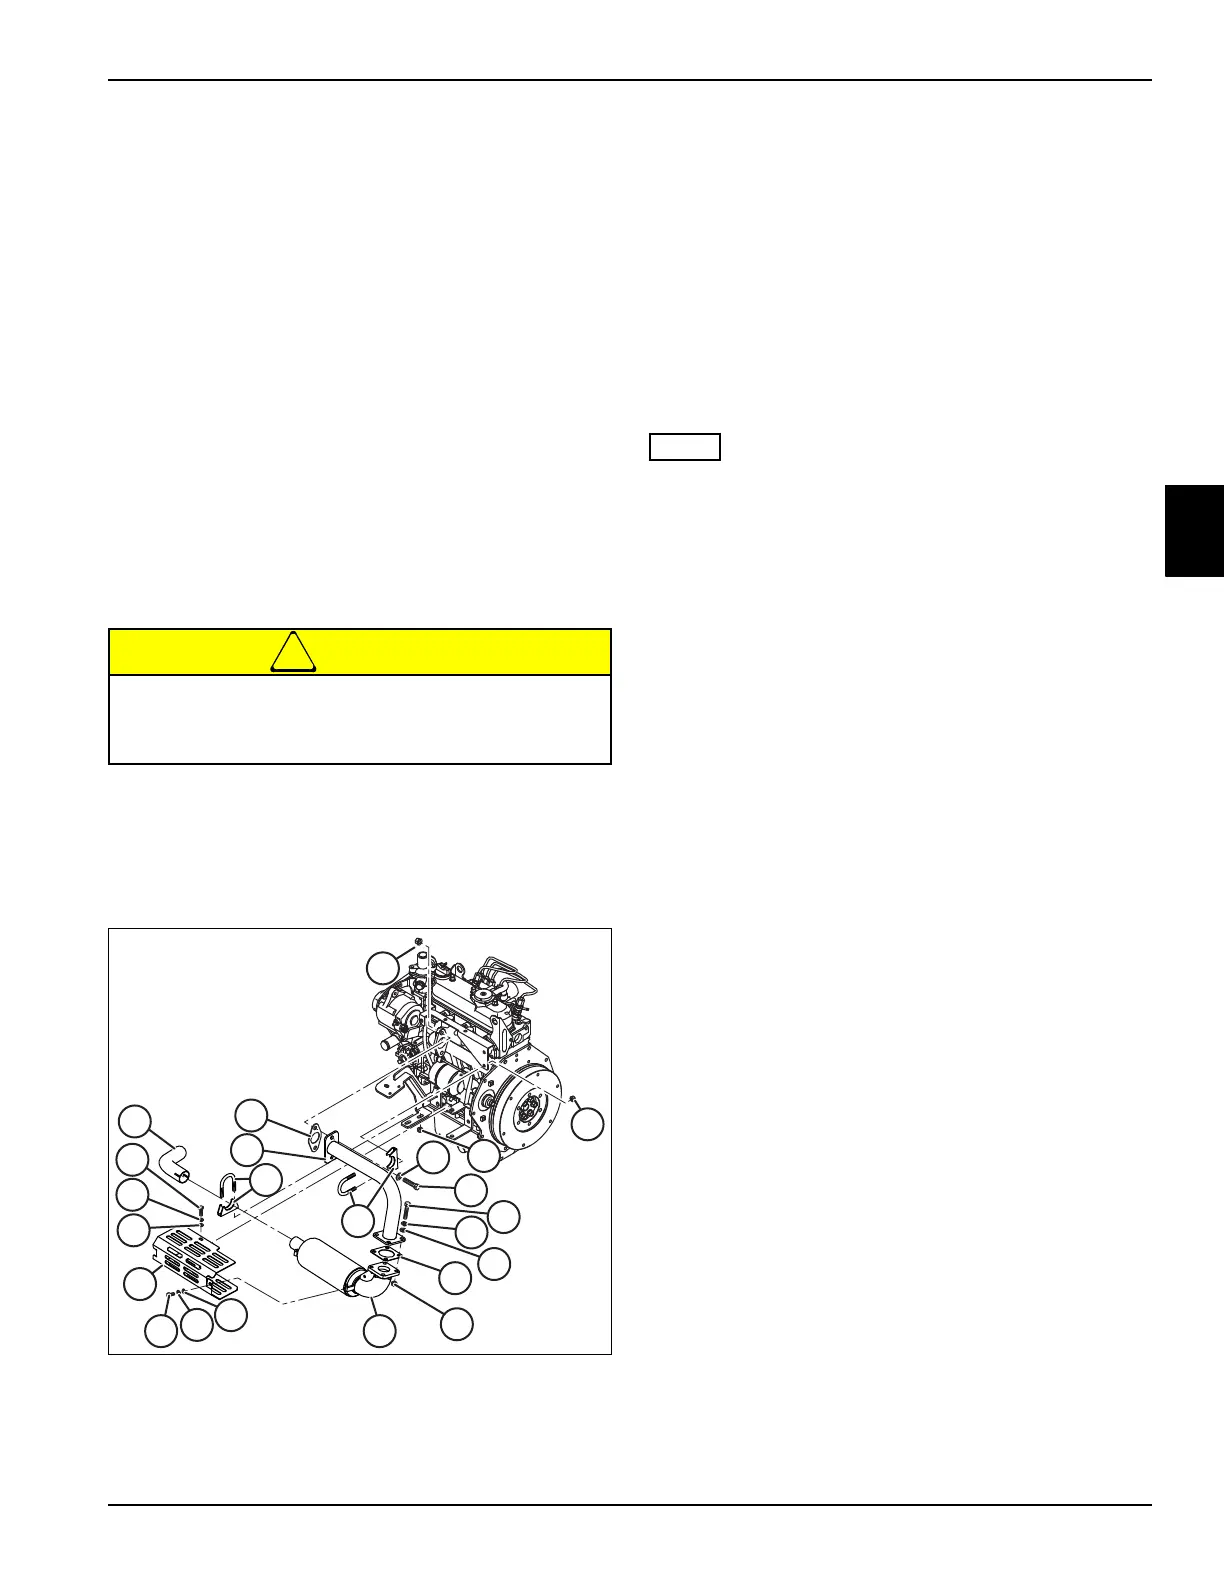
Muffler and Exhaust Assembly
Removal
See Figure 3-6.
1. Park the mower safely. (See “Park Mower Safely” on
page 1-6.)
2. Allow engine to cool completely.
3. Raise the hood.
Figure 3-6
4. Remove four screws (1), lock washers (2), flat
washers (3) and heat shield (4).
5. Remove two nuts (5) and exhaust clamp (6).
6. Disengage and remove tailpipe (7).
7. Support muffler (12) and remove four screws (8), lock
washers (9), flat washers (10) and nuts (11).
8. Remove muffler (12) and gasket (13).
9. Remove two nuts (14) and exhaust clamp (15).
10. Support exhaust pipe (19).
11. Remove two screws (16), lock washers (17), and
nuts (18).
12. Remove exhaust pipe (19) and gasket (20).
Installation
Install new gaskets during installation.
1. Install new exhaust gasket (20), exhaust pipe (19),
two screws (16), two lock washers (17) and two nuts
(18).
2. Install exhaust clamp (15). Secure with two nuts (14).
3. Install gasket (13), muffler (12), four screws (8), four
lock washers (9), four flat washers (10) and four nuts
(11).
4. Install tailpipe (7), exhaust clamp (6) and two nuts
(5).
5. Install heat shield (4), four flat washers (3), four lock
washers (2) and four screws (1).
Do not attempt to service the exhaust system
when the engine is hot. Serious personal injury
can occur.
1
2
3
1
2
3
4
5
6
7
8
9
10
11
12
13
14
15
16
17
18
19
20

 Loading...

