8-32 673831-Rev A
CUTTING UNITS
8
Installation Notes
• Inspect bearing cone (9) for wear or damage.
Replace as needed.
• Pack bearing cone (9) with grease that meets or
exceeds NLGI Grade 2 LB specifications before
assembly.
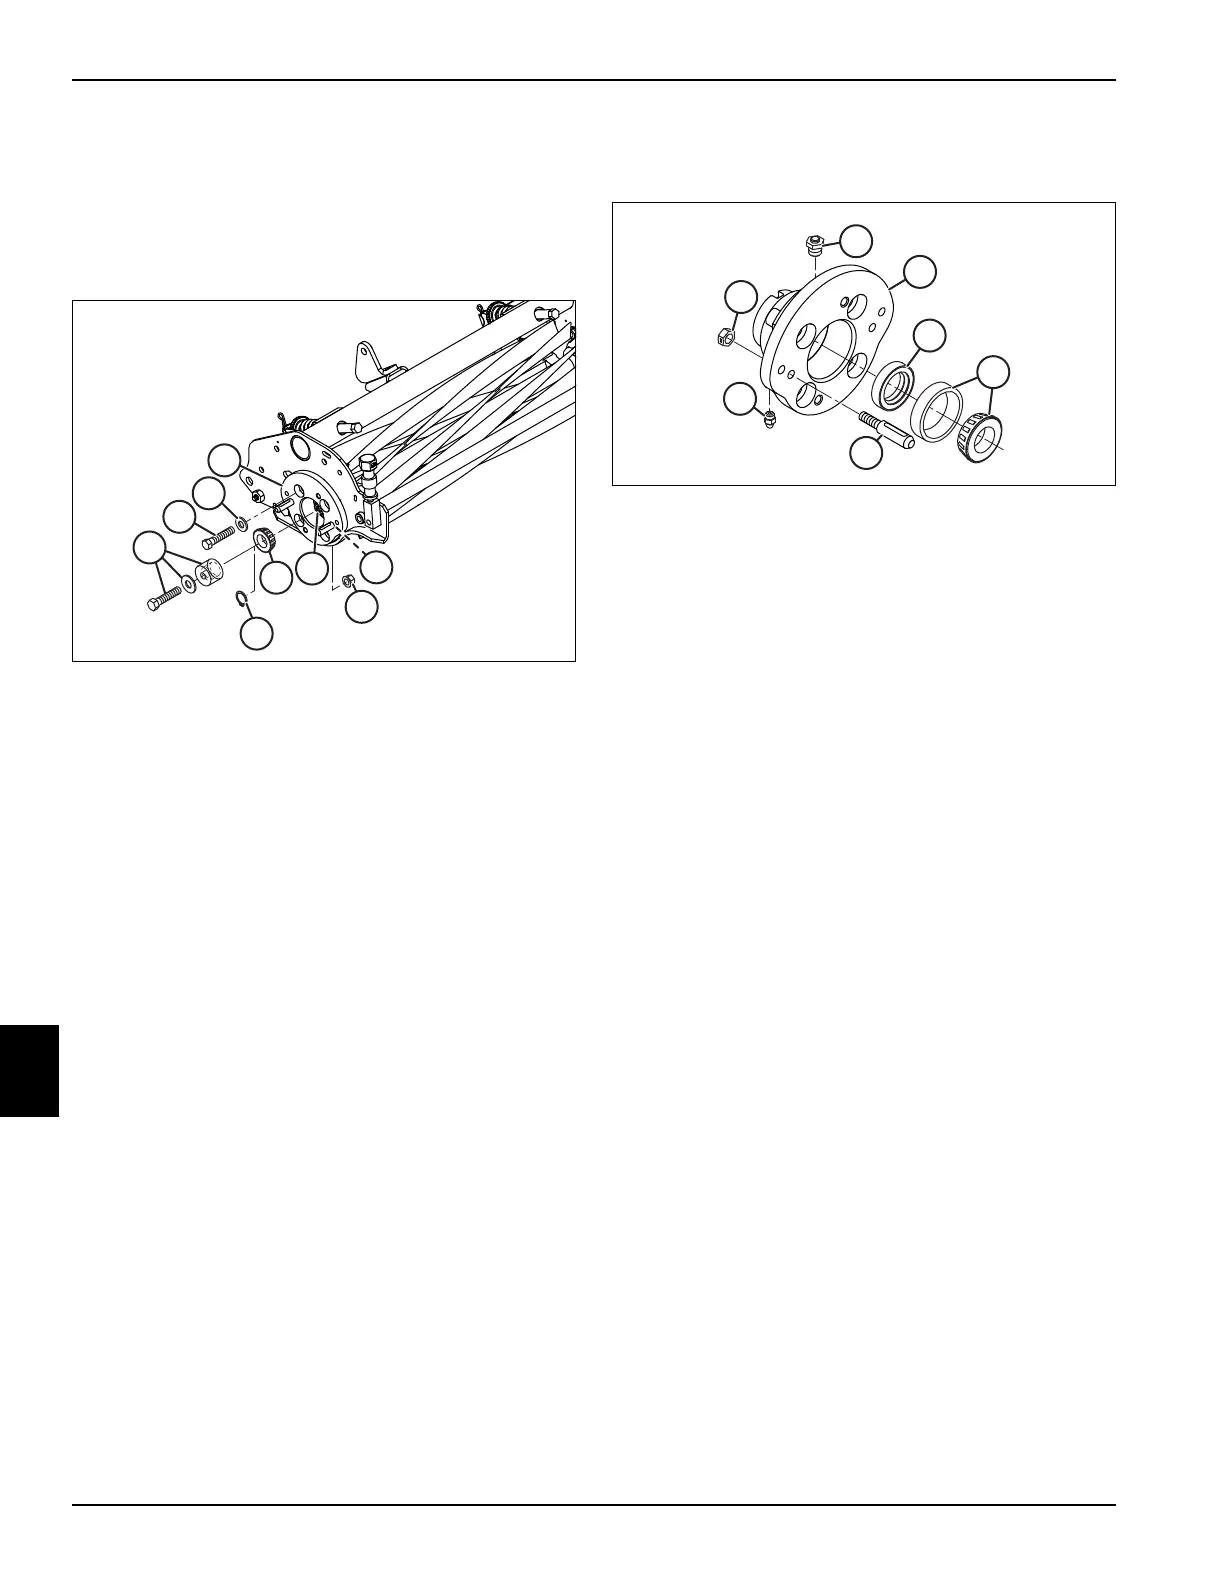
Figure 8-26
1. Loosely assemble bearing housing (6) to reel using
four screws (2), flat washers (3) and flange nuts (4).
2. Slide bearing cone (9) as far as possible onto reel
shaft.
3. Assemble bearing assembly tool (10) (Jacobsen PN
JAC5084) to end of reel shaft (7). Tighten tool until
bearing is fully seated on the reel shaft. Remove the
tool.
4. Assemble snap ring (1).
5. Tighten mounting screws (2) to 18–22 lb-ft (24.4–
29.8 N·m).
• Lubricate grease fitting (8) with grease that meets or
exceeds NLGI Grade 2 LB specifications. Clean
grease fitting before lubricating and apply grease to
the fitting with a hand grease gun only. Pump the gun
slowly until a slight amount of pressure is felt, then
stop—do not overgrease. Do not use an
air-powered grease gun.
• Adjust bedknife-to-reel clearance prior to installing
cutting unit to the mower. (See “Bedknife-to-Reel
Clearance Adjustment” on page 8-18.)
Disassembly and Assembly
See Figure 8-27.
Figure 8-27
Assembly Notes
• Install new grease seal (2).
• Inspect bearing cup and cone (1) for wear or
damage. Replace as needed.
• Pack bearing (1) with grease that meets or exceeds
NLGI Grade 2 LB specifications before assembly.
• Apply grease that meets or exceeds NLGI Grade 2
LB specifications to the lips of grease seal (2).
1 Bearing Cup and Cone 5 Grease Fitting
2 Grease Seal 6 Motor Mounting Pin
3 Vent Fitting 7 Center Lock Nut
4 Reel Bearing Housing

 Loading...

