E
FRAME
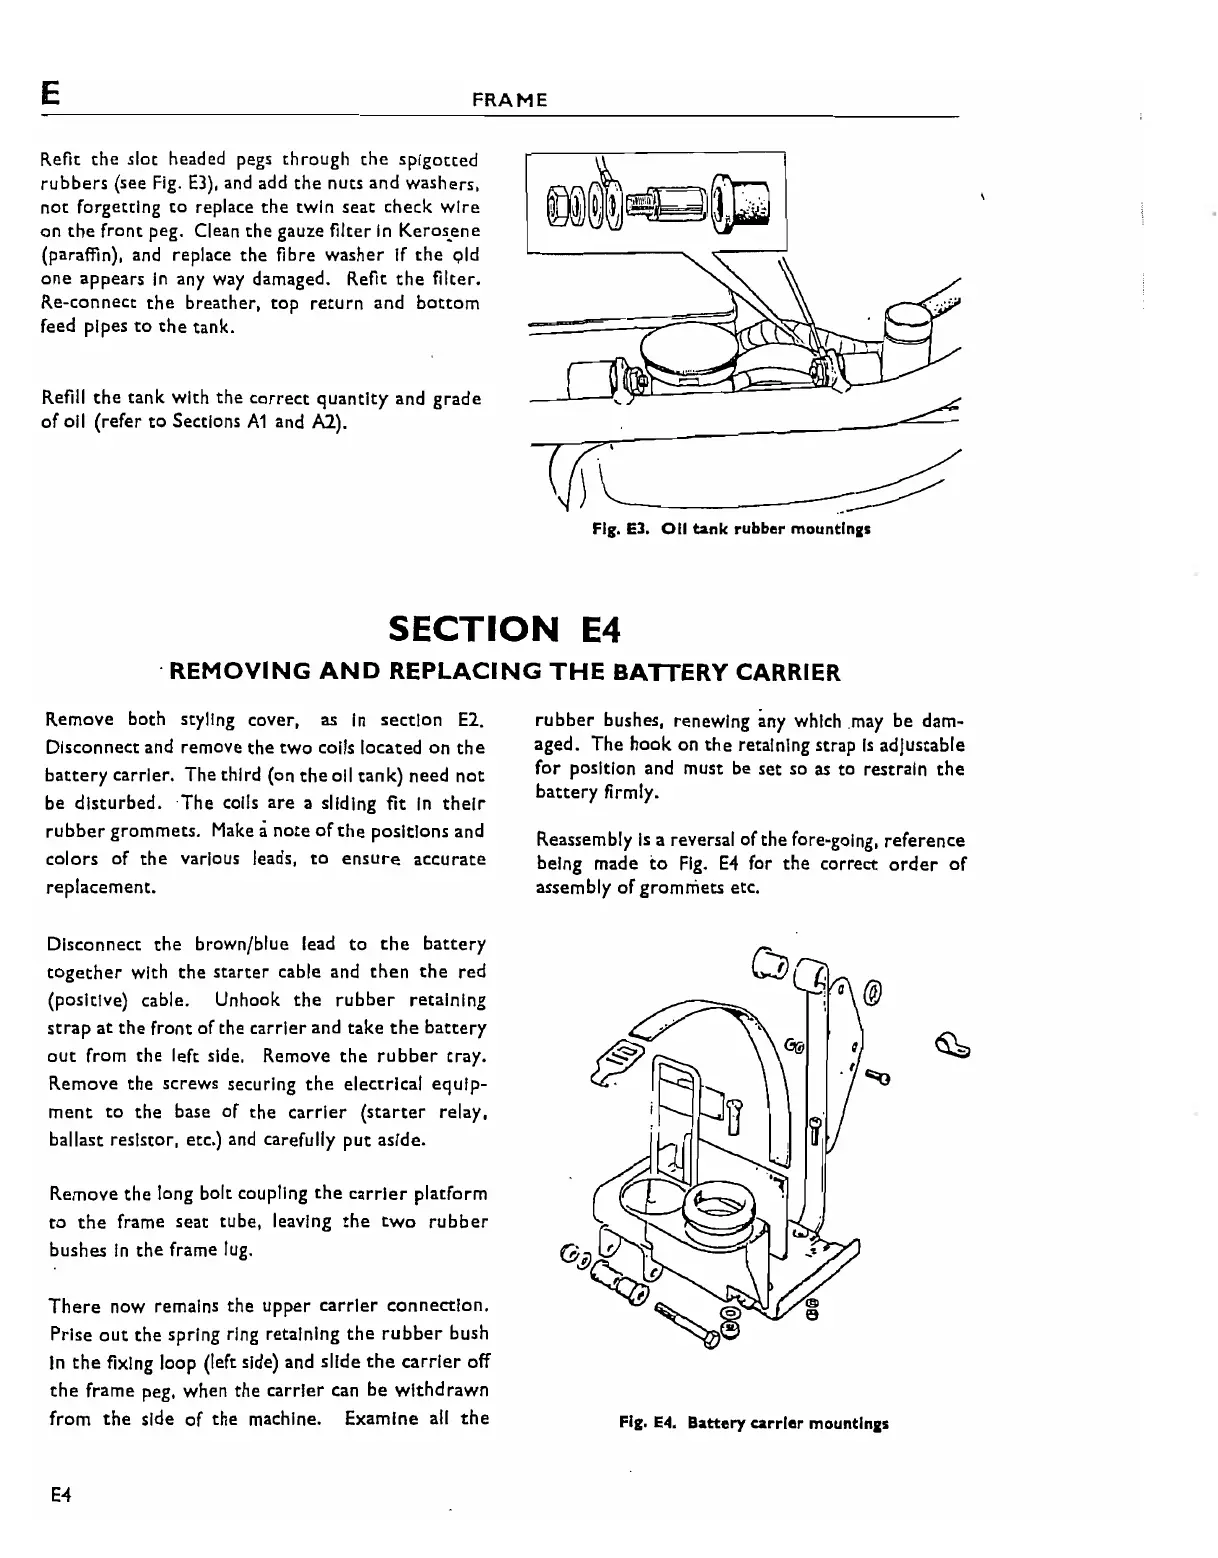
Refit
the
slot headed pegs through
the
splgotted
rubbers
(see
Fig.
E3),
and
add
the
nuts and washers,
not
forgetting
to
replace
the
twin seat check
wire
on
the
front peg. Clean the gauze filter
in
Keros
..
ene
(paraffin), and replace
the
fibre washer
If
the
Qld
one
appears
In
any
way
damaged. Refit
the
filter.
Re-connect
the
breather, top return and
bottom
feed pipes
to
the
tank.
Refill
the
tankwlth
the
correct
quantity and grade
of
all (refer
to
Sections
A1
and
KJ.).
Fig.
EJ.
all
tank rubber mountlna:s
SECTION
E4
.
REMOVING
AND
REPLACING
THE
BATTERY CARRIER
Remove both styling cover, as
In
section
E2.
Disconnect
and
remove the
two
coils located on
the
battery
carrier. The third (on
the
all tank) need
not
be disturbed.
The
calls
are
a sliding fit
In
their
rubber
grommets.
Make
a
note
of
the
positions and
colors
of
the
varioUS
leads, co
ensure
accurate
replacement.
Disconnect
the
brown/blue lead
to
the
battery
together
with
the
starter
cable and
then
the
red
(positive) cable. Unhook
the
rubber
retaining
strap
at
the
front of the carrier and take
the
battery
out
from
the
left side. Remove
the
rubber
tray.
Remove the screws securing
the
electrical eqUip-
ment
to
the
base of the
carrier
(starter
relay,
ballast resistor, etc.)
and
carefully put aside.
Remove
the
long bolt coupling
the
carrier
platform
to
the
frame seat tube, leaving
the
two
rubber
bushes
In
the
frame
lug.
There
now
remains
the upper carrier connection.
Prise
out
the
spring ring retaining
the
rubber
bush
In
the
fiXing
loop (left side) and slide
the
carrier
off
the
frame peg, when
the
carrier can be Withdrawn
from
the
side
of
the
machine. Examine ali
the
E4
rubber
bushes, renewing any which
.may
be dam-
aged. The hook on
the
retaining strap
Is
adjustable
for
position and must
be
set so
as
to restrain
the
battery
firmly.
Reassembly
Is
a reversal ofthe fore-going, reference
being made
to
Fig.
E4
for
the
correct
order
of
assembly
of
gromniets etc.
Fig.
E4.
Battery carrier mountlnas






 To Next Page