Service Parts Disassembly
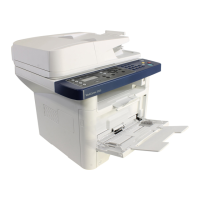
Xerox Internal Use Only Phaser 3330 and WorkCentre 3335/3345
Service Manual
4-65
Electrical
Main PWB
Parts List 1.0 Phaser 3330 Main, Parts List 6.1 WorkCentre 3335/3345 Main
WARNING: Do not perform repair activities with the power on or electrical power supplied to the
machine. The machine could activate and cause serious personal injury when the power is on or
electrical power is supplied.
CAUTION: All customer data on the SD card (customer’s files, network settings, user IDs and
account IDs for accounting, Personal & Secure Print Jobs, Saved Jobs, Address Book, Local Users
Database (for authentication)) will be deleted. Due to MAC address change, device will acquire a
new IP address if customer is using DHCP.
1. Before removing the old Main PWB, print out a Configuration Report (if possible).
2. Determine customer’s billing plan by:
a. Refer to the Configuration Report and look at the last line under the ‘Device Profile’ heading.
b. Refer to the part number on the Toner Cartridge in the device. (Consumables and
Maintenance Items)
If customer’s billing plan is SOLD, go to Step 3.
If customer’s billing plan is Metered, follow step a.) below, then go to Step 3.
a. Follow your local process to obtain a Plan Conversion Code to enable Metered support after
installation of the Main PWB.
3. Ask the customer to Clone their device configuration settings (done via CWIS only).
a. In CWIS, select the Properties Tab, then under General Setup, see Cloning.
4. Ask the customer to export their Address Book & Local Users Database (for authentication) as
these are not
part of clone file.
a. In CWIS, go to Address Book, to export the address book.
b. In CWIS, select Properties Tab - Login/Permissions/Accounting - Device User Database -
Export to File (Local Users Database).
5. Inform customer that their Fax Log will be lost.
6. Do steps 1-4 in the Preparation section (page 4-3).
7. Undock the printer from the optional Tray 2 Base. (page 4-8).
8. Remove the Front Door (page 4-13)
9. Remove the Rear Door (page 4-13).
10. Remove the Right Cover (page 4-17).
11. Disconnect all the connectors on the Main PWB.
Note: The top 2 screws are threaded for sheet metal and the bottom 2 screws are self-tapping for
plastic.

 Loading...
