Service Parts Disassembly
Xerox Internal Use Only Phaser 3330 and WorkCentre 3335/3345
Service Manual
4-75
HVPS
Parts List 3.1A Frame (2 of 2)
WARNING: Do not perform repair activities with the power on or electrical power supplied to the
machine. The machine could activate and cause serious personal injury when the power is on or
electrical power is supplied.
1. Do steps 1-4 in the Preparation section (page 4-3).
2. Undock the printer from the optional Tray 2 Base. (page 4-8).
3. Remove the Front Door (page 4-13)
4. Remove the Rear Door (page 4-13).
5. Remove the Right Cover (page 4-17).
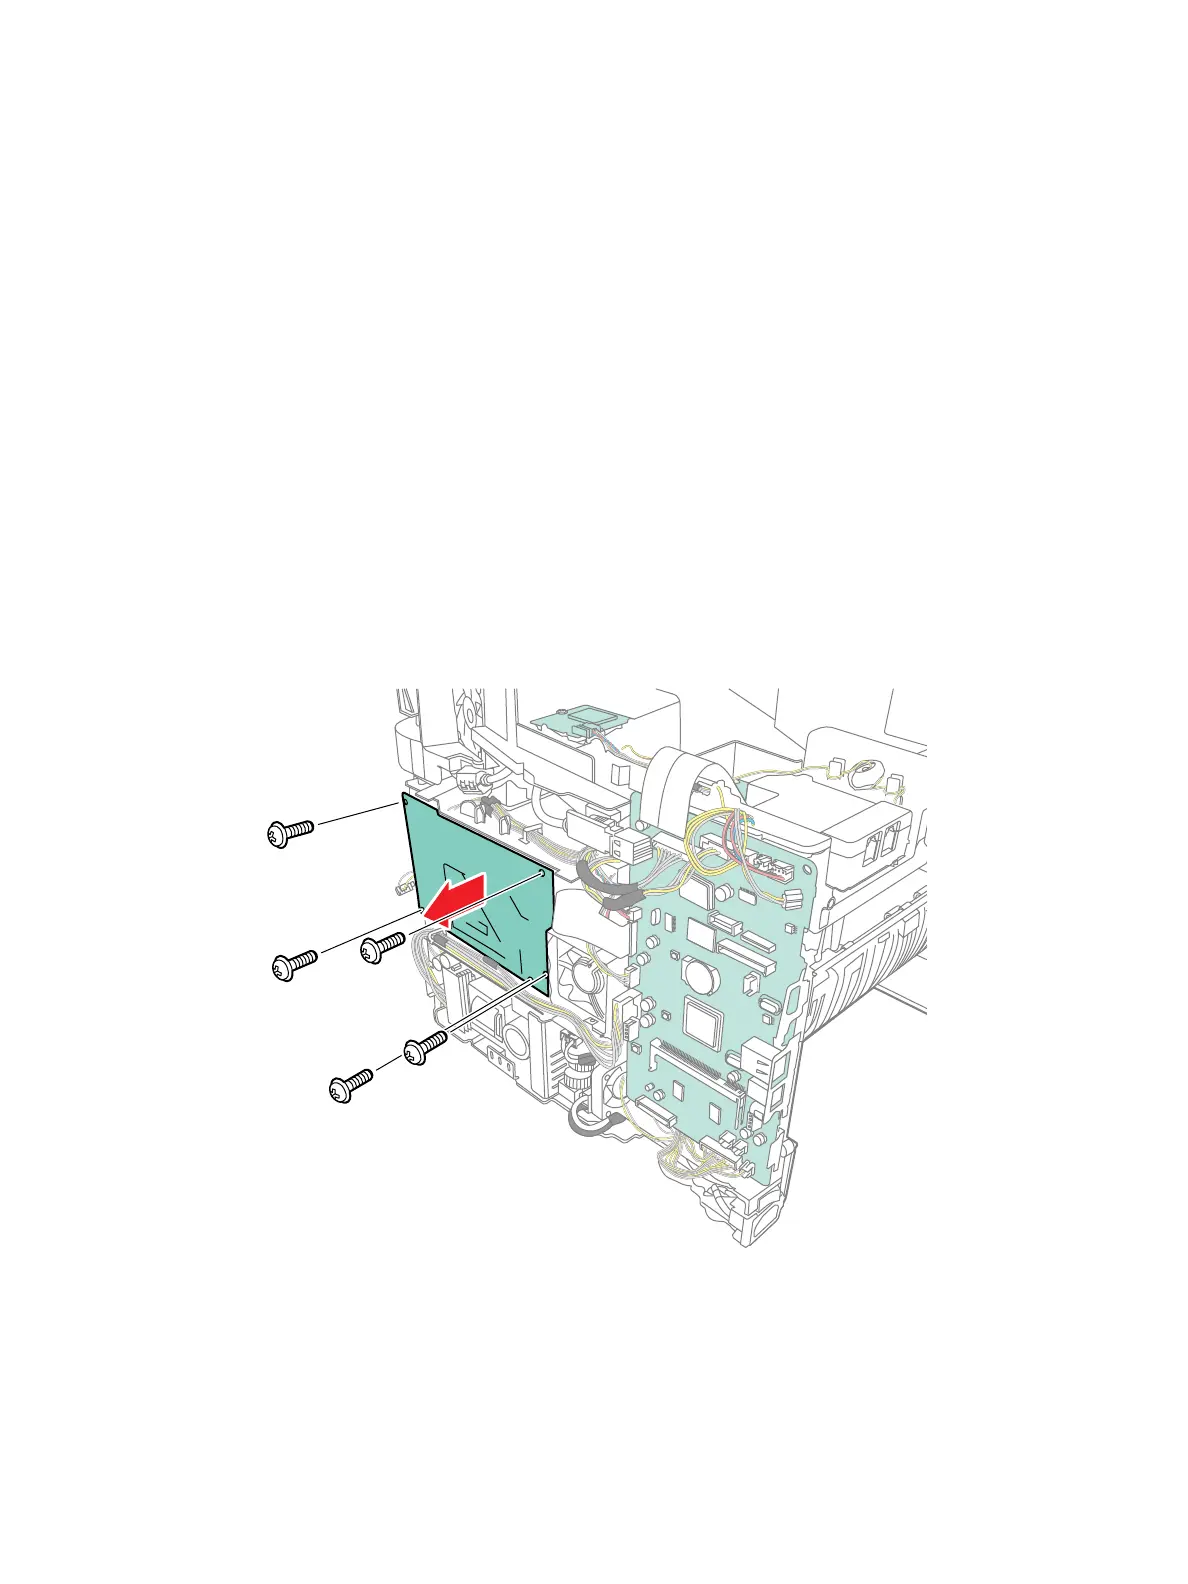
CAUTION: In the next step, after you remove the screws, use care when removing the HVPS PWB
as the connector is still connected on the backside of the PWB and can be damaged.
6. Remove 5 screws (silver, flanged, tap, 10 mm) and ground wire from top-right corner, then remove
the HVPS Board (Parts List 3.1A Frame (2 of 2), PL 3.1A.33) .
7. Remove the Upper Middle Cover (page 4-23).
8. Unplug the connector on the HVPS Board (Parts List 3.1A Frame (2 of 2), PL 3.1A.33) .

 Loading...