Service Parts Disassembly
Phaser 3330 and WorkCentre 3335/3345 Xerox Internal Use Only
Service Manual
4-156
Optional Tray 2 Lift Assy
Parts List 12.3 Optional Tray Frame ETS
1. Disconnect the Optional Tray harness.
2. Remove the Optional Tray 2 Right Side Cover (page 4-149).
3. Open the harness clamps.
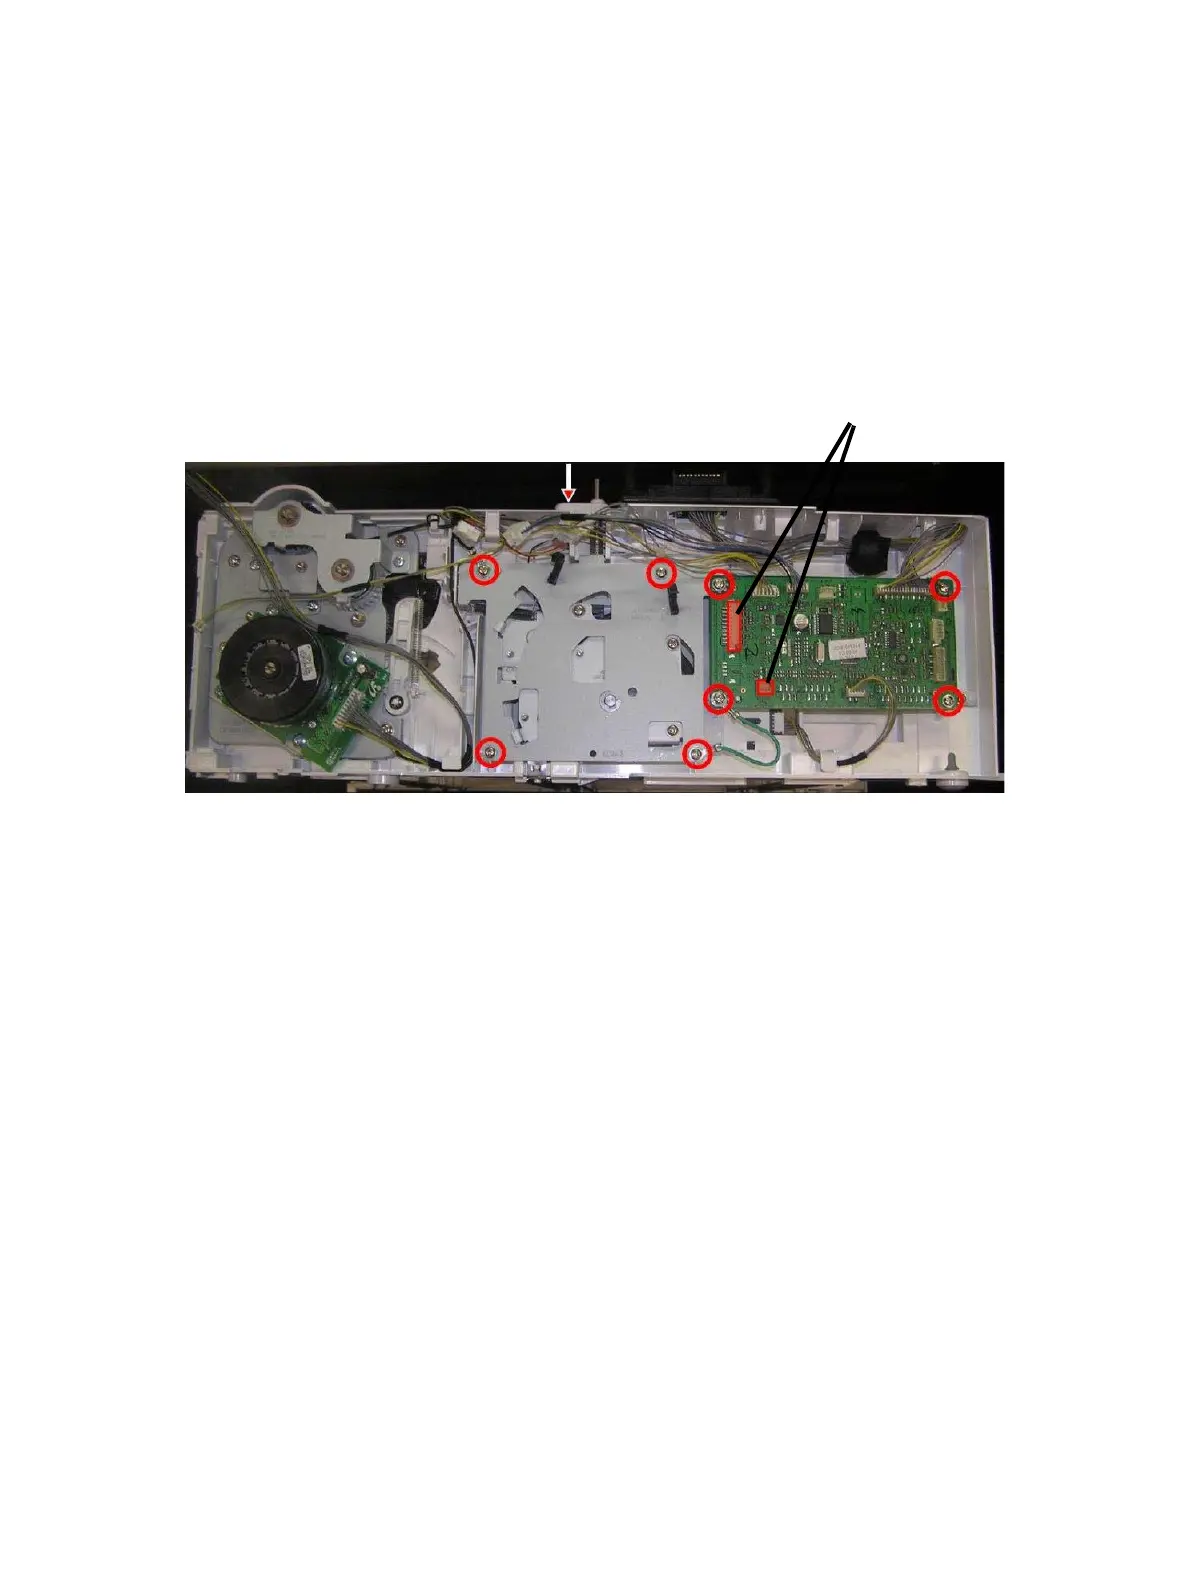
4. Disconnect the connectors from the Optional Tray 2 PWB.
5. Remove 8 screws and the screw holding the locking pin.
6. Remove the Locking Pin
7. Lift the Optional Tray 2 Lift Assy. from under the Tray Borad.
8. Disconnect the Lift Assembly’s plug/jack and remove the Optional Tray 2 Lift Assembly.
Locking Pin
Disconnect the connectors (2)

 Loading...