Service Parts Disassembly
Phaser 3330 and WorkCentre 3335/3345 Xerox Internal Use Only
Service Manual
4-74
SMPS
Parts List 1.0 Phaser 3330 Main or Parts List 6.1 WorkCentre 3335/3345 Main
WARNING: Do not perform repair activities with the power on or electrical power supplied to the
machine. The machine could activate and cause serious personal injury when the power is on or
electrical power is supplied.
1. Do steps 1-4 in the Preparation section (page 4-3).
2. Undock the printer from the optional Tray 2 Base. (page 4-8).
3. Remove the Front Door (page 4-13)
4. Remove the Rear Door (page 4-13).
5. Remove the Right Cover (page 4-17).
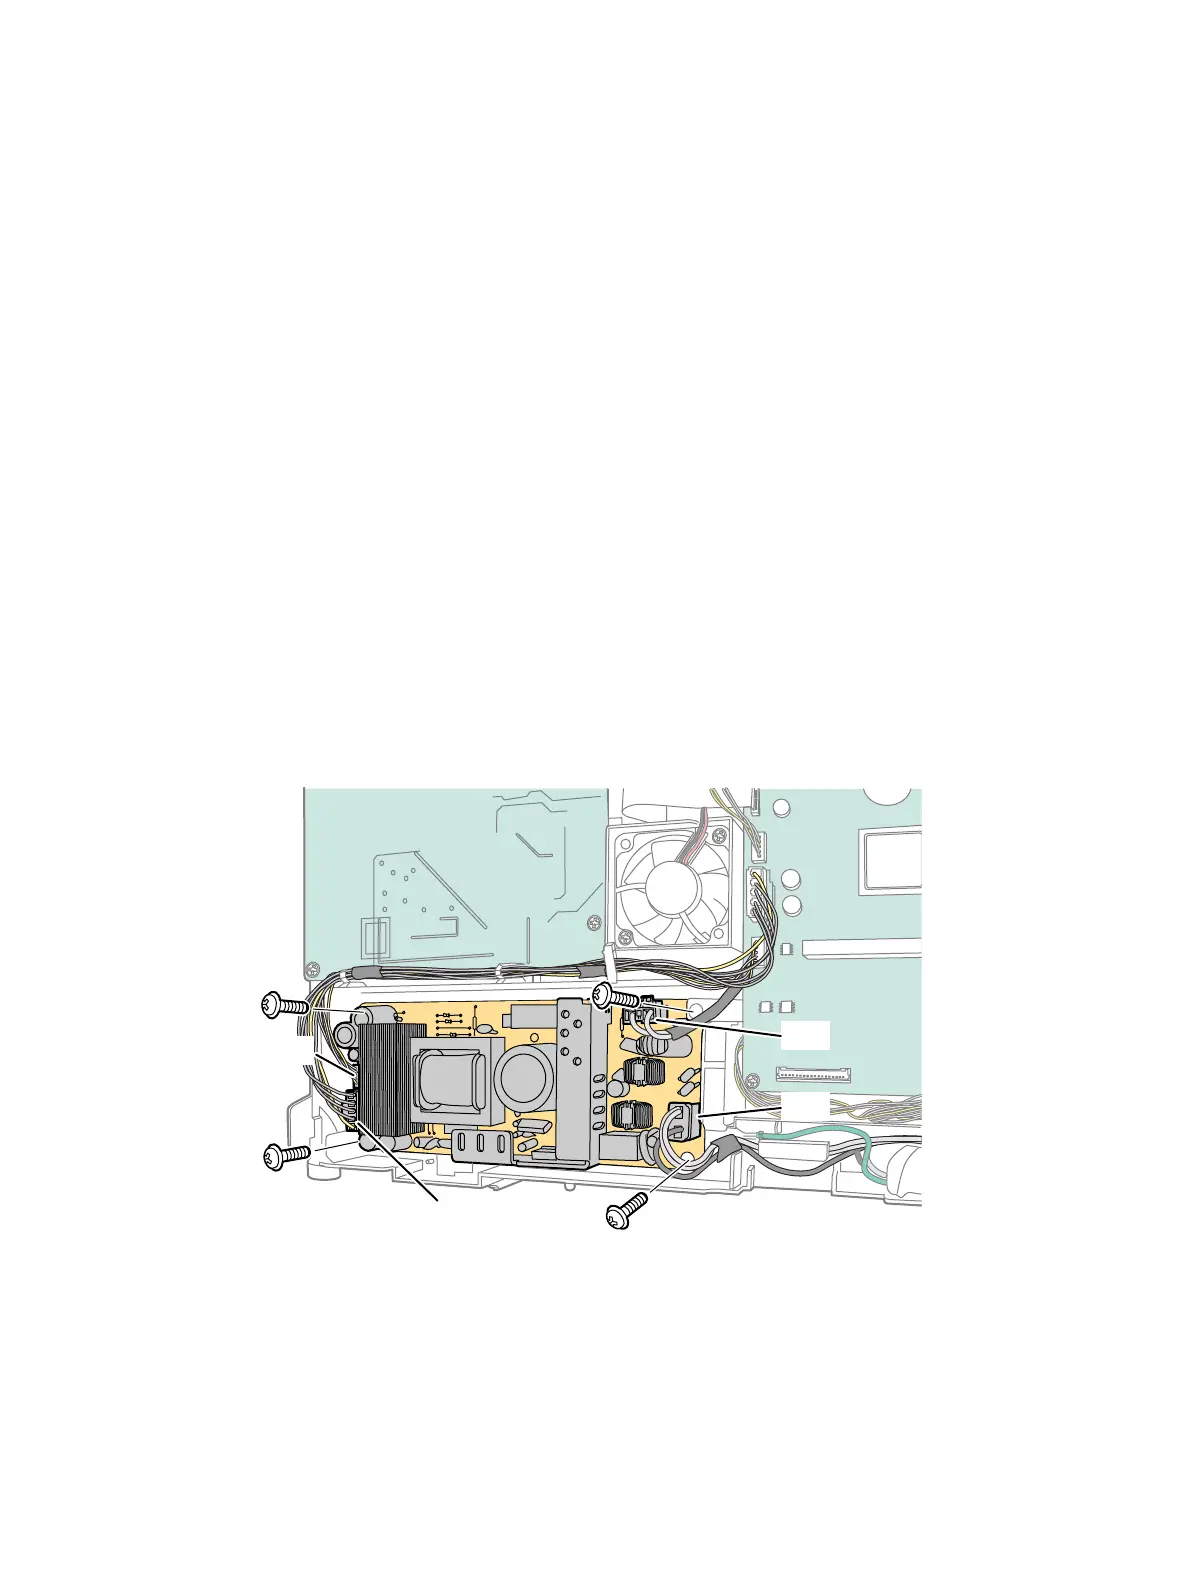
Note: The CON2 connector is very difficult to disconnect when the SMPS is in the printer. It may
be easier to remove all the connectors except CON2 and remove it after the SMPS is out of the
printer.
6. Unplug all connectors on the SPMS Board (Parts List 1.0 Phaser 3330 Main, PL 1.0.6) or (Parts List
6.1 WorkCentre 3335/3345 Main, PL 6.1.6).
Replacement Note: Problems may occur if P/J3 is not plugged into the PWB all the way.
7. Remove 4 screws (silver, flanged, tapping, 10 mm) and the ground wire from top-right corner, and
then remove the SMPS Board.
s3320-088

 Loading...