SIP User's Manual 172 Document #: LTRT-12801
MP-500 MSBG
3.4.5.6.4 Configuring the Charge Codes Table
The 'Charge Codes Table' page is used to configure the metering tones (and their time
interval) that the FXS interfaces generate to the Tel side. To associate a charge code to an
outgoing Tel-to-IP call, use the 'Tel to IP Routing' table.
Notes:
• The 'Charge Codes Table' page is available only for FXS interfaces.
• You can also configure the Charge Codes table using the ini file table
parameter ChargeCode.
¾ To configure the Charge Codes table:
1. Access the 'Charge Codes Table' page (Configuration tab > Protocol Configuration
menu > SIP Advanced Parameters submenu > Charge Codes page item).
Alternatively, you can also access this page from the 'Metering Tones' page (refer to
''Configuring Metering Tones'' on page 171).
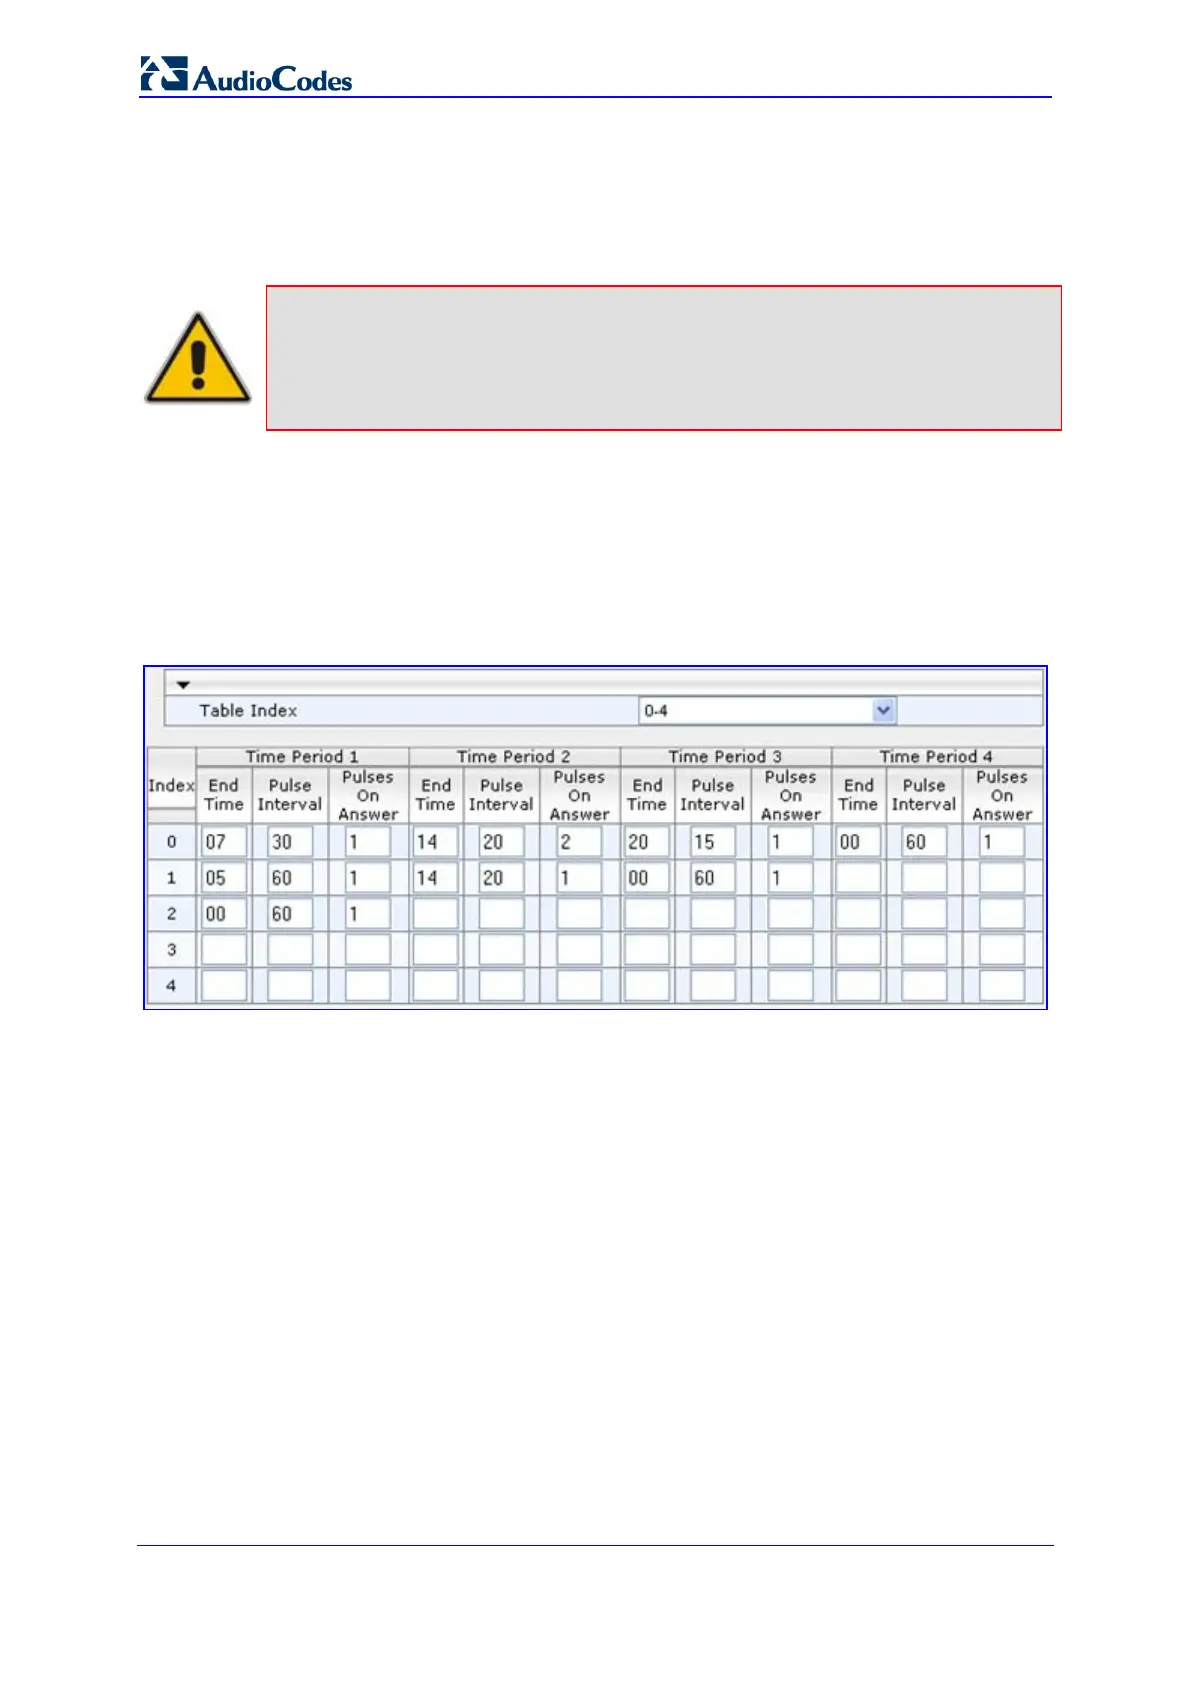
Figure 3-151: Charge Codes Table Page
2. Define up to 25 different charge codes (each charge code is defined per row). Each
charge code can include up to four different time periods in a day (24 hours). Each
time period is composed of the following:
• The end of the time period (in a 24 rounded-hour's format).
• The time interval between pulses (in tenths of a second).
• The number of pulses sent on answer.
The first time period always starts at midnight (00). It is mandatory that the last time
period of each rule ends at midnight (00). This prevents undefined time frames in a
day. The device selects the time period by comparing the device 's current time to the
end time of each time period of the selected Charge Code. The device generates the
Number of Pulses on Answer once the call is connected and from that point on, it
generates a pulse each Pulse Interval. If a call starts at a certain time period and
crosses to the next, the information of the next time period is used.
3. Click the Submit button to save your changes.
4. To save the changes to the flash memory, refer to ''Saving Configuration'' on page
237.

 Loading...